
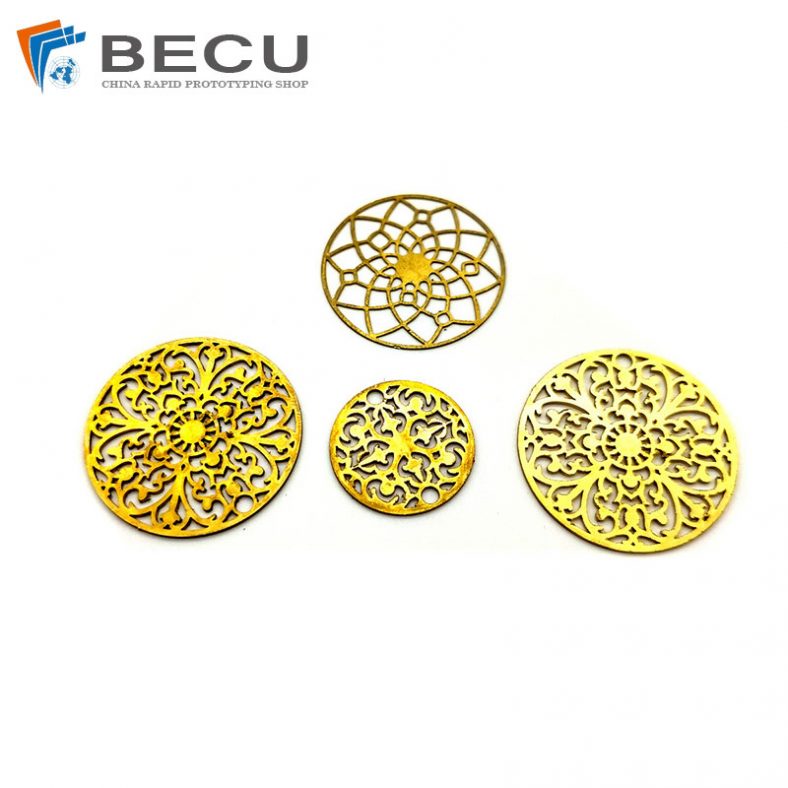
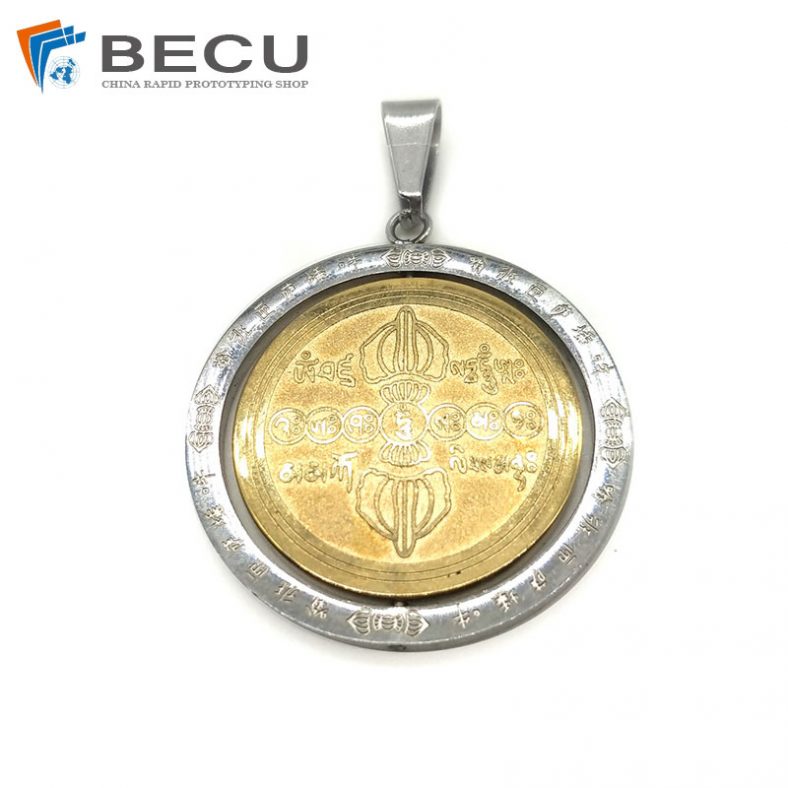
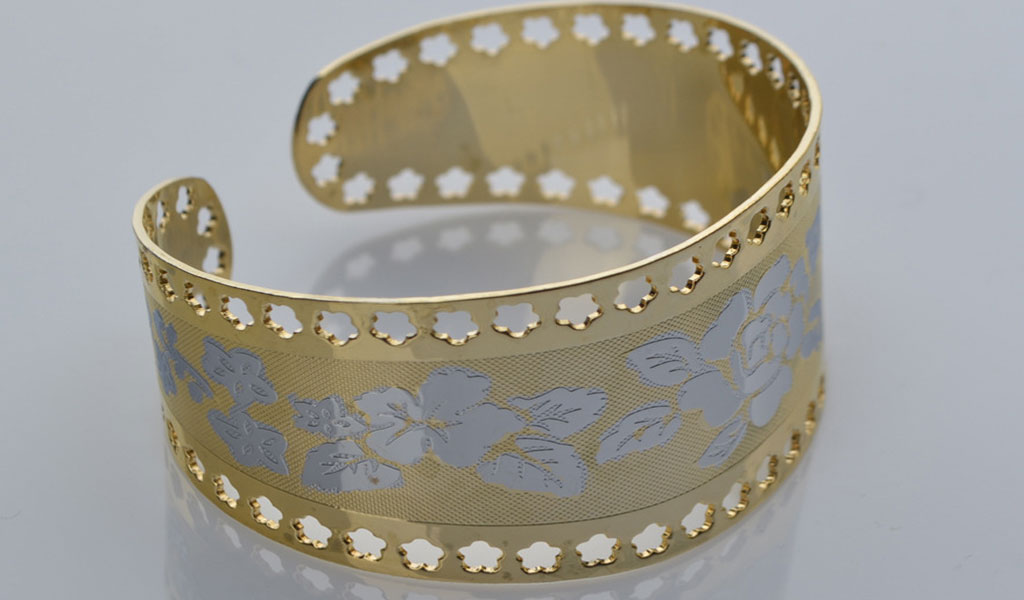
Jewelry etching is an exquisite technique that allows artisans to add intricate designs and patterns to metals, creating unique and personalized pieces. Whether you’re a seasoned jewelry maker or a beginner exploring this craft, mastering the art of etching can open doors to endless creative possibilities.Be-Cu Prototype specialises in transforming sheet metals into high-precision jewelry with the flexibility, short lead times and full traceability needed in today’s always-on world.Our Jewelry Etching Case Studies:
What is Jewelry Etching?
Jewelry etching is a decorative metalworking technique that involves creating intricate designs or patterns on metal surfaces through selective corrosive action. This process removes specific areas of the metal, leaving behind the desired design, resulting in a visually appealing and personalized piece of jewelry.The history of etching in jewelry making dates back centuries, where artisans used various methods to etch metals like silver, copper, gold, and brass. Initially, etching was primarily employed for decorative purposes on armor, weaponry, and religious artifacts.
Over time, it evolved into a technique utilized in jewelry creation, allowing craftsmen to explore intricate designs and unique textures on smaller-scale pieces.
Different Metals Suitable for Etching:
Numerous metals are suitable for etching, each offering distinct characteristics and aesthetics:
- Copper: Widely used due to its affordability, malleability, and ability to produce crisp etched designs.
- Silver: Provides a beautiful backdrop for etched designs, offering a striking contrast between the etched and non-etched areas.
- Brass: Known for its golden appearance, brass allows for intricate etching, offering a vintage or antique look to the final piece.
- Gold: While less commonly etched due to its cost and resistance to corrosion, gold can still be etched with certain specialized techniques and solutions.
Common Reasons for Etching Jewelry:
- Customization: Etching allows artisans to personalize jewelry by incorporating specific designs, patterns, or even personalized messages, making each piece unique.
- Texture and Detail: It enables the creation of intricate and detailed designs that may not be achievable through other jewelry-making techniques.
- Artistic Expression: Jewelry etching is a form of artistic expression, enabling artisans to showcase their creativity and craftsmanship in wearable art.
- Vintage or Distressed Look: Etching can give jewelry an aged or vintage appearance, enhancing its aesthetic appeal.
By understanding the history, suitable metals, and purposes of jewelry etching, artisans can delve deeper into this craft and unleash their creativity to produce stunning, one-of-a-kind pieces.
Essential Tools
Tools Required for Different Etching Methods:
Chemical Etching:
- Etching Solution: Such as ferric chloride or nitric acid, depending on the metal being etched.
- Resist Materials: Wax, enamel, or specialized etching grounds to protect specific areas of the metal from being etched.
- Container for Etching: Plastic or glass container to hold the etching solution.
- Applicators: Brushes or swabs for applying the resist and etching solution.
- Safety Gear: Gloves, goggles, and a respirator to protect against chemical exposure.
Electrochemical Etching:
- Power Source: A power supply such as a rectifier or battery charger.
- Etching Electrolyte: Suitable electrolyte solution (saltwater or electrolytic solution).
- Etching Stencil or Mask: To protect areas not intended for etching.
- Conductive Tool: Such as a stylus or pad for creating the electrical connection.
- Safety Gear: Gloves, goggles, and protective clothing due to the involvement of electrical components.
Additional Tools:
- Stencils or Masks: Used for creating precise designs or patterns on the metal surface.
- Polishing Equipment: Buffing wheels, sandpapers, or polishing compounds for finishing the etched metal.
- Scribing Tools: To mark designs or patterns directly onto the metal surface.
- Cleaning Supplies: Solvents, degreasers, or pickling solutions for metal preparation and cleaning.
Choosing Metals for Etching
Metal Preparation and Cleaning Process:
- Surface Cleaning: Ensure the metal surface is free from dirt, oil, or any contaminants. Use a degreaser or mild detergent to clean the metal thoroughly.
- Surface Smoothing: Sanding or buffing the metal surface helps remove scratches, imperfections, or oxidation, creating a smoother surface for etching.
- Degreasing: After sanding, degrease the metal using acetone, alcohol, or a commercial degreasing agent to eliminate any remaining oils or residues.
Selecting the Appropriate Metal for Your Designs:
- Copper: Ideal for intricate etching due to its ability to produce sharp, well-defined lines.
- Silver: Provides a beautiful backdrop for etched designs, offering a striking contrast between the etched and non-etched areas.
- Brass: Offers a vintage or antique look, suitable for designs that benefit from an aged appearance.
Choose the metal based on the desired aesthetic, the intricacy of the design, and the final look you wish to achieve. Consider the metal’s properties, such as malleability, color, and reaction to etching solutions, to align with your design goals.
By understanding the tools needed and the appropriate metal preparation for etching, artisans can effectively execute their designs while ensuring the best outcomes for their jewelry pieces.
Designing Your Jewelry
Tips for Creating Designs Suitable for Etching
- Simplicity is Key: Opt for designs with clear, well-defined lines and distinct shapes, especially if you’re new to etching. Intricate designs may require more expertise and precision.
- Consider Contrast: Designs with contrasting elements – thick and thin lines, negative and positive spaces – often work exceptionally well when etched onto metal surfaces.
- Experiment with Negative Space: Utilize negative space effectively by envisioning the areas you want etched and those you want to remain untouched.
Software and Tools for Designing Jewelry Patterns:
- Graphic Design Software: Programs like Adobe Illustrator, CorelDRAW, or Inkscape allow for precise creation and manipulation of vector-based designs suitable for etching.
- Online Platforms and Apps: Explore user-friendly design platforms and mobile apps tailored for creating jewelry designs. These often offer templates or customizable options suitable for etching.
- Hand-drawing Tools: Sketching or drawing by hand can also be effective. Use tracing paper or sketch directly onto the resist material for a more organic and personalized touch.
Transferring Designs
Methods for Transferring Designs onto Metal Surfaces:
- Stencils or Masks: Cut out or create stencils or masks using materials like vinyl, paper, or adhesive-backed films. Apply them directly onto the metal surface to protect areas from the etching solution.
- Transfer Paper or Decals: Print or draw your design onto transfer paper or decals, then adhere them to the metal surface. The transferred design acts as a resist against the etching solution.
- Hand-Drawing Techniques: Using a scribing tool or fine-point marker, directly draw or trace the design onto the metal surface, applying the resist material to protect the areas intended for etching.
- Photo Etching: Utilize photoresist methods where designs are transferred onto a light-sensitive resist material using photographic techniques, allowing for highly detailed and intricate designs.
Choosing the right method for transferring designs depends on the complexity of the design, personal preference, and the tools available. Experimentation with different techniques can help artisans determine the most effective method for their specific project.
Mastering the art of preparing designs and transferring them onto metal surfaces is crucial for achieving precise and visually appealing results in the jewelry etching process.
Safety Measures
Detailed Safety Precautions
- Ventilation: Work in a well-ventilated area or use a fume hood to prevent inhalation of fumes from etching solutions.
- Protective Gear: Wear gloves, safety goggles, and a respirator mask to shield against chemical exposure.
- Proper Handling: Read and follow manufacturer instructions for handling etching chemicals. Store them securely, away from children and pets.
- Emergency Procedures: Have access to emergency eye wash stations, first aid kits, and spill containment materials in case of accidents.
Applying the Resist
Techniques for Applying Resist Materials:
- Brush Application: Use fine brushes to apply liquid resist materials (like wax or enamel) precisely onto the metal surface, covering areas you want to protect from etching.
- Masking with Stencils: Apply pre-cut stencils or masks directly onto the metal to cover and protect specific areas from the etching solution.
- Spray Application: Utilize spray-on resist materials for larger areas or when a uniform application is required. Ensure even coverage and proper drying time.
Etching Metal
Chemical Etching Process:
- Prepare the Workspace: Set up your etching station in a well-ventilated area. Place the metal piece to be etched in a plastic or glass container.
- Prepare the Etching Solution: Dilute the etching solution according to manufacturer guidelines, ensuring it’s suitable for the specific metal being etched.
- Immerse the Metal: Submerge the metal piece in the etching solution, periodically agitating or stirring the solution to ensure consistent etching.
- Monitor the Etching Progress: Regularly check the metal piece to observe the etching progress. Remove it from the solution once the desired depth or design is achieved.
Electrochemical Etching Procedure and Equipment Setup:
- Create the Electrolyte Solution: Prepare a suitable electrolyte solution (e.g., saltwater) in a non-conductive container.
- Setup Power Source: Connect the positive lead from the power source to the metal to be etched and the negative lead to a conductive tool, establishing the electrical circuit.
- Etching Process: Move the conductive tool across the metal surface, allowing the electrical current to etch the exposed areas.
Tips for Achieving Desired Depth and Precision:
- Time and Agitation: Control etching depth by adjusting the time the metal spends in the etching solution. Agitating the solution can also impact etching speed.
- Testing: Conduct small test etches on similar metal pieces to determine the ideal etching duration for your specific design.
Following these step-by-step procedures and safety measures ensures a safe and controlled etching process, allowing artisans to achieve precise and visually appealing results in their jewelry pieces.
Cleaning and Neutralizing
Proper Cleaning Methods:
- Removing the Resist: Use appropriate solvents or chemicals (depending on the resist material) to carefully remove the resist from the etched metal surface. Follow manufacturer instructions and safety precautions.
- Neutralizing the Etching Solution: Rinse the etched metal thoroughly in water to remove any remaining etching solution. Then, neutralize the surface by soaking it in a baking soda solution or a commercial neutralizing agent to stop the etching process.
- Cleaning the Metal: After neutralization, wash the metal piece with soap and water to remove any residual chemicals or impurities. Pat it dry with a soft cloth.
Polishing and Finishing
Techniques for Polishing and Finishing Etched Jewelry:
- Polishing: Use polishing compounds, buffing wheels, or abrasive pads to polish the etched metal surface. This helps to bring out shine and smoothness while highlighting the contrast between etched and non-etched areas.
- Texturing: Consider adding textures to the etched areas by using tools like wire brushes, abrasive papers, or textured hammers. This can enhance the visual appeal and uniqueness of the piece.
- Adding Patinas or Finishes: Apply patinas or oxidation solutions to achieve desired colors or effects on the etched metal. Experiment with liver of sulfur, ammonia fuming, or other patina solutions to create antique or colored finishes.
- Protective Coating: Apply a protective coating such as lacquer, wax, or clear sealant to preserve the finished look of the jewelry piece and protect it from tarnishing or oxidation.
Finishing Touches:
- Detailing: Use fine brushes or tools to touch up any areas that need refinement or additional detailing after the finishing process.
- Quality Check: Inspect the piece thoroughly for any imperfections or areas that might need further attention, ensuring a polished final product.
By following these cleaning, polishing, and finishing techniques, artisans can enhance the visual appeal and durability of their etched jewelry, turning their designs into stunning, professional-looking pieces ready to be showcased or worn.
Common Mistakes and Solutions
Addressing Common Issues Encountered During Etching:
- Uneven Etching:Solution: Ensure the metal is clean and free from contaminants before etching. Agitate the etching solution regularly and monitor the process closely for uniformity.
- Under-etching or Over-etching:Solution: Test etching times on sample pieces to determine the optimal duration. Adjust the time accordingly for the desired depth of etching.
- Resist Failure or Leakage:Solution: Check the quality and application of the resist material. Apply multiple layers if necessary, ensuring complete coverage over the intended etched areas.
- Blurred or Inaccurate Designs:Solution: Ensure precise application of resist materials or stencils. Use sharper tools and practice steady hand movements for accurate designs.
- Metal Warping or Corrosion:Solution: Use appropriate metal thickness and ensure proper cleaning and neutralization post-etching to prevent corrosion. Monitor the metal’s condition during etching to prevent warping.
Advanced Tips and Tricks
Expert Advice for Refining Etching Skills:
- Experiment with Multiple Techniques: Explore combining various etching methods (e.g., chemical and electrochemical) to achieve unique effects or depths in your designs.
- Use Different Resist Materials: Experiment with unconventional resist materials like acrylic paint, photoresist films, or laser-cut stencils to achieve different textures and styles.
- Try Alternative Etching Solutions: Test alternative etching solutions or mixtures to achieve specialized effects or faster etching rates on specific metals.
- Layering and Depth Control: Master layering techniques to create depth in designs by etching at different depths or selectively removing layers of metal.
- Collaborate and Learn: Engage with other artisans or join workshops to learn new techniques, exchange ideas, and gain insights into advanced etching methods.
By troubleshooting common mistakes and adopting advanced techniques, artisans can refine their skills, expand their creative horizons, and achieve greater precision and artistic depth in their etched jewelry pieces.
Conclusion
Mastering the intricate craft of etching jewelry opens a world of creative possibilities, allowing artisans to transform metal into personalized and captivating pieces. Patience, practice, and meticulous attention to detail are fundamental elements in this artistic endeavor.
By adhering to proper safety measures, utilizing the right tools and techniques, artisans can craft stunning and unique jewelry pieces that reflect their creativity and craftsmanship. Etching offers a platform for self-expression, enabling the creation of intricate designs, textures, and personalized messages on metal surfaces.The journey toward mastering jewelry etching involves:
- Understanding the Foundations: Grasping the history, techniques, and metals suitable for etching lays a solid foundation for the creative process.
- Skillful Preparation: Learning the art of designing, transferring designs, and applying resist materials accurately sets the stage for successful etching.
- Precision and Care in Etching: Executing the etching process with attention to safety measures, precision, and desired depth brings designs to life on metal surfaces.
- Finishing Touches: Proper cleaning, polishing, and adding finishes enhance the beauty and durability of the etched jewelry pieces.
- Continuous Learning and Improvement: Troubleshooting common mistakes, experimenting with advanced techniques, and seeking continuous improvement are key to mastering this craft.
Ultimately, the art of etching jewelry is a blend of technical expertise and artistic vision. It empowers artisans to create pieces that not only adorn but also resonate with personal stories, emotions, and creativity. Through dedication and practice, every jewelry piece becomes a testament to the artisan’s unique style and craftsmanship. So, with the right dedication and commitment, anyone can master the art of etching jewelry and craft breathtaking pieces that stand the test of time.