
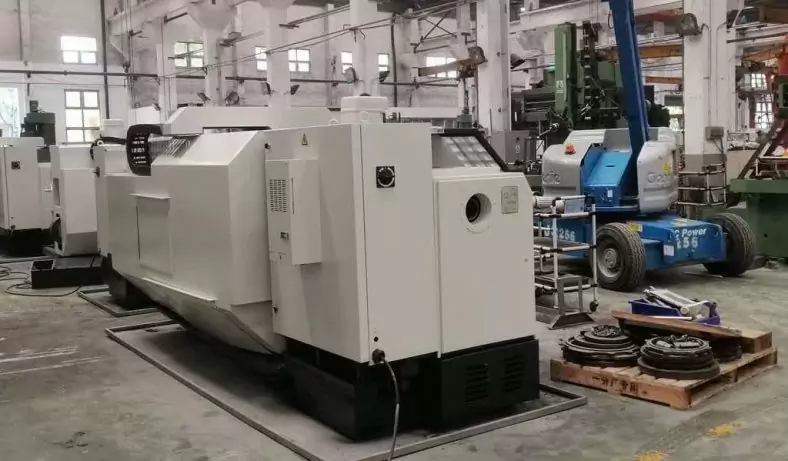
Debugging the excitation adjustment circuit of a CNC lathe involves troubleshooting and resolving any issues that may affect the proper functioning of the circuit. The excitation adjustment circuit is responsible for providing the correct current and voltage levels to the motor’s field winding, ensuring precise control of the motor’s speed and torque. Here’s a step-by-step guide to help you debug the excitation adjustment circuit of a CNC lathe:
Check Power Supply
Ensure that the power supply to the excitation adjustment circuit is stable and within the required voltage range. Check for any loose connections or voltage fluctuations that could lead to improper operation.
Inspect Wiring Connections
Verify all wiring connections within the excitation adjustment circuit, including connections to the motor’s field winding, the exciter, and any control devices. Look for loose or damaged connections that may cause intermittent or erratic behavior.
Test Exciter and Voltage Regulator
If your CNC lathe uses a separate exciter and voltage regulator for excitation adjustment, test these components individually. Verify that the exciter is generating the required output voltage and that the voltage regulator is regulating the voltage correctly.
Measure Output Voltage
Use a multimeter to measure the output voltage of the excitation adjustment circuit when the motor is running. Compare the measured voltage to the specified voltage for your CNC lathe’s motor. If the voltage is not within the correct range, investigate the circuit components that could affect the output voltage.
Inspect Control Signals
Check the control signals sent to the excitation adjustment circuit from the CNC control system. Ensure that the signals are being transmitted correctly and that any command inputs are reaching the excitation circuit as intended.
Monitor Motor Performance
Observe the motor’s performance during operation. Look for any irregularities in speed, torque, or vibrations that could indicate problems with the excitation adjustment circuit.
Check for Overheating
Verify that the excitation adjustment circuit components, such as the voltage regulator and exciter, are not overheating during operation. Overheating can lead to circuit malfunctions and reduced performance.
Analyze Error Codes and Alarms
If your CNC lathe’s control system displays error codes or alarms related to the excitation adjustment circuit, refer to the machine’s user manual or technical documentation to interpret the codes and troubleshoot the specific issues.
Consult Technical Support
If you are unable to identify and resolve the issues with the excitation adjustment circuit, consider seeking assistance from the CNC lathe manufacturer’s technical support or a qualified service technician.
Perform Functional Testing
After any adjustments or repairs, perform functional testing to ensure that the excitation adjustment circuit is operating correctly and the motor is running smoothly.
Always exercise caution when working with electrical circuits and components, and disconnect power before performing any tests or adjustments. If you are not confident in your ability to debug the excitation adjustment circuit, seek assistance from a qualified professional to avoid any potential damage to the CNC lathe or injury to yourself.
Answer: The CNC lathe installs the fuses SFU and 6FU.Plug in the CNC lathe signal synthesis plug-in ZH-C and the voltage regulating thyristor trigger device plug-in QH-C.
Turn the Emirates forward and backward handle to the low-speed position, turn on the unit, press the forward button, then WAl-G is positive, WA2-G is negative, touch line 125, the generator voltage is reduced at this time, indicating that the voltage negative feedback pole Sexually correct.
Adjust the potentiometers 11RP and 12RP, and set the maximum voltage of the CNC lathe generator forward and backward at 440-460V.
Use the “touch test method” to check whether the voltage differential feedback and self-degaussing circuit wiring are correct.
The CNC lathe checks the transformer 4TC output voltage and the action of the voltage relay 2kA.
Connect WE2-VII, plug in DC-C, the trigger device plug-in of the magnetic thyristor, adjust the potentiometers 13RP and 14RP, take the full magnetic voltage U78 1544 is about 7.5V, and the current negative feedback voltage U155-156 is about 3V. The current of the thyristor excitation circuit is set at 4.0-4.2A, however, a 9V dry battery is used to replace the tachogenerator to make Jc-e reverse. Press the forward button on the CNC lathe and adjust the RP-F handle to the high-speed direction, if the excitation circuit current can be smoothly adjusted from 4.2A to about 1A.
Connect the wire 193 on the CNC lathe, set the current in the fixed excitation winding of the motor to 4-4.2A, and the demagnetization relay KUC should operate reliably.
Before the worktable is placed on the bed, connect the thick wire WA2-G, press the forward or backward button, check whether the rotation directions of the motor MI and ~III match, increase the motor speed slowly, and observe that it decelerates and reverses. Direction and braking conditions, check the current cut-off feedback work.
Put on the workbench, let the workbench reciprocate automatically, slowly increase the speed, and observe its offside, vibration and rectification.
Add the load, do a load test, check the polarity of the current positive feedback, and make the speed decrease by no more than 10% at low speed and full load.
At Be-cu.com,we use advanced equipment to offer you Unparalleled precision for producing metal and plastic machining parts
- We combine the latest CNC milling and turning processes with proprietary technology to deliver high quality, on-demand parts.
- Our team of engineers and machinists program the equipment to optimize cutting time, surface finish, and final tolerance to meet your design specifications
- We specialize in cnc precision machining, single part prototyping, short to medium production runs, manufacture parts on time, every time, so you can stay ahead of schedule
- CNC machining can create very similar parts to series parts. It is often more efficient and faster than other rapid prototyping technologies for the manufacture of a quantity of prototypes between 1 and 10 parts . We also recommend CNC machining for parts with large sizes (greater than 600 mm).
Contact Us ([email protected]) Now for your Custom CNC Machining, We are your best online cnc machining and rapid prototyping services choice!