
Creating a comprehensive guide on crafting trophies offers enthusiasts and aspiring craftsmen a multitude of techniques to express creativity. In this extensive article, we’ll delve into six diverse methods for making unique trophies, ranging from traditional woodworking to modern 3D printing. Each approach offers its own distinct charm, allowing individuals to craft personalized trophies for various occasions, competitions, or events.
Woodworking For Make a Trophy
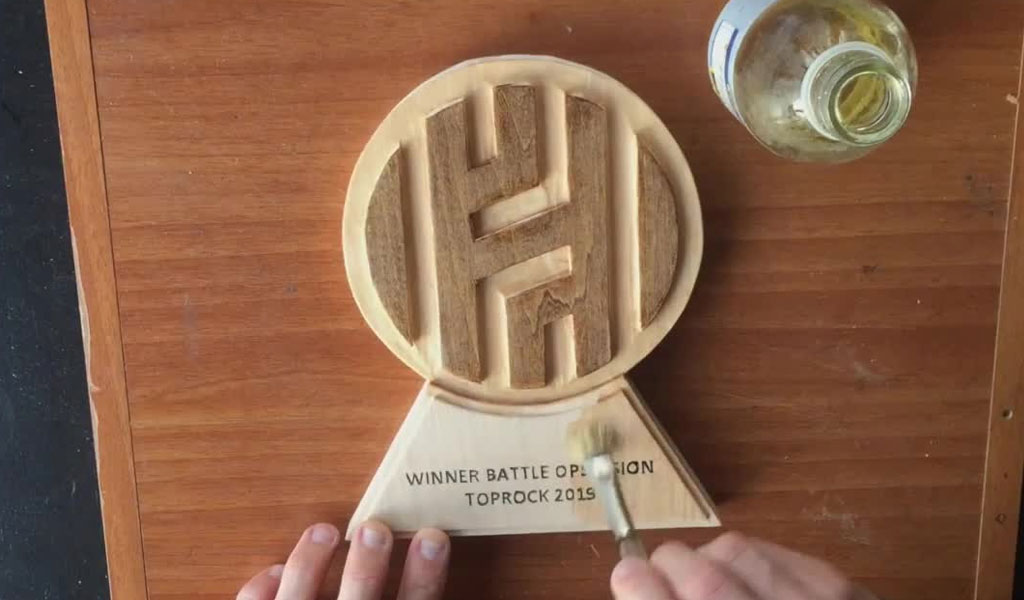
Woodworking is a time-honored craft that lends itself beautifully to creating trophies. Here is a step-by-step guide on how to make a wooden trophy:
Materials and Tools
- Wood: Choose a hardwood such as oak, walnut, cherry, or maple for durability and aesthetics.
- Design Plan: Sketch or draft the trophy design you envision.
- Saw: Table saw, bandsaw, or handsaw for cutting the wood.
- Carving Tools: Chisels, gouges, and knives for shaping.
- Sandpaper and Sanding Blocks: To smoothen the wood surfaces.
- Wood Glue: For joining different parts together.
- Finishing Materials: Stain, varnish, or lacquer for a polished look.
- Safety Gear: Safety glasses, dust mask, and gloves.
Steps By Steps
- Design Phase: Begin by drafting a detailed plan of the trophy. Consider the shape, size, and any intricate details you want to include. Decide on the base, column, and any additional decorative elements.
- Wood Selection and Preparation: Choose high-quality wood and mark out the pieces based on your design. Use a saw to cut the wood into the required shapes and sizes. Sand the pieces to remove rough edges and ensure a smooth finish.
- Shaping and Carving: Employ carving tools to shape the various components of the trophy. Carve intricate details such as logos, names, or patterns according to your design. Take your time to ensure precision and finesse in the carving process.
- Assembly: Use wood glue to join the different parts together. Pay attention to alignment and symmetry as you assemble the base, column, and any additional elements. Clamp the pieces together securely and allow the glue to dry completely.
- Sanding and Finishing: Once the glue has dried, sand the entire trophy surface thoroughly to achieve a smooth texture. Start with coarse sandpaper and progress to finer grits for a polished finish. Wipe away any dust.
- Staining and Varnishing: Apply a wood stain if desired to enhance the natural color of the wood. Follow this with a coat of varnish or lacquer for protection and a glossy appearance. Allow each coat to dry completely before applying the next.
- Final Touches: Inspect the trophy for any imperfections or rough spots. Sand lightly if needed and add additional coats of varnish for a smooth, lustrous finish.
- Presentation: Once the trophy is complete and the finishing is dry, mount or attach any plaques, plates, or engraved elements to personalize the trophy for the intended recipient.
Woodworking offers endless possibilities for creativity and customization when making trophies. Whether for sports events, academic achievements, or corporate recognitions, a handmade wooden trophy reflects craftsmanship and dedication, making it a cherished symbol of accomplishment.
Metal Manufacturing


Creating a trophy using metalworking techniques infuses it with durability, elegance, and a sense of prestige. Here’s a guide on how to make a metal trophy:
Materials and Tools
- Metal: Choose a suitable metal such as brass, bronze, aluminum, or stainless steel.
- Design Blueprint: Sketch or draft the trophy design, including its size, shape, and any intricate details.
- Cutting Tools: Bandsaw, hacksaw, or metal cutting tools to cut the metal pieces.
- Welding Equipment: Welding machine, filler rods, and safety gear for joining metal parts.
- Grinding and Polishing Tools: Angle grinder, sanding discs, and polishing compounds.
- Engraving Tools (if required): Engraving machine or tools for adding inscriptions or designs.
- Protective Gear: Safety goggles, gloves, and a face mask for safety.
Steps
- Design and Blueprint: Begin by sketching a detailed plan of the trophy design. Decide on the dimensions, the base, the shape of the cup or figure, and any intricate engravings or details.
- Metal Cutting: Using the appropriate cutting tools, cut the metal pieces according to the design plan. Be precise with measurements to ensure accuracy in the final assembly.
- Shaping and Forming: Employ metalworking techniques such as bending, hammering, or casting to shape the individual parts. Use molds or forms to create specific shapes if necessary. Take time to ensure each piece is formed accurately.
- Joining and Welding: Use a welding machine to join the different metal parts together. Welding requires precision and skill, so ensure proper safety measures and take necessary precautions.
- Grinding and Smoothing: After welding, use an angle grinder and sanding tools to smooth out any rough edges, weld seams, or imperfections on the metal surface. This step is crucial for achieving a polished finish.
- Polishing and Finishing: Apply polishing compounds and buff the metal surface to achieve a smooth, shiny finish. This step enhances the appearance of the trophy, giving it a lustrous look.
- Engraving (Optional): If desired, use engraving tools or machines to add inscriptions, names, or designs onto the metal surface. This personalization adds a special touch to the trophy.
- Final Inspection: Carefully examine the trophy for any flaws or inconsistencies. Make any necessary touch-ups or adjustments to ensure a flawless final product.
- Presentation: Once the trophy is complete and polished, mount it onto a base or platform if required. Add any plaques, plates, or engraved elements to customize it for the intended recipient.
Creating a metal trophy through metalworking techniques demands skill, precision, and attention to detail. The resulting trophy stands as a testament to craftsmanship and serves as a prestigious symbol of achievement in various fields, including sports, arts, academics, or professional accomplishments.
Glass Glitz
Creating a trophy using glasswork techniques can result in stunning, elegant, and visually striking awards. Here’s a guide on how to make a glass trophy:
Materials and Tools
- Glass Sheets or Blanks: Choose clear or colored glass sheets suitable for cutting and shaping.
- Glass Cutting Tools: Glass cutter, glass saw, or scoring tool for cutting the glass.
- Glass Grinding and Polishing Tools: Glass grinder, sandpaper, polishing pads.
- Glass Fusing Materials (if applicable): Glass kiln, kiln shelf, kiln wash, glass frits, and compatible glass pieces.
- Safety Gear: Safety goggles, gloves, and a dust mask for protection.
Steps By Steps
- Design Planning: Begin by sketching or planning the trophy design. Decide on the size, shape, and any intricate details or patterns you wish to incorporate into the glass trophy.
- Glass Cutting: Using a glass cutter or glass saw, carefully cut the glass sheets according to the design plan. Take precise measurements and ensure clean, accurate cuts to achieve the desired shapes for the trophy components.
- Shaping and Grinding: Use a glass grinder or sandpaper to smooth the edges and surfaces of the cut glass pieces. This step is crucial for safety and achieving a professional-looking finish.
- Glass Assembly (if applicable): If creating a fused glass trophy, arrange the cut glass pieces on a kiln shelf, layering different colors or elements to create the desired design. Fuse the glass pieces together in a glass kiln following proper firing schedules and temperatures.
- Finishing Touches: After cutting and assembling the glass pieces, polish the trophy components using polishing pads or buffing tools to achieve a smooth, glossy finish.
- Personalization (if desired): Consider adding engraving or etching onto the glass surface to personalize the trophy. Use glass etching cream or a sandblasting technique to create names, logos, or text on the glass.
- Final Assembly: Once all the glass components are prepared and finished, assemble the trophy. Use glass glue or UV-curing adhesive to securely attach the parts together.
- Presentation: Mount the glass trophy onto a base or platform if desired. Add any plaques, plates, or additional elements to customize the trophy for the intended recipient.
Creating a glass trophy through glasswork techniques allows for artistic expression and craftsmanship. Glass trophies are often chosen for their elegance and beauty, making them suitable for recognizing achievements in art, culture, innovation, or any field that celebrates excellence. The intricate designs and transparency of glass trophies make them a captivating symbol of accomplishment.
Ceramic Sensation
Creating a trophy using pottery and ceramics techniques offers a unique and artistic approach. Here’s a step-by-step guide on how to make a ceramic trophy:
Materials and Tools
- Clay: Choose a suitable clay type for ceramics, such as stoneware or porcelain.
- Pottery Wheel (optional): Used for wheel-throwing techniques.
- Hand-building Tools: Rolling pin, clay cutters, shaping tools, and carving tools.
- Kiln: Access to a kiln for firing the ceramics.
- Glazes and Underglazes: Various colors and finishes for decorating the trophy.
- Kiln Furniture: Kiln shelves, stilts, and kiln wash for firing support.
Steps
- Design and Planning: Begin by sketching or planning the trophy design. Consider the size, shape, and any intricate details you want to incorporate into the ceramic trophy.
- Preparing the Clay: Knead the clay to remove air bubbles and achieve a consistent texture. Cut out or weigh the appropriate amount of clay needed for the trophy.
- Wheel-throwing (optional) or Hand-building: If using a pottery wheel, center the clay on the wheel and shape it using wheel-throwing techniques to form the base or main body of the trophy. If hand-building, use rolling pins, cutters, and shaping tools to build and sculpt the trophy’s components.
- Assembly and Sculpting: Join the different clay components together using scoring and slipping techniques. Sculpt any additional details or embellishments onto the trophy using carving tools or sculpting techniques.
- Drying: Allow the assembled trophy to dry slowly and completely to avoid cracking. Cover it loosely with plastic to control the drying process.
- Bisque Firing: Once dry, bisque fire the trophy in a kiln to harden it. Follow the recommended firing schedule and temperature suitable for the clay type used.
- Glazing and Decorating: Apply glazes or underglazes to decorate the bisque-fired trophy. Use brushes, dipping, or pouring techniques to achieve desired colors and finishes.
- Final Firing: Fire the trophy in the kiln again to set the glazes. Ensure the kiln firing reaches the recommended temperature for the glazes used.
- Final Touches: After the final firing, inspect the trophy for any imperfections. Sand or touch up areas if needed. Add any additional decorative elements or personalization.
- Presentation: Once completed, mount the ceramic trophy on a base or display it in a suitable manner. Add any plaques, plates, or engravings to customize it for the intended recipient.
Crafting a ceramic trophy through pottery techniques allows for creativity and artistic expression. Ceramic trophies are often chosen for their tactile appeal and individualistic charm, making them ideal for recognizing achievements in arts, culture, or community service. The handcrafted nature of ceramic trophies serves as a unique symbol of accomplishment.
3D Printing Innovation
Creating a trophy using 3D printing techniques offers endless possibilities for intricate designs and customization. Here’s a step-by-step guide on how to make a 3D printed trophy:
Materials and Tools
- 3D Printer: Select a suitable 3D printer based on the printing technology and capabilities required for the trophy.
- 3D Modeling Software: Use software like Blender, Tinkercad, or Fusion 360 to design the trophy in a 3D digital format (STL, OBJ, etc.).
- Filament or Resin: Choose the appropriate printing material based on the 3D printer’s specifications (PLA, ABS, resin, etc.).
- Support Materials (if applicable): Material for supports during printing, if needed for complex designs.
- Sanding Tools: Sandpaper or sanding blocks for smoothing the printed parts.
- Primer and Paint (optional): For finishing and painting the trophy.
Steps By Steps
- Design Phase: Create or download a 3D model of the trophy using 3D modeling software. Design the trophy considering its size, shape, and intricate details. Ensure the model is suitable for 3D printing.
- Prepare the 3D Printer: Set up the 3D printer according to the manufacturer’s instructions. Load the chosen printing material into the printer and ensure proper calibration and settings for the print job.
- Printing: Use the 3D model file to start the printing process. Monitor the printing progress and ensure that the layers adhere properly to create the desired shape. Depending on the complexity and size of the trophy, this process may take several hours or even days.
- Post-Processing: Once the printing is complete, carefully remove the printed parts from the printer’s build platform. If supports were used, remove them as per the recommended method for the specific material used. Use sandpaper or sanding tools to smooth rough edges or imperfections on the printed parts.
- Finishing (Optional): Apply a primer to the printed parts to prepare them for painting, if desired. Use suitable paints or coatings to add color or finishes to the trophy, enhancing its appearance.
- Assembly (if applicable): If the trophy consists of multiple printed parts, assemble them together using adhesive or appropriate joining methods. Ensure proper alignment and attachment for a cohesive final product.
- Final Touches: Inspect the trophy for any flaws or areas that need refinement. Make any necessary adjustments or additional finishing touches to achieve the desired look.
- Presentation: Once completed, mount the 3D printed trophy on a base or display it in a suitable manner. Add any personalized elements or labels to customize it for the intended recipient.
Crafting a trophy using 3D printing technology allows for intricate designs, precise detailing, and customization. 3D printed trophies are suitable for recognizing achievements in technology, innovation, competitions, or events that celebrate futuristic advancements. The versatility of 3D printing offers a contemporary and innovative approach to trophy making.
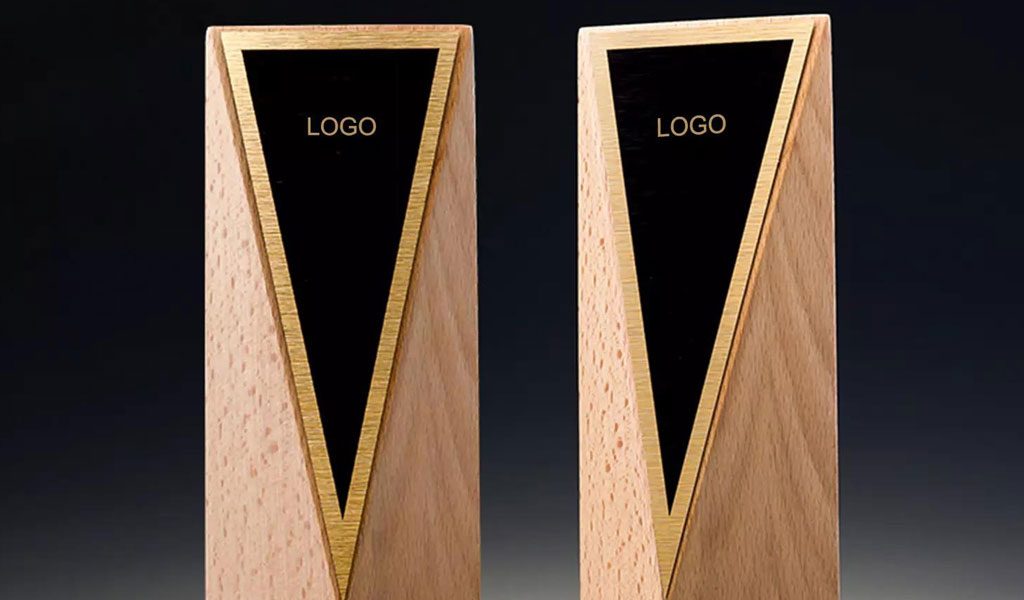
Mixed Media Marvel
Creating a trophy using mixed media offers a versatile and innovative approach by combining various materials. Here’s a guide on how to make a mixed media trophy:
Materials and Tools
- Assorted Materials: Wood, metal, glass, ceramics, 3D printed components, or any other materials you intend to combine.
- Tools Specific to Each Material: Woodworking tools, metalworking tools, glassworking tools, pottery tools, 3D printing equipment, etc.
- Adhesives or Joining Materials: Epoxy, glue, soldering equipment, or any suitable methods for joining different materials together.
- Finishing Materials: Stains, paints, varnishes, or other finishes appropriate for the chosen materials.
- Safety Gear: Safety goggles, gloves, and other protective equipment specific to the materials and tools used.
Steps By Steps
Design Planning: Sketch or plan out the trophy design, considering the incorporation of multiple materials. Determine how each material will contribute to the overall appearance and structure of the trophy.
Prepare Individual Components: Utilize the specific techniques and tools for each material to create the different components of the trophy. For instance:
- Wood: Cut, shape, and finish wooden parts according to the design.
- Metal: Fabricate or forge metal components, incorporating any required welding or soldering.
- Glass: Use glassworking techniques to create glass elements or embellishments.
- Ceramics: Hand-build or wheel-throw ceramic pieces that complement the design.
- 3D Printing: Print customized elements that fit into the overall design.
Assembly: Use appropriate methods, such as adhesives, welding, or fasteners, to combine the different materials. Ensure structural integrity and stability when assembling various components together.
Finishing Touches: Apply finishes or coatings suitable for each material to achieve the desired appearance. This could involve staining, painting, polishing, or other surface treatments based on the nature of the materials used.
Personalization: Incorporate any personalization elements such as engraved plates, inscriptions, or additional decorative details to make the trophy unique for the intended recipient or event.
Final Inspection: Thoroughly inspect the trophy for any flaws or areas that require refinement. Make necessary adjustments or touch-ups to ensure a high-quality final product.
Presentation: Once completed, mount the mixed media trophy onto a base or suitable display stand. Ensure it is securely attached and visually appealing. Prepare the trophy for presentation to the recipient or for display.
Creating a trophy using mixed media allows for a diverse range of artistic expression and customization. Mixed media trophies are versatile and can be tailored to suit various events or achievements, combining the characteristics and aesthetics of different materials for a truly unique and impactful award.
In Conclusion
Trophy making encompasses a wide spectrum of techniques, each offering its distinct characteristics and artistic merits. Whether embracing traditional craftsmanship or venturing into innovative technologies, the art of trophy making enables creators to celebrate accomplishments in a manner that reflects the spirit and significance of the achievements being recognized. By exploring these six diverse methods, individuals can unleash their creativity to craft trophies that stand as tangible symbols of honor, achievement, and excellence.