
Accurate measurements are the backbone of various industries, from woodworking to engineering. Whether you’re a hobbyist or a professional, knowing how to use essential measuring tools like steel rulers, internal and external calipers, and feeler gauges is crucial for achieving precision in your work. In this guide, we’ll walk you through the proper techniques for using these tools effectively.
View More Articles:
Introduction
Precision measurements play a pivotal role across a wide spectrum of industries and tasks, ranging from construction and engineering to manufacturing and craftsmanship. The ability to obtain accurate measurements is not only essential for ensuring quality but also for achieving optimal functionality and fit. In this guide, we will explore three fundamental tools that facilitate precise measurements: the steel ruler, internal and external calipers, and the feeler gauge.
These tools form the foundation of dimensional analysis, enabling us to gauge lengths, widths, depths, and gaps with utmost accuracy. By understanding the proper usage of these tools, you’ll unlock the ability to translate design specifications into tangible results, whether you’re constructing a building, fabricating intricate components, or simply striving for excellence in your everyday projects.
While the allure of modern technology is undeniable, these traditional tools continue to hold their ground due to their reliability, ease of use, and universal applicability. However, it’s important to recognize that achieving accuracy requires more than just possession of these tools; it demands a grasp of proper techniques and a meticulous approach. As we delve into the usage of steel rulers, internal and external calipers, and feeler gauges, keep in mind that the key to successful measurements lies not only in the tools themselves but also in the knowledge and precision with which you wield them.
Steel Ruler
A steel ruler is a versatile measuring tool known for its durability, straightness, and precision. It’s often used in applications where accuracy is crucial, such as engineering, woodworking, and crafting. Understanding its construction, measurements, and proper usage is essential for obtaining accurate results.
1. Construction and Materials
Steel rulers are typically made from high-quality stainless steel or hardened steel, which ensures their rigidity and resistance to bending. This construction material allows for minimal expansion and contraction due to temperature changes, making them ideal for consistent measurements.
2. Units of Measurement
Steel rulers come with markings for both imperial (inches) and metric (centimeters and millimeters) units of measurement. The imperial side usually has inches divided into fractions, while the metric side features centimeter and millimeter divisions.
3. Proper Handling and Avoiding Parallax Errors
To prevent parallax errors, which occur when the ruler isn’t viewed directly from above, follow these steps:
- Place the ruler flat on the surface to be measured.
- Align your line of sight perpendicular to the ruler, ensuring that there’s no tilt or angle.
- Position your eyes at the same level as the measurement point for accurate readings.
4. Making Accurate Measurements Using the Zero-Mark Method
The zero-mark method involves aligning the zero mark of the ruler with the starting point of the object being measured. Here’s how to use this method:
- Place the zero mark at one end of the object.
- Read the measurement directly from where the other end of the object aligns with the ruler’s markings.
5. Importance of Alignment and Magnification
Achieving precise measurements also requires proper alignment and attention to detail. For fine measurements, consider using a magnifying glass to ensure accuracy. Align the ruler as closely as possible to the object’s edge, making sure there’s no gap or overlap.
6. Measuring Curved Objects
When measuring curved objects, align the ruler with the points where the curve intersects the ruler’s edge. If the curve is more pronounced, use a flexible ruler to conform to the shape and then measure it against a straight ruler.
Remember that even a slight misalignment or miscalculation can lead to significant measurement errors. Practice aligning the ruler correctly and employing the zero-mark method for consistent accuracy in your measurements.
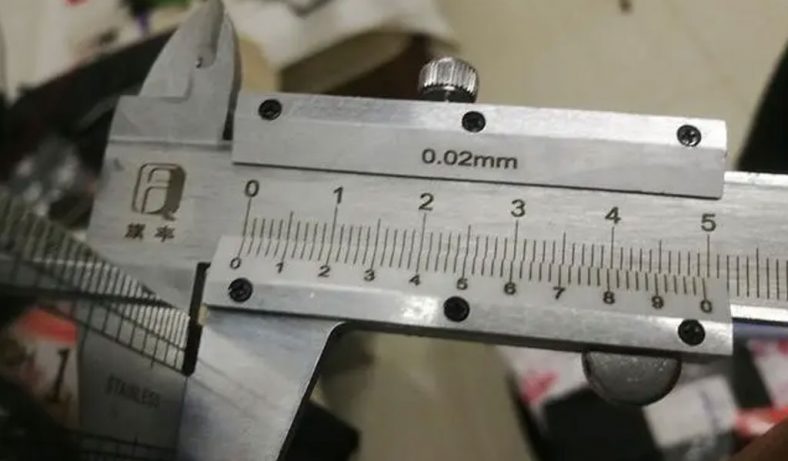
Internal and External Calipers
Internal and external calipers are indispensable tools for accurately measuring dimensions of objects, holes, and gaps. They come in various types, each catering to specific needs and preferences.
1. Types of Calipers
- Vernier Calipers: These traditional calipers provide precise measurements through a sliding vernier scale.
- Dial Calipers: Featuring a dial gauge, these calipers offer easy-to-read measurements and are well-suited for quick measurements.
- Digital Calipers: These modern calipers provide digital readouts with high accuracy, eliminating the need for manual interpretation.
2. Components of Calipers
- Jaws: The measuring arms that come in contact with the object being measured.
- Depth Rod: An extension that enables measurement of depth.
- Locking Mechanism: Holds the jaws in place for consistent measurements.
- Scale: The graduated scale displaying measurements in inches, millimeters, or both.
3. Choosing the Appropriate Type and Size:
- Consider the level of precision required for your task.
- Select the appropriate type based on ease of use and readability.
- Choose a size that accommodates the range of measurements you’ll encounter.
4. Measuring Internal Dimensions with Internal Calipers
- Gently open the caliper jaws using the adjustment screw.
- Insert the jaws into the internal space you want to measure.
- Gradually tighten the adjustment screw until the jaws make contact with the inner surfaces.
- Read the measurement from the scale or display.
5. Measuring External Dimensions with External Calipers:
- Open the caliper jaws and place them around the object’s outer surfaces.
- Slowly close the jaws by turning the adjustment screw.
- Ensure the jaws maintain even pressure on both sides of the object.
- Read the measurement from the scale or display.
6. Maintaining Even Pressure and Alignment:
- Apply equal pressure on both jaws to prevent skewing of measurements.
- Align the jaws perpendicular to the surface being measured.
- Make sure the caliper is free from dirt or debris that could affect accuracy.
- Double-check alignment before taking measurements.
Accurate readings depend on consistent application of pressure and proper alignment of the caliper jaws. Careful handling and adherence to the chosen type’s operational guidelines will help you achieve reliable results. Regular maintenance and calibration of the calipers will ensure their continued accuracy and effectiveness in measurements.
Feeler Gauge
A feeler gauge is a precision tool used for measuring the clearance or gap between two parallel surfaces. It consists of a set of thin metal strips with specific thicknesses. Feeler gauges are indispensable in various applications where accurate measurements of gaps, clearances, and tolerances are essential.
1. Common Applications:
- Engine and machinery maintenance: Measuring spark plug gaps, valve clearances, and bearing tolerances.
- Automotive work: Checking brake pad clearances, piston ring gaps, and exhaust system gaps.
- Manufacturing: Ensuring proper alignment and spacing in precision components.
- Woodworking: Determining gaps between joints and fittings.
2. Types of Feeler Gauges:
- Blade-Style Feeler Gauges: These consist of individual metal blades, each with a marked thickness. They are used for measuring gaps and clearances with greater accuracy.
- Wire-Style Feeler Gauges: These have a series of round wires bundled together, each wire representing a specific thickness. They are more flexible and suitable for measuring irregular surfaces.
3. Selecting the Right Thickness:
- Refer to the equipment’s specifications or guidelines to determine the required gap or clearance.
- Choose a feeler gauge strip or wire that fits snugly into the gap without forcing it. A gauge that’s too thick or too thin can lead to inaccurate readings.
4. Inserting and Reading the Feeler Gauge:
- Select the appropriate feeler gauge blade or wire.
- Gently insert the feeler gauge into the gap, applying slight pressure.
- If there’s resistance or friction, the gauge is too thick. If it slides in too easily, it’s too thin.
- Withdraw the gauge carefully and observe which marked thickness fits comfortably.
- Read the measurement value on the feeler gauge where it emerges from the gap.
5. Tips for Accurate Measurements:
- Slide the feeler gauge smoothly and evenly into the gap to avoid skewing the reading.
- Check at multiple points along the gap to ensure consistency, as gaps might vary slightly.
- Use proper lighting and magnification if necessary to enhance accuracy.
- Make sure the surfaces being measured are clean and free of debris that could affect the reading.
Feeler gauges are invaluable tools for achieving precise measurements in scenarios where small tolerances matter. Consistency and attention to detail are key to obtaining accurate readings, so take your time and practice using the tool to ensure your measurements are reliable and trustworthy.
Best Practices for Precision Measurements
Accurate measurements are the cornerstone of successful projects and endeavors. To ensure consistently reliable results, adhere to these best practices when using precision measurement tools:
1. Cleanliness and Proper Storage:
- Keep your tools clean and free from debris that could affect measurements. Dust and particles can lead to inaccurate readings.
- Store tools in a dry, controlled environment to prevent rust or corrosion, especially for steel rulers and calipers.
2. Calibration and Maintenance:
- Regularly calibrate your measuring tools using standards with known accuracies. This ensures that your tools are still providing accurate readings.
- Follow the manufacturer’s recommendations for maintenance. Lubricate moving parts as needed and ensure that mechanisms are functioning properly.
3. Practice and Validation:
- Practice using your tools on non-critical tasks to build confidence and familiarity. This minimizes errors when working on important projects.
- Validate measurements by cross-checking with alternative methods or tools when possible, especially in situations where precision is paramount.
4. Avoiding Common Mistakes:
- Parallax Errors: Always view measurement tools directly from above to avoid parallax errors, which can result from viewing at an angle.
- Uneven Pressure: Apply even pressure when using calipers or feeler gauges to ensure accurate measurements.
- Incorrect Zero Point: Double-check that the zero point on a ruler, caliper, or gauge aligns accurately with the starting point of your measurement.
5. Double-Check and Seek Assistance:
- Always double-check your measurements before making critical cuts, adjustments, or decisions.
- If you’re uncertain about a measurement or technique, don’t hesitate to seek guidance from experts or colleagues who have experience.
6. Document and Record:
Maintain a record of measurements and results for future reference. This is particularly crucial for projects with intricate measurements or those involving multiple steps.
By adhering to these best practices, you’ll enhance your measurement accuracy and minimize the likelihood of errors. Precision measurements require a combination of skill, attention to detail, and continuous improvement. Remember that even experienced professionals occasionally encounter challenges, so never hesitate to take your time, verify your readings, and seek assistance when needed. Your commitment to precision will yield superior results and elevate the quality of your work.
Conclusion
In this comprehensive guide, we’ve explored the essential aspects of precision measurement tools: the steel ruler, internal and external calipers, and feeler gauge. By mastering the proper usage of these tools, you’re equipped to achieve accuracy in a wide array of applications, from engineering and manufacturing to woodworking and craftsmanship.Key Takeaways:
- Steel rulers are reliable and versatile tools made from durable materials, offering imperial and metric units of measurement.
- Internal and external calipers come in various types, providing precise measurements of internal and external dimensions.
- Feeler gauges play a crucial role in measuring gaps and clearances accurately with their various types and thicknesses.
Importance of Accurate Measurements: Accurate measurements are the foundation of quality and precision across industries. Whether you’re constructing intricate components, crafting fine woodworking projects, or maintaining complex machinery, your ability to measure with precision directly impacts the end result’s functionality, fit, and aesthetic.
Continuous Improvement: Enhancing your measurement skills requires consistent practice and a dedication to refining your techniques. By adhering to best practices, such as proper alignment, even pressure, and cross-validation, you can confidently produce reliable results.
Further Learning: To delve deeper into precision measurement techniques, consider exploring additional resources:
- Books on metrology and dimensional analysis.
- Online tutorials and video guides demonstrating measurement tool usage.
- Professional courses on measurement technology and practices.
Remember, the journey toward precision is an ongoing one. As you refine your skills and knowledge, you’ll not only improve your own capabilities but also contribute to the quality and excellence of your projects and the industries you’re a part of.