
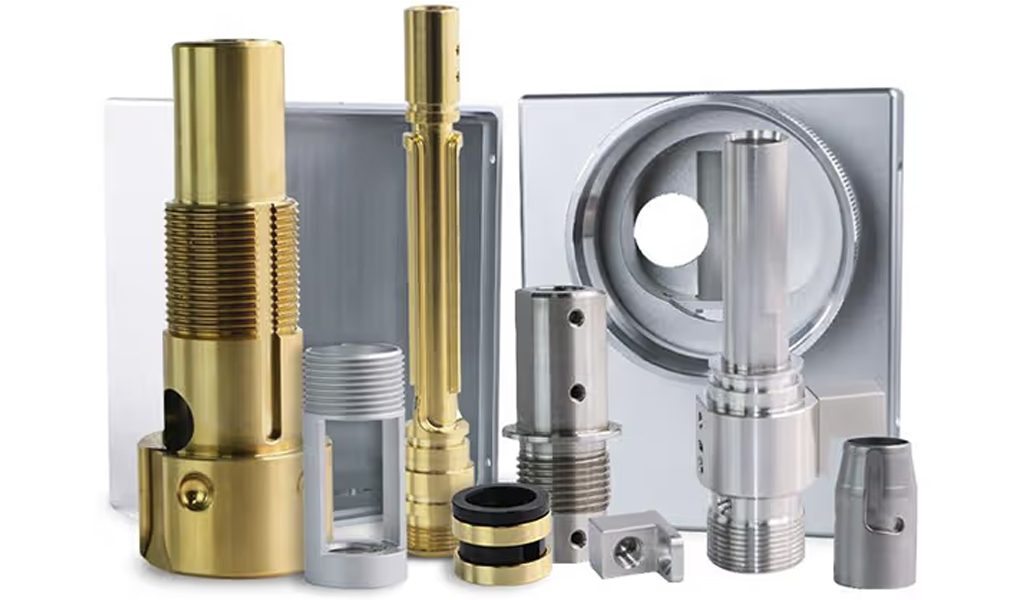
CNC machining, an integral part of modern manufacturing, has revolutionized the production process, offering precision, speed, and versatility. However, determining the cost of CNC machining can be a complex task, involving various factors that influence the final price,On average, CNC Machining costs between $35 and $120 per hour in USA. However, you can get a lower price from the Chinese CNC Machine Shop like Be-Cu.com, which offers $10 – $30 per hour from 3-axis machining to 5-axis machining and Swiss Machining to Precision CNC Milling.. In this comprehensive guide, we will delve into the intricacies of calculating CNC machining costs, providing valuable insights for businesses and enthusiasts alike.
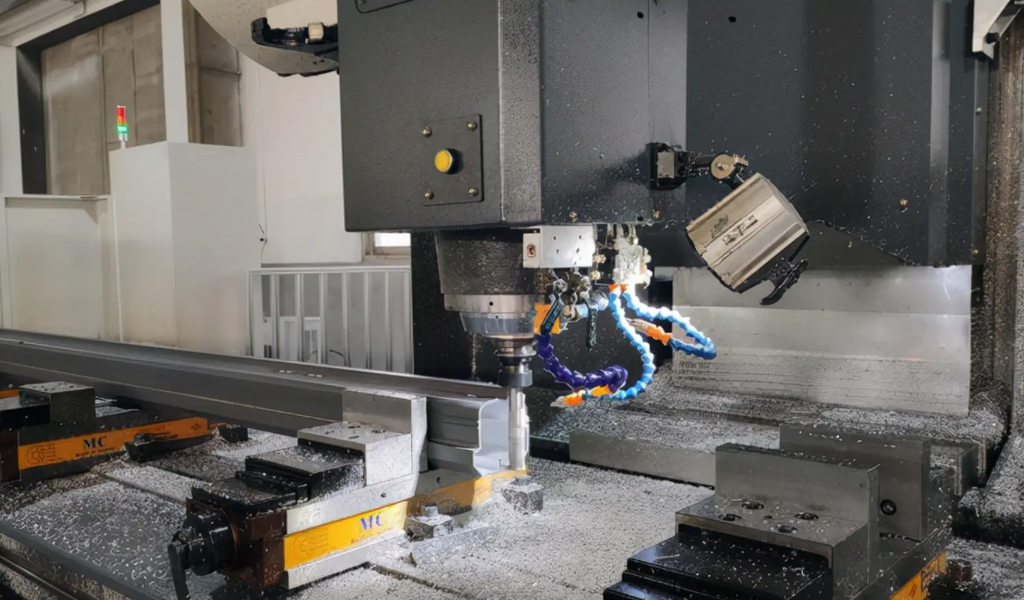
Learn About CNC Machining Process
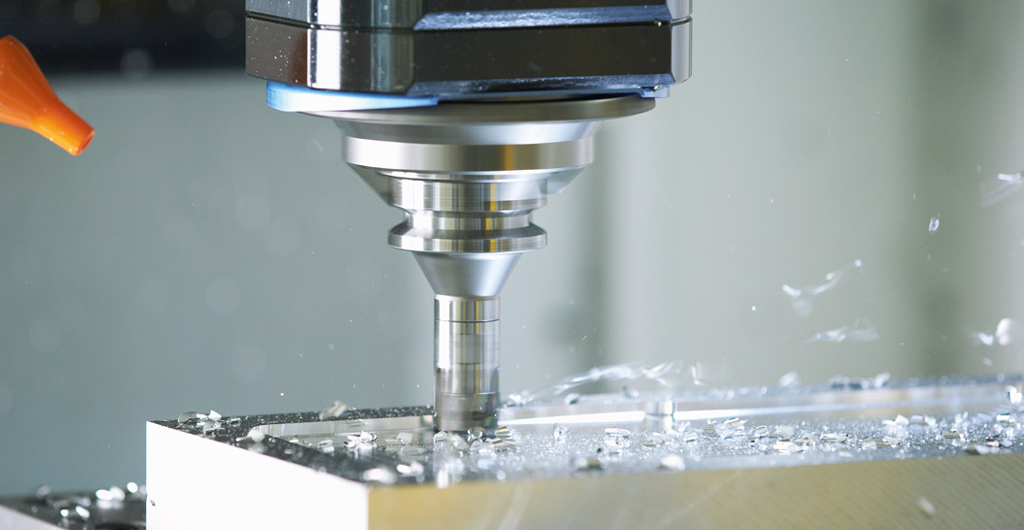
Understanding the detailed CNC machining process will help us better know how to calculate the cost of CNC machining. Below are several process in the calculation of CNC machining:
1.Blanking
Use a saw to cut the corresponding material into the approximate size of the parts to be processed. (Generally leave 5-8mm margin in length and width)
2.Open It Rough
Use lathes, milling machines, wire cutting and other equipment to process the rough shape of the parts required by the drawings, and remove most of the blank margin.
3.Timeliness
Aging is divided into natural aging and artificial aging. Natural aging refers to leaving the workpiece standing for 24 hours or longer, while artificial aging refers to heat treating the workpiece in a high-temperature box or box furnace. The purpose of aging is to eliminate stress and reduce deformation of the workpiece during the finishing milling process.
4.Measure The Size
After aging, the workpiece will deform to a certain extent and needs to be re-measured to determine the allowance.
5.Finishing
Strictly follow the dimensions required by the drawings and perform fine processing to meet the size of the workpiece required by the drawings. For workpieces with higher precision requirements, semi-finishing processes will be arranged as needed before finishing.
6.Post-processing
This process will be interspersed with the aforementioned processes depending on the type of parts.
- Fitter: Including trimming, sawing, filing, straightening, drilling, thread processing, deburring, chamfering, screw installation, etc. of the workpiece.
- Grinding machine: When the precision requirements for the outer circle, inner hole, end face, etc. of the workpiece are high, it is necessary to leave a margin after the finishing process and grind it with a grinder.
- Boring machine: Boring machines are used to process holes that require high size, shape, and position accuracy.
- Flaw detection: Surface flaw detection is required for screw standard parts and welded parts to ensure the strength of the workpiece.
7.Surface Treatment
After the workpiece is processed, the surface of the workpiece needs to be treated such as ordinary oxidation, pulse anodization, hard oxidation, passivation, sandblasting, painting, etc. to achieve beautiful and anti-oxidation effects.
8.Inspection
The surface-treated workpiece needs to be inspected including various sizes, colors and other key information to ensure that it meets the drawing requirements.
9.Packing And Warehousing
The workpieces that pass the inspection are packaged and stored in the warehouse together with certificates, test reports and other documents.
Factors That Affect CNC Machining Cost
CNC machining cost is influenced by a multitude of factors, and a comprehensive understanding of these elements is essential for businesses aiming to manage expenses effectively.
| Factor | CNC Milling | CNC Turning | Swiss Machining | 5-Axis Machining |
|---|---|---|---|---|
| Material Cost | Material price per unit | Material price per unit | Material price per unit | Material price per unit |
| Labor Cost | Operator hourly rate | Operator hourly rate | Operator hourly rate | Operator hourly rate |
| Machining time | Turning time | Machining time | Machining time | |
| Setup time cost | Setup time cost | Setup time cost | Setup time cost | |
| Machine Cost | Machine hourly rate | Machine hourly rate | Machine hourly rate | Machine hourly rate |
| Tooling Cost | Tooling setup cost | Tooling setup cost | Tooling setup cost | Tooling setup cost |
| Tool replacement cost | Tool replacement cost | Tool replacement cost | Tool replacement cost | |
| Overhead Cost | Overhead rate | Overhead rate | Overhead rate | Overhead rate |
| Complexity Handling | Medium to High | Low to Medium | High | Very High |
| Production Volume | Suitable for batches | Suitable for batches | Suitable for high vol. | Suitable for complex, |
| and large quantities | and moderate volumes | low to moderate volumes | ||
| Versatility | Good | Moderate | Limited | Excellent |
| Precision | High | Moderate to High | Very High | Extremely High |
| Lead Time | Moderate | Moderate | Moderate | Moderate to High |
| Tool Changes | Frequent | Moderate | Frequent | Moderate to Frequent |
| Setup Time | Moderate | Moderate | Moderate | Moderate to High |
| Application Areas | General machining | Shaft-like parts | Small, intricate parts | Complex, 3D geometry |
| Example Industries | Aerospace, Automotive | Automotive, Aerospace | Medical, Watchmaking | Aerospace, Prototyping |
Note: The above chart provides a general comparison and actual costs and considerations may vary based on specific project requirements, material choices, and machining facility capabilities. Always consult with the machining facility for accurate cost estimates and recommendations.
Here’s an exploration of the key factors that significantly impact CNC machining costs:
- Material Selection: The type, grade, and quantity of materials used in CNC machining directly influence costs. High-performance or exotic materials often come with a higher price tag. Efficient material use and minimizing waste through accurate measurements are essential for cost control.
- Machine Time: CNC machines operate on an hourly basis, and the time required for machining impacts costs. Complex designs, intricate details, or frequent tool changes can extend machining time. Optimizing designs and minimizing tool changes contribute to efficient use of machine time and cost savings.
- Labor Costs: Skilled operators are vital for CNC machining. Labor costs involve the wages of the operators, setup time, and any post-machining processes. While skilled operators may command higher wages, their expertise can result in faster machining, ultimately affecting overall costs.
- Tooling and Tool Changes: Tooling costs, including the purchase and replacement of cutting tools, are integral to CNC machining costs. The complexity of the design and the need for frequent tool changes can increase expenses. Choosing efficient tooling strategies and optimizing tool usage contribute to cost-effectiveness.
- Overhead Costs: Overhead costs include facility expenses, utilities, and maintenance. Allocating a portion of these overhead costs to each machining job provides a more accurate reflection of the total expenditure. Factoring in overhead ensures that indirect costs are considered in the CNC machining cost calculation.
- Quality Requirements: Meeting specific quality standards or tolerances may necessitate additional processes and inspections, contributing to costs. Implementing stringent quality control measures, while adding to the overall expense, can prevent rework and ensure customer satisfaction.
- Batch Size and Production Volume: The quantity of units produced in a single batch affects CNC machining costs. Larger production volumes often result in economies of scale, reducing the cost per unit. Deciding on an optimal batch size based on demand and production capabilities is crucial for cost-effectiveness.
- Complexity of Design: Highly intricate and complex designs may require more time and specialized tooling, impacting costs. Simplifying designs without compromising functionality can lead to cost savings in machining time and tooling expenses.
- Technology and Automation: Investing in advanced CNC technologies and automation systems can increase upfront costs but lead to long-term savings. Automation reduces labor costs, minimizes errors, and enhances overall efficiency, making it a strategic choice for cost-conscious businesses.
- Post-Machining Processes: Additional processes such as surface finishing, coating, or assembly contribute to overall costs. Considering these secondary operations in the initial cost estimation is crucial for an accurate representation of the total CNC machining cost.
- Supplier Selection: The choice of CNC machining service provider influences costs. Different suppliers may have varying pricing structures, capabilities, and expertise. Evaluating suppliers based on quality, reliability, and cost competitiveness is essential for effective cost management.
A nuanced understanding of these factors is imperative for businesses aiming to calculate and control CNC machining costs. By strategically managing material selection, machine time, labor, and other key elements, businesses can optimize efficiency and enhance cost-effectiveness in CNC machining processes.
Calculation formula Of CNC Machining Cost
The calculation of CNC machining cost involves considering various factors. Here’s a simplified formula to estimate the CNC machining cost:
Total Cost=Material Cost+Labor Cost+Machine Cost+Tooling Cost+Overhead Cost
Material Cost:
Material Cost=Material Price per Unit×Material Volume or Weight
Labor Cost:
Labor Cost=(Operator Hourly Rate×Machining Time in Hours)+Setup Time Cost
Machine Cost:
Machine Cost=Machine Hourly Rate×Machining Time in Hours
Tooling Cost:
Tooling Cost=Tooling Setup Cost+(Tool Replacement Cost per Tool×Number of Tool Changes)
Overhead Cost:
Overhead Cost=Overhead Rate×Machining Time in Hours
The Overhead Rate is typically calculated by allocating overhead expenses (facility costs, utilities, maintenance) to the production hours.
Add these individual costs together to obtain the total CNC machining cost.
It’s important to note that these are general formulas, and the specific parameters (such as hourly rates, setup costs, etc.) will vary depending on the machining facility, the complexity of the project, and other specific considerations.
For a more detailed and accurate estimate, it’s recommended to work closely with the machining facility, considering all the factors discussed earlier, and incorporating any additional costs or specific requirements related to the project. Advanced ERP (Enterprise Resource Planning) systems are often used in the industry to automate and optimize these calculations based on real-time data.
Example For Calculation CNC Machining Cost
Let’s consider a hypothetical example to illustrate the calculation of CNC machining cost. Please note that the values used here are for illustrative purposes, and actual costs may vary based on specific circumstances, such as location, material costs, and machine rates.
Example:
Assumptions:
- Material: Aluminum Alloy
- Material Price per Unit: $10 per cubic inch
- Material Volume: 50 cubic inches
- Machining Time: 4 hours
- Operator Hourly Rate: $30
- Setup Time: 1 hour
- Machine Hourly Rate: $50
- Tooling Setup Cost: $100
- Tool Replacement Cost per Tool: $20
- Number of Tool Changes: 3
- Overhead Rate: 20% of the machine cost
Calculation:
- Material Cost: \text{Material Cost} = $10 \times 50 \text{ cubic inches} = $500
- Labor Cost: \text{Labor Cost} = ($30 \times 4 \text{ hours}) + $30 \times 1 \text{ hour} = $150
- Machine Cost: \text{Machine Cost} = $50 \times 4 \text{ hours} = $200
- Tooling Cost: \text{Tooling Cost} = $100 + ($20 \times 3) = $160
- Overhead Cost: \text{Overhead Cost} = 0.20 \times \$200 = $40
- Total CNC Machining Cost: \text{Total Cost} = $500 + $150 + $200 + $160 + $40 = $1050
In this example, the total CNC machining cost for producing a part from aluminum alloy, considering material, labor, machine, tooling, and overhead costs, is $1050.
It’s crucial to adapt this example based on the specific details of your project, including material type, machining complexity, and other unique factors. Additionally, working closely with the machining facility and considering real-time data will provide a more accurate estimate.
How to Calculate CNC Milling Cost


Calculating CNC milling cost involves considering various factors related to material, machine, labor, tooling, and overhead expenses. Here is a step-by-step guide on how to calculate CNC milling cost:
1. Material Cost:
Material Cost=Material Price per Unit×Material Volume or Weight
- Determine the cost of the raw material per unit (e.g., per cubic inch or per pound).
- Measure the volume or weight of the material required for the job.
2. Labor Cost:
Labor Cost=(Operator Hourly Rate×Machining Time in Hours)+Setup Time Cost
- Identify the hourly rate of the machine operator.
- Estimate the total machining time required for the job.
- Include any setup time costs associated with preparing the machine for the specific job.
3. Machine Cost:
Machine Cost=Machine Hourly Rate×Machining Time in Hours
- Determine the hourly rate for using the CNC milling machine.
- Calculate the total machining time for the specific job.
4. Tooling Cost:
Tooling Cost=Tooling Setup Cost+(Tool Replacement Cost per Tool×Number of Tool Changes)
- Include the setup cost for tooling.
- Identify the cost per tool replacement.
- Determine the number of tool changes required for the job.
5. Overhead Cost:
Overhead Cost=Overhead Rate×Machining Time in Hours
- Determine the overhead rate, which is usually a percentage of the machine cost.
- Allocate overhead expenses based on the machining time.
6. Total CNC Milling Cost:
Total Cost=Material Cost+Labor Cost+Machine Cost+Tooling Cost+Overhead Cost
- Sum up the individual costs calculated in the previous steps to obtain the total CNC milling cost.
Example:
Let’s use the example mentioned earlier with values for each parameter to calculate the total CNC milling cost. Assuming the values are:
- Material Cost: $500
- Labor Cost: $150
- Machine Cost: $200
- Tooling Cost: $160
- Overhead Cost: $40
\text{Total CNC Milling Cost} = $500 + $150 + $200 + $160 + $40 = $1050
This example demonstrates a simplified calculation, and actual costs may vary based on specific details of the project, machining facility rates, and other factors. It’s essential to work closely with the machining facility to obtain accurate estimates for each parameter.
How to Calculate CNC Turning Cost


Comprehensive cost accounting, how to determine the processing time of a single workpiece, CNC lathe processing fee: the standard algorithm is working hours * each working hour.
You just quote the hourly price based on the required processing time * machine tool, water, electricity, and labor costs are all included.
Equipment depreciation and mechanical processing quotation are relatively complex issues. Workers’ wages are about this. Tool loss fee.
Taxes and other items can be added up. The main factors are as follows: First, it is the calculation of the processing batch size. You can estimate how much is appropriate. Even the unit price is based on working hours, and it also depends on the complexity of the product. Market demand relationship.
The Formula For Calculating Taper Of CNC Turning?
The names and codes of each part of the cone, D-big head diameter, b-small head diameter, L-full length of the workpiece, a-taper angle, 2a-taper angle, K-taper,
l-cone length, M-degree.
Calculation formulas for each part of a cone.
M (degree)=tga (=tg bevel angle),
=D – d / 2 l (=large head diameter – small head diameter / 2 x cone length),
=K/2(=taper/2).
K (taper)=2tga (=2 x tg bevel angle)
=D – d / l (large head diameter – small head diameter / cone length).
D (big head diameter) = b + 2ltga (= small head diameter + 2 x cone length x tg angle),
=d + Kl (= small head diameter + taper x cone length),
=d + 2lM (= small head diameter + 2 x cone length x slope).
d (small head diameter) = D – 2ltga (= large head diameter – 2 x cone length x tg angle),
=D – Kl (= big head diameter – taper x cone length),
=D – 2lM(=big head diameter – 2 x cone length x slope).
When the length of the workpiece cone is short and the bevel angle a is large, the angle of the small tool holder can be turned for turning.
Calculation formula for the rotation angle β of the small tool holder during turning (approximate).
β(degree)=28.7°x K(taper),
=28.7°x D – d / l (large head diameter – small head diameter / cone length). The approximate calculation formula is only applicable when a (angle) is below 6°, otherwise the calculation result error will be large.
Factors Of Calculating CNC Turning Cost
Calculating CNC turning cost involves assessing various factors related to material, machine, labor, tooling, and overhead expenses. Here is a step-by-step guide on how to calculate CNC turning cost:
1. Material Cost:
Material Cost=Material Price per Unit×Material Volume or Weight
- Determine the cost of the raw material per unit (e.g., per cubic inch or per pound).
- Measure the volume or weight of the material required for the turning job.
2. Labor Cost:
Labor Cost=(Operator Hourly Rate×Turning Time in Hours)+Setup Time Cost
- Identify the hourly rate of the machine operator.
- Estimate the total turning time required for the job.
- Include any setup time costs associated with preparing the machine for the specific turning job.
3. Machine Cost:
Machine Cost=Machine Hourly Rate×Turning Time in Hours
- Determine the hourly rate for using the CNC turning machine.
- Calculate the total turning time for the specific job.
4. Tooling Cost:
Tooling Cost=Tooling Setup Cost+(Tool Replacement Cost per Tool×Number of Tool Changes)
- Include the setup cost for tooling.
- Identify the cost per tool replacement.
- Determine the number of tool changes required for the turning job.
5. Overhead Cost:
Overhead Cost=Overhead Rate×Turning Time in Hours
- Determine the overhead rate, usually a percentage of the machine cost.
- Allocate overhead expenses based on the turning time.
6. Total CNC Turning Cost:
Total Cost=Material Cost+Labor Cost+Machine Cost+Tooling Cost+Overhead Cost
- Sum up the individual costs calculated in the previous steps to obtain the total CNC turning cost.
Example:
Let’s use an example with values for each parameter:
- Material Cost: $300
- Labor Cost: $120
- Machine Cost: $150
- Tooling Cost: $80
- Overhead Cost: $30
\text{Total CNC Turning Cost} = $300 + $120 + $150 + $80 + $30 = $680
This example provides a simplified calculation, and actual costs may vary based on specific project details, machining facility rates, and other considerations. Working closely with the machining facility is crucial for obtaining accurate estimates for each parameter.
How to Calculate Swiss Machining Cost

Calculating Swiss machining cost involves considering various factors related to material, machine, labor, tooling, and overhead expenses. Swiss machining, often used for high-precision and complex components, has its unique set of parameters. Here’s a step-by-step guide on how to calculate Swiss machining cost:
1. Material Cost:
Material Cost=Material Price per Unit×Material Volume or Weight
- Determine the cost of the raw material per unit (e.g., per cubic inch or per pound).
- Measure the volume or weight of the material required for the Swiss machining job.
2. Labor Cost:
Labor Cost=(Operator Hourly Rate×Machining Time in Hours)+Setup Time Cost
- Identify the hourly rate of the machine operator.
- Estimate the total machining time required for the Swiss machining job.
- Include any setup time costs associated with preparing the machine for the specific job.
3. Machine Cost:
Machine Cost=Machine Hourly Rate×Machining Time in Hours
- Determine the hourly rate for using the Swiss machining center.
- Calculate the total machining time for the specific Swiss machining job.
4. Tooling Cost:
Tooling Cost=Tooling Setup Cost+(Tool Replacement Cost per Tool×Number of Tool Changes)
- Include the setup cost for tooling.
- Identify the cost per tool replacement.
- Determine the number of tool changes required for the Swiss machining job.
5. Overhead Cost:
Overhead Cost=Overhead Rate×Machining Time in Hours
- Determine the overhead rate, usually a percentage of the machine cost.
- Allocate overhead expenses based on the Swiss machining time.
6. Total Swiss Machining Cost:
Total Cost=Material Cost+Labor Cost+Machine Cost+Tooling Cost+Overhead Cost
- Sum up the individual costs calculated in the previous steps to obtain the total Swiss machining cost.
Example:
Let’s use an example with values for each parameter:
- Material Cost: $400
- Labor Cost: $200
- Machine Cost: $250
- Tooling Cost: $120
- Overhead Cost: $50
\text{Total Swiss Machining Cost} = $400 + $200 + $250 + $120 + $50 = $1020
This example provides a simplified calculation, and actual costs may vary based on specific project details, machining facility rates, and other considerations. Collaborating closely with the machining facility is essential for obtaining accurate estimates for each parameter in Swiss machining.
How to Calculate 5 Axis CNC Machining Cost
Calculating the cost of 5-axis CNC machining involves considering various factors related to material, machine, labor, tooling, and overhead expenses. Here’s a step-by-step guide on how to calculate 5-axis CNC machining cost:
1. Material Cost:
Material Cost=Material Price per Unit×Material Volume or Weight
- Determine the cost of the raw material per unit (e.g., per cubic inch or per pound).
- Measure the volume or weight of the material required for the 5-axis CNC machining job.
2. Labor Cost:
Labor Cost=(Operator Hourly Rate×Machining Time in Hours)+Setup Time Cost
- Identify the hourly rate of the machine operator.
- Estimate the total machining time required for the 5-axis CNC machining job.
- Include any setup time costs associated with preparing the machine for the specific job.
3. Machine Cost:
Machine Cost=Machine Hourly Rate×Machining Time in Hours
- Determine the hourly rate for using the 5-axis CNC machine.
- Calculate the total machining time for the specific 5-axis CNC machining job.
4. Tooling Cost:
Tooling Cost=Tooling Setup Cost+(Tool Replacement Cost per Tool×Number of Tool Changes)
- Include the setup cost for tooling.
- Identify the cost per tool replacement.
- Determine the number of tool changes required for the 5-axis CNC machining job.
5. Overhead Cost:
Overhead Cost=Overhead Rate×Machining Time in Hours
- Determine the overhead rate, usually a percentage of the machine cost.
- Allocate overhead expenses based on the 5-axis CNC machining time.
6. Total 5-Axis CNC Machining Cost:
Total Cost=Material Cost+Labor Cost+Machine Cost+Tooling Cost+Overhead Cost
- Sum up the individual costs calculated in the previous steps to obtain the total 5-axis CNC machining cost.
Example:
Let’s use an example with values for each parameter:
- Material Cost: $600
- Labor Cost: $300
- Machine Cost: $400
- Tooling Cost: $180
- Overhead Cost: $60
\text{Total 5-Axis CNC Machining Cost} = $600 + $300 + $400 + $180 + $60 = $1540
This example provides a simplified calculation, and actual costs may vary based on specific project details, machining facility rates, and other considerations. Working closely with the machining facility is essential for obtaining accurate estimates for each parameter in 5-axis CNC machining.
10 Strategic Tips for Cost-Effective CNC Machined Parts
CNC machining has revolutionized the manufacturing industry, offering precision and efficiency. However, optimizing the cost of CNC machined parts requires a thoughtful approach in the design and manufacturing process. In this comprehensive article, we delve into 10 strategic tips to reduce the cost of CNC machined parts, ranging from material selection to design considerations.
Material Selection
Material selection is a pivotal factor in determining the cost, functionality, and manufacturability of CNC machined parts. The careful consideration of materials can significantly impact the overall cost-effectiveness of the production process.
- Balancing Cost and Functionality:When selecting materials for CNC machined parts, it’s crucial to strike a balance between cost and functionality. While exotic materials may offer superior properties, they often come with a hefty price tag. Assess the specific requirements of your project and choose materials that meet functional needs without unnecessary expenses. Common choices like aluminum, mild steel, and certain plastics provide a cost-effective balance for many applications.
- Consideration of Machinability:The ease with which a material can be machined directly impacts production costs. Some materials, such as certain alloys or hardened steels, pose challenges due to their hardness and abrasiveness. Opt for materials with good machinability to streamline the CNC machining process, reducing tool wear and enhancing overall efficiency.
- Material Alternatives and Trade-offs:Explore alternative materials that may offer cost savings without compromising performance. In some cases, a material with slightly different properties may be more economical while still meeting the project’s requirements. Engage in a thorough evaluation of material alternatives, considering factors like strength, corrosion resistance, and thermal conductivity.
- Compatibility with CNC Machines:The compatibility of the chosen material with CNC machines is crucial for achieving optimal results. Some materials may generate excessive heat or pose challenges during machining, affecting both the quality of the finished part and the lifespan of the cutting tools. Verify that your chosen material aligns with the capabilities of the CNC machines in use, ensuring a smoother and more cost-effective manufacturing process.
- Bulk Material Purchases:Ordering materials in bulk can yield significant cost savings. Negotiate with suppliers to secure favorable terms for larger quantities, taking advantage of economies of scale. However, it’s essential to strike a balance and avoid excessive stockpiling, considering storage costs and the shelf life of certain materials.
- Adaptability to Post-Machining Processes:Consider the adaptability of the chosen material to post-machining processes, such as finishing or coating. Some materials may require additional treatments to achieve the desired surface finish or improve specific properties. Assessing the compatibility of the material with these processes at the selection stage can help avoid unexpected costs during the later stages of production.
- Eco-Friendly Material Choices:With an increasing focus on sustainability, consider the environmental impact of your material choices. Some materials may be recyclable or sourced sustainably, aligning with eco-friendly practices. While the initial cost may not be the sole consideration, the long-term benefits of environmentally conscious choices can contribute to the overall cost-effectiveness of the project.
- Materials for Prototyping vs. Production:In the early stages of product development, consider using more cost-effective materials for prototypes before transitioning to higher-cost materials for production. This approach allows for iterative design changes without incurring excessive expenses during the prototyping phase.
The thoughtful selection of materials is a cornerstone of cost-effective CNC machining. By carefully evaluating the trade-offs between cost, functionality, and machinability, manufacturers can optimize their material choices to meet both budgetary constraints and performance expectations. Engaging in a collaborative dialogue with material suppliers and CNC machining experts can provide valuable insights for making informed decisions in the material selection process.
Avoid Multiple Finishes
The finishing processes applied to CNC machined parts play a significant role in determining the final appearance, functionality, and cost of the components. Streamlining these finishing steps can lead to substantial cost savings without compromising the quality or performance of the machined parts.
- Understanding the Impact of Finishing:Finishing processes, such as polishing, anodizing, or coating, add an extra layer of complexity and cost to CNC machined parts. While these processes enhance aesthetics and provide additional functionalities, it’s crucial to weigh the necessity of each finish against the project’s requirements. A pragmatic approach to finishing can lead to significant cost reductions.
- Consolidating Finishing Requirements:Rather than opting for an array of different finishes, consider consolidating finishing requirements to minimize the number of steps in the machining process. This not only simplifies the production workflow but also reduces labor costs and the overall time required for completion. Prioritize essential finishes that align with both functional and aesthetic needs.
- Functional Finishes Over Decorative Finishes:Focus on functional finishes that directly contribute to the performance and longevity of the CNC machined parts. While decorative finishes may enhance the visual appeal, they often come with additional costs. Assess the functional requirements of the part and prioritize finishes that improve durability, corrosion resistance, or other critical performance factors.
- Selective Finishing for Aesthetic Appeal:If aesthetics are a primary concern, consider selective finishing for specific areas of the part rather than applying finishes uniformly. This approach allows for cost savings by concentrating finishing efforts on visible surfaces, reducing the overall surface area that requires additional treatments.
- Utilizing In-House Finishing Capabilities:If feasible, leverage in-house finishing capabilities to control costs and streamline the manufacturing process. In-house finishing not only provides greater flexibility but also eliminates the need for outsourcing, reducing lead times and potential delays. Evaluate the feasibility of establishing or enhancing in-house finishing capabilities to enhance cost-effectiveness.
- Consideration of Alternative Surface Treatments:Explore alternative surface treatments that can achieve similar results at a lower cost. For instance, textured finishes or mechanical treatments may provide the desired appearance and feel without the expense associated with more complex finishing processes. Engage in a thorough evaluation of cost-effective alternatives without compromising on the desired outcome.
- Communication with Finishing Suppliers:Maintain open communication with finishing suppliers to negotiate favorable terms and explore cost-saving opportunities. Suppliers may offer discounts for bulk finishing orders or provide insights into optimizing finishing processes to reduce costs. Establishing a collaborative relationship with finishing suppliers can be mutually beneficial in achieving cost-effectiveness.
- Post-Machining Finishing vs. Pre-Machining Surface Quality:Strive to achieve a high-quality surface finish during the machining process itself to minimize the reliance on post-machining finishing. By optimizing machining parameters and tooling, it’s possible to reduce the need for extensive post-machining treatments, thereby lowering overall costs.
- Continuous Process Improvement:Embrace a culture of continuous improvement to refine and optimize finishing processes over time. Regularly assess the effectiveness of current finishing methods and explore innovative approaches or technologies that may offer cost savings without compromising quality.
- Educating Design Teams:Educate design teams about the cost implications of various finishes to foster a collaborative approach to cost-effective design. By aligning design decisions with realistic finishing expectations, it becomes possible to create parts that meet both aesthetic and budgetary requirements.
Minimizing the number of finishing processes is a key strategy for achieving cost-effective CNC machined parts. By carefully evaluating the necessity of each finish, consolidating requirements, and exploring alternative treatments, manufacturers can strike a balance between achieving the desired functionality and appearance while optimizing costs in the CNC machining process.
Order in Bulk
Ordering materials and components in bulk is a strategic approach that can significantly impact the cost-effectiveness of CNC machining projects. This practice, known for its ability to capitalize on economies of scale, enables manufacturers to achieve substantial savings in production costs.
- Economies of Scale:Bulk ordering leverages the concept of economies of scale, where the unit cost decreases as the volume of production increases. This principle applies not only to raw materials but also to machined components and other essential elements of the CNC machining process. By ordering in larger quantities, manufacturers can distribute fixed costs across a greater number of units, resulting in lower per-unit costs.
- Negotiating Favorable Terms:Establishing strong relationships with suppliers is crucial for negotiating favorable terms on bulk orders. Communication and collaboration with suppliers can lead to discounts, reduced material costs, and more flexible payment arrangements. Regularly reviewing and renegotiating terms ensures that manufacturers are consistently benefiting from cost advantages associated with bulk ordering.
- Strategic Inventory Management:Bulk ordering necessitates effective inventory management strategies to avoid issues such as overstocking or underutilization of resources. Implement just-in-time inventory practices to strike a balance between maintaining an adequate supply of materials and avoiding excess inventory costs. This strategic approach ensures that bulk orders are aligned with actual production needs, optimizing cost efficiency.
- Forecasting Demand Accurately:Accurate demand forecasting is paramount when considering bulk orders. Utilize historical data, market trends, and customer feedback to anticipate future demand for CNC machined parts. Collaborate closely with sales and marketing teams to obtain comprehensive insights into market dynamics, enabling more precise predictions of material requirements.
- Lead Time Considerations:Assess lead times associated with bulk orders to ensure timely availability of materials. While ordering in larger quantities offers cost advantages, it’s essential to balance this with the need for timely production. Streamlining the supply chain and working closely with suppliers can mitigate potential delays and ensure that bulk orders align with production schedules.
- Flexible Manufacturing Processes:Bulk ordering necessitates a degree of flexibility in manufacturing processes. Ensure that the production facility can seamlessly adapt to variations in order sizes and respond to changes in demand. A flexible manufacturing setup enhances the efficiency of handling bulk orders, minimizing disruptions and optimizing the overall cost structure.
- Consistency in Material Quality:While emphasizing cost savings through bulk ordering, it’s crucial to maintain consistency in material quality. Establish clear quality standards with suppliers and conduct periodic quality assessments to ensure that bulk orders meet the required specifications. Consistent material quality is essential for achieving cost-effectiveness without compromising the integrity of CNC machined parts.
- Risk Mitigation Strategies:Implement risk mitigation strategies to address potential challenges associated with bulk ordering. Diversify suppliers to reduce dependency on a single source, and maintain contingency plans for unforeseen disruptions in the supply chain. Proactive risk management ensures that the benefits of bulk ordering are not overshadowed by potential complications.
- Collaboration with Suppliers:Foster open communication and collaboration with suppliers to enhance the effectiveness of bulk ordering. Share production forecasts, upcoming projects, and other relevant information to allow suppliers to better align their production capabilities with the manufacturer’s needs. A collaborative partnership contributes to the success of bulk ordering initiatives.
- Continuous Improvement:Embrace a culture of continuous improvement in the bulk ordering process. Regularly evaluate the performance of suppliers, assess the impact of bulk orders on overall production costs, and explore opportunities for further optimization. A commitment to ongoing improvement ensures that bulk ordering remains a dynamic and effective cost-saving strategy.
Bulk ordering is a powerful strategy for optimizing cost efficiency in CNC machining. By capitalizing on economies of scale, negotiating favorable terms, and implementing robust inventory management practices, manufacturers can achieve substantial cost savings while maintaining the quality and integrity of CNC machined parts. The strategic application of bulk ordering principles contributes to a lean and efficient manufacturing process, fostering long-term success in the competitive landscape.
Avoid Excessively Thin Walls
The design phase of CNC machined parts plays a crucial role in determining the efficiency and cost-effectiveness of the manufacturing process. One key design consideration that significantly impacts machining costs is the thickness of walls in the part. Excessively thin walls pose challenges during machining, affecting both the quality of the final product and production efficiency.
- Challenges of Excessively Thin Walls:Excessively thin walls in CNC machined parts present a myriad of challenges. These challenges include increased risk of deflection, vibration, and tool breakage during machining. Thin walls may compromise the structural integrity of the part, leading to dimensional inaccuracies and reduced overall quality. Moreover, the intricate nature of machining thin features demands slower cutting speeds, impacting efficiency and increasing production time.
- Balance Design Aesthetics with Functionality:While thin walls may seem aesthetically pleasing in design, it’s essential to strike a balance between visual appeal and functional manufacturability. Evaluate the structural requirements of the part and consider alternative design approaches that maintain both the intended aesthetics and the feasibility of CNC machining.
- Optimal Wall Thickness Guidelines:Establish optimal wall thickness guidelines based on the material properties and machining capabilities. Consult with CNC machining experts or refer to machining guidelines provided by material suppliers to determine the minimum acceptable wall thickness for a given material. Adhering to these guidelines ensures that parts can be machined efficiently without compromising structural integrity.
- Consider Alternative Geometries:Explore alternative geometric designs that achieve the desired visual effect without relying on excessively thin walls. Features such as ribs, gussets, or fillets can add visual interest to the part while providing the necessary structural support. By redistributing material strategically, designers can mitigate the challenges associated with thin walls.
- Avoid Extreme Aspect Ratios:Extreme aspect ratios, where the height of a thin wall is much greater than its width, exacerbate machining difficulties. Strive to maintain balanced aspect ratios to improve stability during machining. This approach minimizes the risk of deflection and vibration, allowing for more efficient material removal.
- Utilize Support Structures:When thin walls are unavoidable, consider incorporating support structures to enhance stability during machining. These support structures can be strategically placed to reinforce thin sections, preventing deformation and ensuring dimensional accuracy. However, it’s crucial to balance the use of support structures to avoid overcomplicating the design.
- Collaborate with Machinists:Foster collaboration between designers and CNC machinists to leverage their expertise in optimizing part designs for manufacturability. Machinists can provide valuable insights into the challenges associated with thin walls and suggest design modifications that enhance machinability without compromising the intended aesthetics.
- Material Selection Impact:The choice of material significantly influences the manufacturability of thin-walled parts. Some materials may be more prone to deflection and tool wear during machining. Consider selecting materials with good machinability and consult with material suppliers to understand the specific challenges and recommendations for machining thin-walled features.
- Prototyping and Testing:Prioritize prototyping and testing phases to assess the manufacturability of designs with thin walls. Prototyping allows for practical evaluation of the machining process, revealing potential challenges and areas for improvement. Iterative testing enables designers to refine their approach and achieve the right balance between aesthetics and manufacturability.
- Documentation and Guidelines:Develop comprehensive documentation and guidelines for designers to reference during the part creation process. Clearly articulate the acceptable limits for wall thickness based on material and machining considerations. Establishing a standardized set of guidelines ensures consistency in design practices and facilitates efficient communication between design and manufacturing teams.
Avoiding excessively thin walls is paramount for optimizing CNC machining costs. By striking a balance between design aesthetics and manufacturability, considering alternative geometries, and collaborating closely with machinists, designers can create parts that are not only visually appealing but also efficient to machine. Implementing these strategies enhances the overall cost-effectiveness of CNC machining processes, leading to high-quality and economically produced components.
Round Internal Edges with Sufficient Radius
The internal geometry of CNC machined parts plays a pivotal role in both the manufacturability and overall quality of the final product. One critical design consideration is the rounding of internal edges, particularly ensuring that the radius is sufficient for machining processes.
- Impact on Toolpath Efficiency:Rounding internal edges with a sufficient radius contributes to smoother toolpath transitions during CNC machining. Sharp corners or tight radii can impede the movement of cutting tools, leading to increased tool wear and potentially compromising the accuracy of the machined features. A well-rounded internal edge allows for more fluid tool movement, improving overall machining efficiency.
- Toolpath Optimization for Tool Longevity:The nature of CNC machining involves the use of cutting tools that have specific limitations, including their ability to navigate sharp corners. Rounding internal edges reduces the stress on cutting tools, prolonging their lifespan and minimizing the need for frequent tool changes. This optimization not only enhances efficiency but also reduces tooling costs over the course of production.
- Reduction of Machining Vibrations:Sharp internal corners can induce vibrations during machining, negatively impacting both the quality of the finished part and the longevity of cutting tools. By introducing a sufficient radius to internal edges, designers can mitigate these vibrations, leading to a more stable machining process. This reduction in vibrations enhances the precision of the machined features and contributes to overall part quality.
- Improved Surface Finish:Rounded internal edges facilitate a smoother material removal process, resulting in an improved surface finish on the machined part. This is particularly crucial for applications where surface aesthetics are a priority. Achieving a desirable surface finish during the machining stage minimizes the need for additional post-processing steps, reducing both time and costs.
- Mitigation of Stress Concentrations:Sharp internal corners can create stress concentrations in the material, potentially leading to structural weaknesses or part failure. Rounding internal edges distributes stresses more evenly across the part, reducing the likelihood of stress-related issues. This design consideration is particularly relevant in applications where the structural integrity of the machined part is critical.
- Enhanced Chip Evacuation:Efficient chip evacuation is vital for maintaining the effectiveness of the machining process. Sharp internal corners can impede the smooth evacuation of chips, leading to chip recutting and poor machining outcomes. Rounded internal edges facilitate the proper flow of chips, reducing the risk of chip entanglement and ensuring a more efficient and reliable machining operation.
- Adherence to Machining Guidelines:Various machining guidelines recommend specific minimum radii for internal edges based on the chosen material and machining process. Adhering to these guidelines ensures that the part is designed with manufacturability in mind, reducing the likelihood of issues such as tool breakage, excessive tool wear, or deviations from the intended tolerances.
- Ease of Programming and Setup:Rounded internal edges simplify the programming and setup processes for CNC machining. CNC programmers can more easily generate toolpaths without the complexity associated with sharp corners. Additionally, the setup of cutting tools becomes more straightforward, contributing to time savings during the preparation phase of machining.
- Consideration for Material Properties:The choice of material influences the effectiveness of rounding internal edges. Some materials may require larger radii to accommodate the specific characteristics of the material during machining. Designers should collaborate with CNC machining experts and material suppliers to determine optimal radii based on the selected material.
- Validation through Prototyping:Prioritize the validation of rounded internal edges through prototyping and testing phases. Prototyping allows designers to assess the effectiveness of the chosen radii in real-world machining scenarios. Iterative testing enables refinements to the design, ensuring that the internal edges are both rounded and have a sufficient radius for optimal CNC machining.
Rounding internal edges with a sufficient radius is a critical aspect of CNC machining design. This consideration impacts toolpath efficiency, tool longevity, surface finish, and overall part quality. By prioritizing rounded internal edges, designers can streamline the machining process, reduce costs associated with tool wear, and ensure the production of high-quality CNC machined parts.
Don’t Design Deep Cavities
The design phase of CNC machined parts significantly influences the feasibility, efficiency, and cost-effectiveness of the manufacturing process. One crucial design consideration is the depth of cavities within the part.
- Tool Reach and Stability:Deep cavities pose challenges related to tool reach and stability during CNC machining. The length of cutting tools is limited, and excessively deep features may require specialized tools or extended tool setups, leading to increased costs and potential machining complications. Designers should consider the limitations of cutting tools and avoid unnecessarily deep cavities to ensure tool stability and machining efficiency.
- Tool Deflection and Vibrations:Deep cavities increase the risk of tool deflection and vibrations during machining. As cutting tools penetrate deeper into a part, they are subjected to higher forces, potentially causing deflection and compromising the precision of the machined features. By minimizing cavity depth, designers can reduce the impact of these forces, resulting in improved tool stability and dimensional accuracy.
- Machining Time and Costs:Deep cavities typically require longer machining times due to the incremental nature of material removal. Prolonged machining times contribute to higher production costs, increased wear on cutting tools, and greater energy consumption. Designing parts with shallower features helps optimize machining efficiency, leading to cost savings and shorter production cycles.
- Chip Evacuation Challenges:Efficient chip evacuation is essential for maintaining optimal machining conditions. Deep cavities can impede the smooth evacuation of chips, leading to chip recutting, tool jamming, and potential machining defects. Designers should prioritize features that allow for effective chip evacuation, minimizing disruptions and ensuring a more reliable machining process.
- Coolant Distribution Issues:Deep cavities may pose challenges in distributing coolant effectively throughout the machining process. Insufficient coolant flow in deep features can result in poor heat dissipation, leading to thermal issues and reduced tool life. By avoiding excessively deep cavities, designers promote better coolant distribution, contributing to enhanced tool performance and longevity.
- Material Removal Considerations:The depth of cavities directly impacts the amount of material that needs to be removed during machining. Deep features require multiple passes, increasing material removal time and tool wear. Designers should optimize part geometry to minimize the volume of material that needs to be machined, aligning with cost-effective production practices.
- Tool Changes and Setup Complexity:Machining deep cavities often necessitates tool changes and complex setups to reach different depths. These changes introduce additional downtime and increase the likelihood of errors during setup. Simplifying the machining process by avoiding excessively deep cavities reduces the complexity of tool changes and setup, streamlining production and minimizing disruptions.
- Structural Integrity and Distortion:Deep cavities may compromise the structural integrity of the machined part, leading to distortion or warping. Material removal from deep features can result in uneven stresses within the part, affecting dimensional stability. Designers should assess the structural implications of deep cavities and explore alternative design approaches to mitigate potential distortions.
- Consideration of Material Properties:The choice of material influences the feasibility of machining deep features. Some materials may be more challenging to machine at significant depths due to factors like hardness or heat resistance. Collaboration between designers and material experts is crucial to selecting materials that align with the intended design while considering machining constraints.
- Prototyping and Testing:Prioritize the validation of part designs through prototyping and testing, particularly when dealing with features like deep cavities. Prototyping allows designers to assess the manufacturability of the part, identify potential challenges, and refine the design iteratively. Testing the prototype ensures that the chosen design strikes the right balance between design intent and manufacturability.
Avoiding excessively deep cavities in CNC machined parts is a key strategy for minimizing costs and optimizing manufacturability. By considering tool limitations, mitigating machining challenges, and prioritizing efficient material removal, designers can contribute to a more streamlined and cost-effective CNC machining process. Balancing design intent with practical manufacturability ensures the production of high-quality parts while meeting cost-efficiency goals.
Limit the Depth of Threads
In the design phase of CNC machined parts, the incorporation of threads is a common requirement for various applications. However, the depth of threads has implications for both the machining process and overall production costs.
- Machining Challenges with Deep Threads:Deep threads present machining challenges due to the increased tool engagement and extended machining times. The length of thread features impacts the efficiency of material removal, leading to longer cycle times and elevated machining costs. Designers should be mindful of these challenges and seek to optimize thread depth for efficient manufacturing.
- Tool Wear and Breakage Risks:Extended threads amplify the risk of tool wear and breakage. Deeper threads subject cutting tools to higher forces and increased wear, necessitating careful consideration of tool selection and the associated costs. Limiting the depth of threads helps mitigate these risks, promoting longer tool life and reducing the frequency of tool changes.
- Optimizing Machining Speeds:Shallow threads enable higher machining speeds, contributing to overall production efficiency. Reduced thread depth allows for faster tool traversal, minimizing cycle times and enhancing the throughput of CNC machining processes. This optimization leads to cost savings by reducing the time required to manufacture threaded features.
- Material Removal Considerations:Deep threads require more extensive material removal, affecting both machining times and costs. Designers should strategically limit thread depth to optimize material removal efficiency. By aligning thread depth with functional requirements and minimizing excess material, designers contribute to a more cost-effective machining process.
- Surface Finish and Tolerance Control:Achieving high-quality threads involves maintaining control over surface finish and tolerances. Excessively deep threads may compromise the ability to achieve desired surface finishes and tight tolerances. Limiting thread depth allows for better control over these critical aspects, ensuring that the machined threads meet specified quality standards.
- Reduced Chip Evacuation Challenges:Threads with excessive depth can impede the effective evacuation of chips, leading to potential issues such as chip recutting and tool jamming. Limiting thread depth facilitates improved chip evacuation, reducing the likelihood of disruptions during the machining process and promoting a smoother production workflow.
- Tool Accessibility and Setup Simplification:Shallow threads enhance tool accessibility and simplify the machining setup. Accessibility becomes crucial when dealing with complex part geometries, and limiting thread depth allows for easier tool positioning and setup adjustments. This simplification contributes to reduced setup times and increased operational efficiency.
- Material Integrity and Structural Considerations:The depth of threads can influence the integrity and structural stability of machined parts. Excessively deep threads may compromise the overall strength and durability of the component. Designers should carefully balance thread depth with structural considerations to ensure that the final part meets both functional and structural requirements.
- Strategic Use of Inserts and Taps:Consider utilizing inserts or taps for achieving deeper threads when necessary. Inserts and taps are specialized tools designed for threading operations and can offer advantages in terms of efficiency and precision. Strategic use of these tools allows designers to achieve specific thread depths without sacrificing cost-effectiveness.
- Prototyping and Iterative Design:Emphasize prototyping and iterative design processes to validate thread designs before full-scale production. Prototyping allows designers to assess the manufacturability of threads, identify potential challenges, and refine the design iteratively. Iterative testing ensures that the chosen thread depth strikes the right balance between functional requirements and cost-effectiveness.
Limiting the depth of threads in CNC machined parts is a key consideration for achieving optimal efficiency and cost-effectiveness. By addressing machining challenges, minimizing tool wear risks, and optimizing material removal, designers contribute to a streamlined production process that meets functional requirements while managing costs effectively. Balancing thread depth with other design considerations ensures the successful integration of threaded features in CNC machined components.
Specify Tolerances Only When Necessary, Avoiding Tight Tolerances
Precision in CNC machining is crucial for meeting functional requirements, but excessively tight tolerances can significantly impact manufacturing costs.
- Cost Implications of Tight Tolerances:Excessively tight tolerances demand meticulous machining processes, specialized tools, and careful quality control measures. These requirements contribute to increased production costs, longer machining times, and higher tooling expenses. Designers should be cognizant of the cost implications associated with tight tolerances and evaluate whether such precision is truly necessary for the intended application.
- Functional Requirements Analysis:Begin the design process by thoroughly analyzing the functional requirements of the part. Identify critical dimensions and features that directly influence the performance and functionality of the component. Prioritize tight tolerances only for these critical aspects, allowing for more relaxed tolerances in non-critical areas.
- Collaboration with Machinists and Quality Control:Foster collaboration between designers, machinists, and quality control teams to determine appropriate tolerances for each feature. Machinists can provide insights into the achievable precision based on the chosen machining processes, while quality control experts can guide the selection of tolerances that ensure functionality without excessive costs.
- Material Considerations:Different materials exhibit varying responses to machining processes, thermal expansion, and other factors that affect tolerances. Consider the material properties and their impact on achievable tolerances when specifying dimensions. Optimize tolerances based on the material’s characteristics to strike a balance between precision and cost-effectiveness.
- Statistical Process Control (SPC):Implement Statistical Process Control techniques to monitor and control manufacturing processes. SPC allows for real-time assessment of variability in machining processes, enabling designers to adjust tolerances based on the actual performance of the manufacturing system. This dynamic approach ensures precision without imposing unnecessary constraints.
- Critical vs. Non-Critical Dimensions:Distinguish between critical and non-critical dimensions in the design. Critical dimensions, directly affecting functionality, may warrant tighter tolerances. Non-critical dimensions, which do not significantly impact performance, can have more lenient tolerances, contributing to cost savings without compromising overall quality.
- Industry Standards and Norms:Refer to industry standards and norms to guide tolerance specifications. Many industries have established standards that provide recommended tolerances for common features. Adhering to these standards ensures compatibility with established practices, streamlining manufacturing processes and reducing the need for custom tooling or processes.
- Assembly Considerations:Evaluate how the part fits into the overall assembly and consider the interaction between components. Sometimes, tolerances can be relaxed without compromising the functionality of the final assembly. By optimizing tolerances at the assembly level, designers can achieve precision where it matters most while maintaining cost-effectiveness.
- Feedback Loop with Prototyping:Utilize prototyping as a feedback loop to refine tolerance specifications. Prototyping allows designers to assess the actual performance of machined parts and make informed adjustments to tolerances. This iterative approach ensures that specified tolerances align with both design intent and practical manufacturing considerations.
- Documentation and Communication:Clearly document and communicate tolerance specifications to all stakeholders involved in the manufacturing process. Transparent communication between design, machining, and quality control teams is crucial for aligning expectations, avoiding misunderstandings, and optimizing the overall efficiency of CNC machining processes.
Specifying tolerances only when necessary and avoiding excessively tight tolerances is a strategic approach to balancing precision and cost-effectiveness in CNC machining. By focusing on critical dimensions, collaborating with relevant stakeholders, and leveraging industry standards, designers can optimize tolerance specifications to meet functional requirements while minimizing production costs. This balanced approach contributes to the efficient and economical production of high-quality CNC machined parts.
Use Standard Hole Sizes
The design of CNC machined parts plays a pivotal role in determining the manufacturability and overall cost-effectiveness of the production process. Incorporating standard hole sizes in designs is a pragmatic strategy to streamline machining operations and reduce costs.
- Industry Standardization Benefits:Utilizing standard hole sizes aligns with industry-wide standardization efforts. Industry standards specify commonly accepted hole sizes based on practical considerations, which can lead to cost savings through the use of readily available tools, reducing the need for custom tooling and associated expenses.
- Tooling Availability and Costs:Standard hole sizes correspond to commonly available drill bits and tooling, which are more cost-effective due to their widespread use. Designers should leverage the availability of standard tools to optimize machining costs and reduce lead times, as sourcing standard tools is generally quicker and more economical than custom or specialized tooling.
- Minimization of Tool Changes:Standardizing hole sizes minimizes the need for frequent tool changes during machining. This reduction in tool changes enhances operational efficiency, shortens machining times, and contributes to cost savings by avoiding downtime associated with tool adjustments and replacements.
- Compatibility with CNC Machines:CNC machines are often equipped with tool libraries that accommodate standard tool sizes. By designing parts with standard hole sizes, designers enhance compatibility with the available tooling in CNC machine tool libraries, promoting seamless integration into the machining process and minimizing the risk of tool-related issues.
- Optimized Material Removal:Standard hole sizes allow for optimized material removal rates during machining. Using common hole dimensions enables more efficient chip evacuation, reducing the likelihood of chip recutting and tool wear. This optimization contributes to faster material removal and overall cost savings.
- Flexibility in Toolpath Strategies:Standard hole sizes provide flexibility in toolpath strategies. CNC machining software is often optimized for common hole dimensions, allowing designers to leverage efficient toolpath strategies that are well-suited for standard sizes. This adaptability enhances the overall efficiency of the machining process.
- Reduction of Machining Complexity:Standardizing hole sizes simplifies the machining process and reduces overall complexity. Complex or non-standard hole dimensions may require additional tool changes, custom programming, or specialized machining techniques, all of which contribute to increased costs. Simplifying hole dimensions streamlines the machining workflow and promotes cost-effective production.
- Conformance to Design Standards:Incorporating standard hole sizes aligns with design standards and best practices. Design standards often recommend or specify common hole dimensions for specific applications. Adhering to these standards ensures that designs meet industry-accepted practices, facilitating smoother collaboration between design and manufacturing teams.
- Prototyping and Testing Efficiency:Standard hole sizes enhance the efficiency of prototyping and testing phases. Parts with standard hole dimensions are more likely to be machined accurately during prototyping, allowing designers to assess the performance of components more reliably. This efficiency in testing contributes to faster iterations and reduces the overall development time.
- Clear Communication with Machinists:Clearly communicate the use of standard hole sizes to machinists and CNC programmers. Open communication ensures that manufacturing teams are aware of the design intent and can plan machining operations more effectively, resulting in better collaboration and optimized CNC machining processes.
Embracing standard hole sizes in CNC machined part designs is a practical strategy for optimizing efficiency and reducing costs. By aligning with industry standards, leveraging readily available tooling, and streamlining the machining workflow, designers contribute to a more cost-effective and streamlined CNC machining process. This approach ensures the production of high-quality parts while promoting efficiency throughout the manufacturing lifecycle.
Don’t Include Lettering in Designs
Including texts and lettering during part machining is unnecessary because it requires extra time and effort while increasing cost. You can paint your desired texts on the finished parts once manufactured.
If you need to include texts for any reason, you should employ laser engraving modules that involve the removal of lesser material.
In Conclusion: Work With an Expert CNC Machining Company Like Be-Cu.com
Optimizing CNC machining processes for efficiency and cost-effectiveness requires thoughtful consideration at the design stage. The outlined tips, encompassing material selection, avoiding multiple finishes, bulk ordering, wall thickness management, internal edge radii, cavity depth limitations, thread depth control, tolerance specifications, standard hole sizes, and the exclusion of lettering, collectively contribute to a holistic approach for designers.
By strategically selecting materials based on their machinability and cost, designers set the foundation for successful CNC machining. Avoiding multiple finishes and incorporating standard hole sizes streamlines the manufacturing process, reducing the need for complex post-processing and specialized tooling. Bulk ordering and material quantity optimization capitalize on economies of scale, minimizing production costs.Attention to wall thickness, internal edge radii, and cavity depth limitations ensures manufacturability and structural integrity. Controlling thread depth and specifying tolerances judiciously strike a balance between precision and cost-effectiveness. Excluding lettering simplifies the machining process, reducing tool wear and complexity.
Furthermore, collaboration with machinists, adherence to industry standards, and the use of statistical process control contribute to a more cooperative and adaptive manufacturing environment. Prototyping and iterative design allow for practical validation and refinement, aligning designs with the capabilities of CNC machining.
It may be challenging to analyze and use these factors to your advantage. Therefore, work with an expert CNC machining company like Be-Cu.com. Contact us today, and let’s discuss your CNC machining project!