
Jewelry has held a special place in human culture for centuries. From ancient civilizations to modern-day fashionistas, the allure of adorning oneself with beautiful ornaments has never waned. While jewelry-making has evolved with technology and fashion trends, the core principles of craftsmanship and creativity remain unchanged. In this comprehensive guide, we will explore the intricate world of jewelry manufacturing, from the initial design concepts to the final polished product. Whether you’re a budding jewelry artisan or simply curious about the process, this article will provide you with an in-depth understanding of how to manufacture jewelry.
View More Page:

Chapter 1: Understanding Jewelry Manufacturing
The manufacturing of jewelry starts with the selection of materials.
Precious jewelry is generally made of precious metals, stones and other materials, so the material selection process needs to be carefully screened to ensure the quality of the results.
Next we will describe in detail what is the jewelry manufacturing process
First of all, the appropriate material must be selected based on the required craftsmanship and design; secondly, the appropriate size and shape of the piece must be checked based on the nature of the material; and then, the completeness, unity and contrast of each piece of jewelry unit must be checked based on the color.
1.1 The History of Jewelry Manufacturing
The art of jewelry making is as old as human civilization itself. Throughout history, jewelry has served various purposes, from religious and cultural symbolism to personal adornment and wealth display. Understanding the historical context of jewelry manufacturing is essential for appreciating the evolution of techniques and styles in this intricate craft.
- Ancient Beginnings:Jewelry-making can be traced back to ancient civilizations such as Egypt, Mesopotamia, and the Indus Valley, where craftsmen used simple tools to shape metals and stones into wearable art. In these early societies, jewelry often had spiritual significance and was worn as amulets or talismans to ward off evil spirits.
- The Art of Filigree and Enamel:As civilizations advanced, so did jewelry-making techniques. The Ancient Greeks and Romans are known for their mastery of filigree, a delicate form of metalwork, and enamel, a decorative glass coating. These techniques allowed artisans to create intricate designs and colorful pieces that still inspire contemporary jewelry artists today.
- The Middle Ages and Renaissance:During the Middle Ages, jewelry craftsmanship continued to flourish. Royal and noble families commissioned exquisite pieces that showcased the wealth and power of their dynasties. The Renaissance period witnessed a revival of interest in classical art, influencing jewelry designs with motifs from ancient Greece and Rome.
- Industrial Revolution and Mass Production:The Industrial Revolution brought about significant changes in jewelry manufacturing. Mass production techniques, such as die-striking and stamping, made jewelry more accessible to a broader audience. However, these methods also led to a decline in the craftsmanship and uniqueness of jewelry pieces.
- The Art Nouveau and Art Deco Movements:In the late 19th and early 20th centuries, the Art Nouveau movement ushered in a new era of jewelry design characterized by flowing lines, natural motifs, and a departure from traditional jewelry norms. This period was followed by the Art Deco movement, which embraced geometric shapes and bold, colorful gemstones.
- Contemporary Jewelry Manufacturing:Today, jewelry manufacturing encompasses a wide range of styles and techniques, from traditional handcrafted pieces to cutting-edge, technology-driven designs. The industry continues to evolve, reflecting changing consumer tastes and the integration of sustainable and ethical practices.
1.2 Types of Jewelry
Jewelry comes in a myriad of forms, each with its own unique appeal and manufacturing challenges. Let’s explore some of the most popular types of jewelry and the materials commonly used to create them.
- Rings : Rings are one of the most iconic types of jewelry. They come in various styles, including engagement rings, wedding bands, and fashion rings. The manufacturing process for rings involves precise sizing, gemstone setting, and intricate metalwork.
- Necklaces and Pendants : Necklaces and pendants are versatile pieces that adorn the neck and chest area. They can be simple chains or elaborate, gem-studded pendants. Creating necklaces involves chain-making, pendant design, and careful gemstone selection.
- Earrings : Earrings are worn on the ears and can be studs, hoops, dangles, or chandeliers. The manufacturing process includes soldering posts or wires, attaching ear hooks, and setting gemstones if applicable.
- Bracelets and Bangles : Bracelets and bangles are worn around the wrist. They vary in style, from delicate chains to chunky bangles. Manufacturing involves bending and shaping metal, creating clasps, and adding decorative elements.
- Brooches and Pins : Brooches and pins are decorative pieces that can be worn on clothing. They often feature intricate designs and gemstone embellishments. Creating these pieces requires precision in design and assembly.
- Watches : Watches combine functionality with aesthetics. Watchmaking is a highly specialized field that involves intricate movements, case design, and dial decoration.
- Body Jewelry : Body jewelry includes items such as belly button rings, nose rings, and eyebrow piercings. These pieces require specialized materials and manufacturing techniques to ensure comfort and safety.
- Custom made jewelry and Art Jewelry : Custom and art jewelry encompass a wide range of designs and styles, often pushing the boundaries of traditional jewelry-making. These pieces may incorporate unconventional materials and experimental techniques.
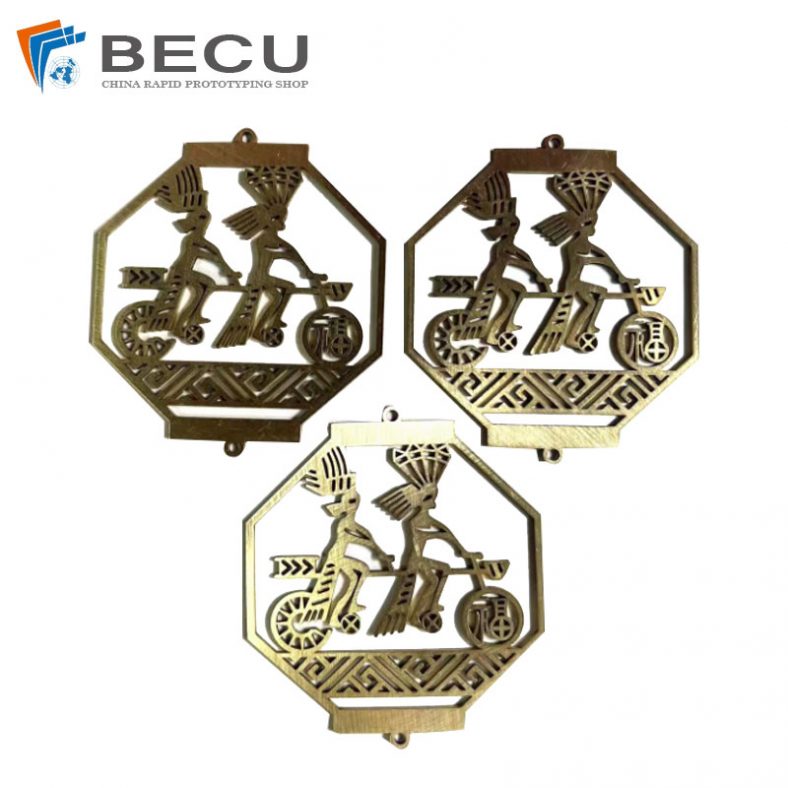
This overview provides a glimpse into the intricate world of jewelry manufacturing. In the subsequent chapters of this comprehensive guide, we will delve deeper into each of these stages, exploring the techniques, tools, and expertise required to transform raw materials into stunning pieces of wearable art.View More Our Jewelry Case Studies:
-
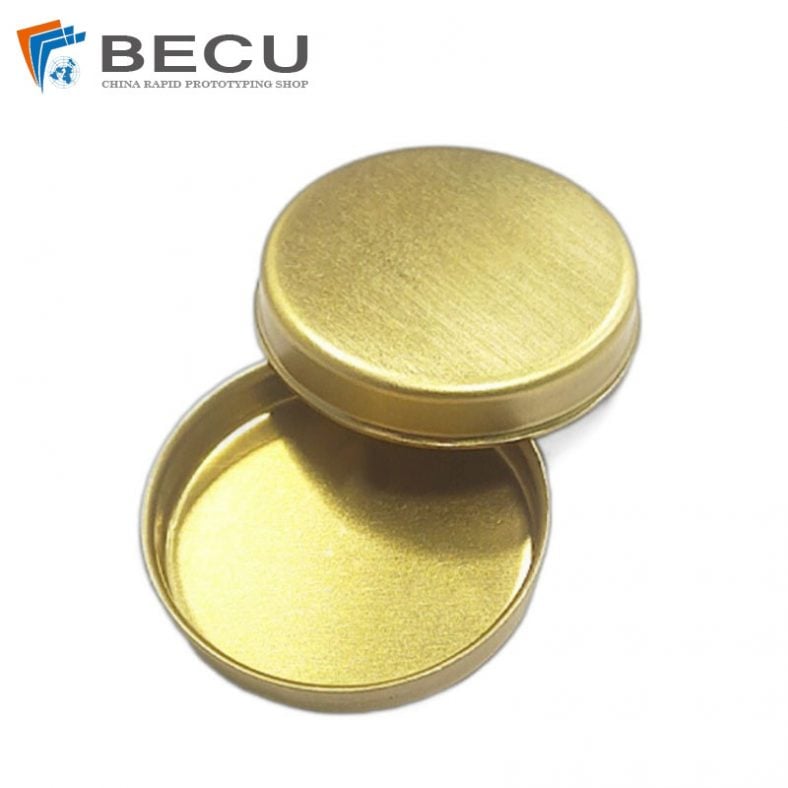
Deep Drawing Stamped Brass 360 High-End Perfume Box
-
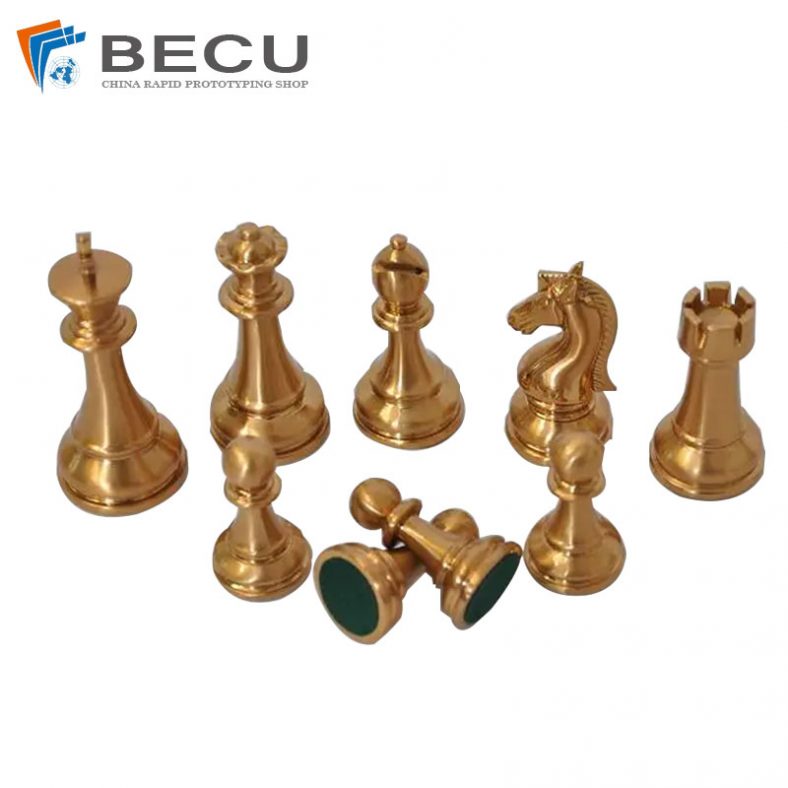
CNC Machining Metal Chess Pieces,Board And Sets
-
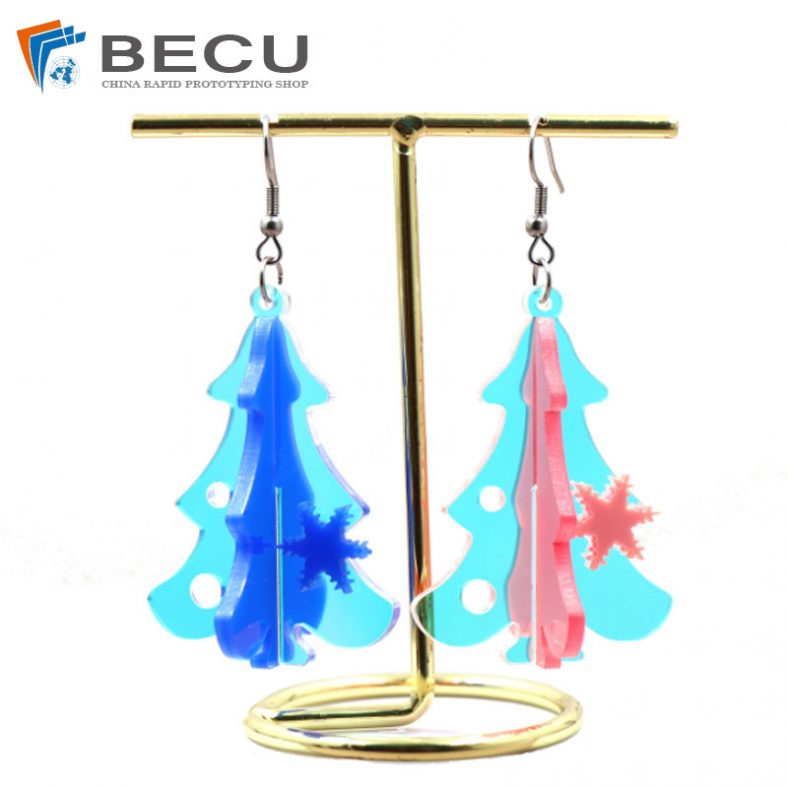
Acrylic Laser Cut Earrings
-
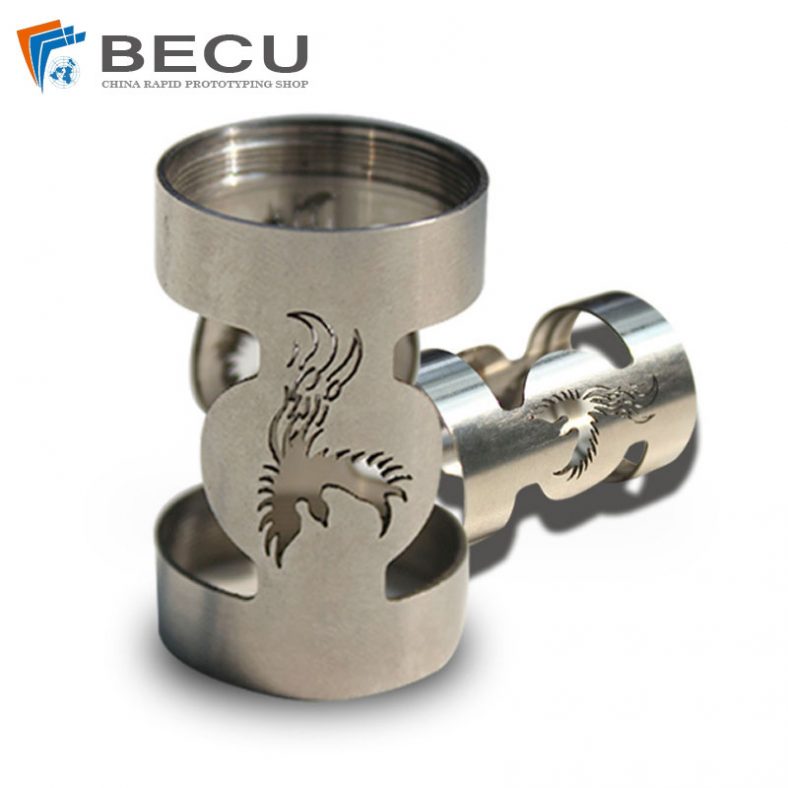
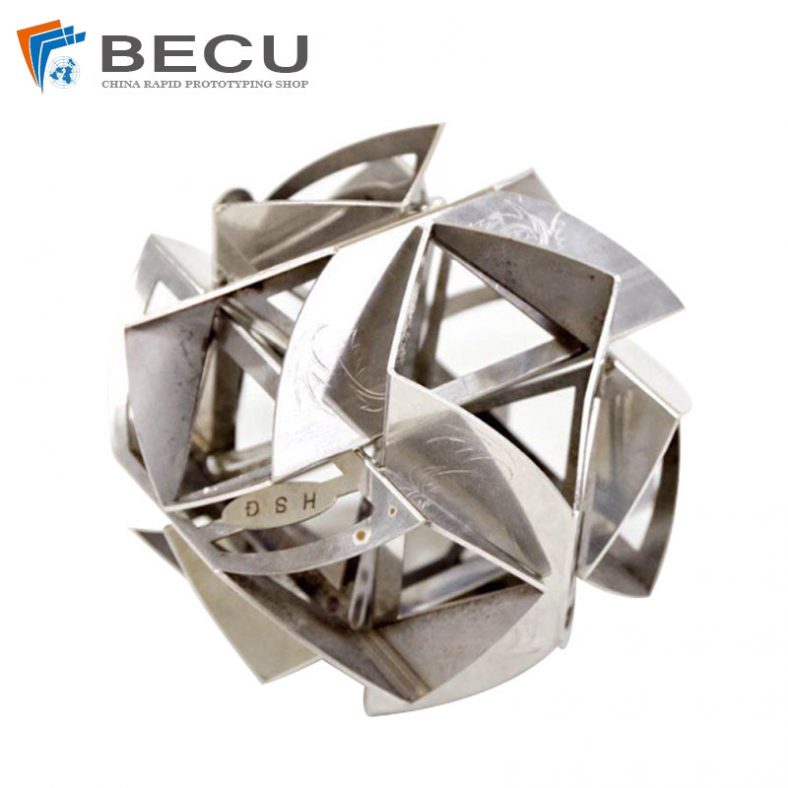
Microporous 3-Dimensional Cut Stainless Steel Circular Tube
-

Laser Cutting Iron Art Wall Decorations
-
Custom Brass Hanging Signs For Wall Decorations
-
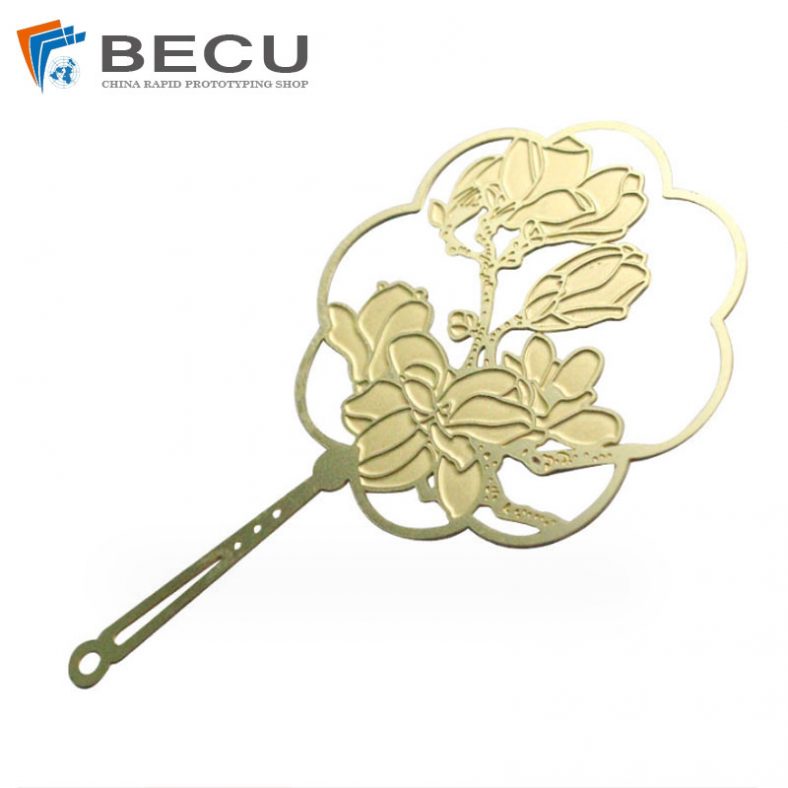
Hollow Laser Cut And Carved Copper Bookmark
-
3D Laser Cutting Of Square Tube Jewelry
Chapter 2: Designing Your Jewelry
2.1 Inspiration and Conceptualization
The journey of creating exquisite jewelry begins with inspiration and conceptualization. This stage is where the initial spark of creativity ignites, and ideas take shape. Let’s explore the crucial steps involved in finding inspiration and transforming concepts into tangible designs.
Cultivating Inspiration
- Nature and Environment: Nature is a perennial source of inspiration for jewelry designers. The beauty of landscapes, flora, and fauna can spark innovative ideas. Observe the intricacies of a flower’s petal or the play of light on a dewdrop for potential design cues.
- History and Culture: Past civilizations, their art, and cultural symbols can provide a rich tapestry of ideas. From the elegance of Art Deco to the symbolism of ancient hieroglyphics, history offers a treasure trove of design elements.
- Personal Experiences: Your own life experiences and emotions can be a powerful muse. Special moments, travel, and personal milestones can be translated into jewelry pieces that carry deep sentimental value.
- Fashion Trends: Keeping an eye on current fashion trends and forecasts can help you design pieces that resonate with contemporary tastes. However, remember that timeless designs often hold enduring appeal.
- Materials: Sometimes, the materials themselves can inspire designs. The unique properties of a gemstone or metal might suggest a specific form or style.
Conceptualization and Sketching
Once you’ve found your inspiration, it’s time to refine your ideas and create rough sketches. Here’s how to approach this critical stage:
- Research: Dive deeper into your chosen theme or concept. Gather reference materials, study similar designs, and understand the historical or cultural context that informs your idea.
- Mood Boards: Create mood boards with images, color palettes, and textures that align with your concept. Mood boards are an excellent way to visually communicate your vision.
- Sketching: Begin with rough pencil sketches. Don’t worry about precision at this stage; focus on capturing the essence of your design. Experiment with different shapes, arrangements, and proportions.
- Refinement: Review your initial sketches and select the most promising ideas. Refine these sketches, adding more detail and accuracy to the designs.
- Materials Consideration: While sketching, think about the materials you intend to use. Consider how different metals and gemstones can enhance or complement your design.
- Feedback: Share your sketches with peers or mentors for feedback. Fresh perspectives can help you refine your concepts and identify potential challenges.
2.2 Sketching and Rendering
After conceptualization, the next step is to bring your jewelry designs to life through sketching and rendering. This stage requires precision and attention to detail as you create comprehensive drawings that serve as blueprints for your jewelry pieces.
Tools of the Trade
- Pencils: High-quality drawing pencils, ranging from 2H (hard) to 6B (soft), are essential for creating precise and varied lines.
- Sketchbook: Invest in a dedicated sketchbook to keep your design ideas organized and easily accessible.
- Erasers: Quality erasers are crucial for making corrections and adjustments to your sketches.
- Rulers and Protractors: These tools help you maintain straight lines and precise angles in your drawings.
The Sketching Process
- Orthographic Views: Begin by sketching multiple views of your design, including front, side, and top views. This approach provides a comprehensive understanding of your piece.
- Detailed Drawings: Create detailed renderings of each component of your jewelry, from settings to clasps. Pay attention to dimensions, proportions, and symmetry.
- Materials Annotation: Specify the types and dimensions of materials to be used in your designs. Include notes about gemstone sizes, metal thickness, and any other relevant details.
- Exploded Views: For complex pieces with multiple components, consider creating exploded views that show how the parts fit together.
- Shading and Texture: Add shading and texture to your drawings to convey the play of light and shadow on your jewelry. This adds depth and realism to your designs.
- Annotation: Use labels and annotations to clarify any design elements or features that may not be immediately apparent in your sketches.
2.3 Computer-Aided Design (CAD)
In the modern era, technology has transformed the jewelry design process, making it more efficient and precise. Computer-Aided Design (CAD) software allows designers to create 3D models of their jewelry designs with remarkable accuracy.
Advantages of CAD in Jewelry Design
- Precision: CAD software enables designers to create highly precise and symmetrical designs, reducing the margin of error.
- Visualization: CAD allows you to visualize your design from every angle, helping you make informed decisions about proportions and aesthetics.
- Efficiency: Changes and iterations can be made quickly and easily in CAD, saving time and resources compared to manual adjustments.
- Scaling: CAD software allows you to scale your designs up or down, making it easier to create variations of a design or tailor pieces to customer preferences.
- Rendering: Some CAD programs offer realistic rendering capabilities, allowing you to see how your jewelry will look in different materials and lighting conditions.
- Communication: CAD models can be shared digitally with clients, manufacturers, or artisans, streamlining the communication process.
Learning and Using CAD
To harness the power of CAD in jewelry design, you’ll need to:
- Choose the Right Software: Select a CAD software that aligns with your design needs and budget. Popular options include Rhino, Matrix, and Tinkercad.
- Training: Invest time in learning the software through tutorials, courses, or workshops. Many software providers offer training resources.
- Practice: Mastery comes with practice. Experiment with creating different designs using CAD to become proficient.
- Integration: Integrate CAD into your design workflow, combining it with hand sketching or other design methods as needed.
By combining traditional design techniques with the capabilities of CAD, you can bring your jewelry designs to life with precision and creativity.
In the next chapters, we’ll explore the critical stages of jewelry manufacturing, including material selection, wax carving, casting, gemstone setting, and the finishing touches that turn your designs into exquisite jewelry pieces.
Chapter 3: Selecting Materials
Selecting the right materials is a crucial aspect of jewelry design and manufacturing. The materials you choose not only determine the appearance and durability of your jewelry but also influence its overall value. In this chapter, we will explore the primary categories of materials used in jewelry-making:
3.1 Metals
Metals are the backbone of most jewelry pieces. They provide structure, durability, and a wide range of aesthetic possibilities. Here are some of the most commonly used metals in jewelry manufacturing:
3.1.1 Gold
Gold is one of the most coveted and timeless metals in jewelry-making. It comes in various colors, including yellow, white, rose, and green, depending on the alloy used. The purity of gold is measured in karats (e.g., 24K is pure gold), with lower karats indicating a higher percentage of alloyed metals for added strength. Gold’s malleability and ability to hold intricate designs make it a favorite for crafting intricate jewelry pieces.
3.1.2 Silver
Silver is another popular choice for jewelry due to its affordability and bright, shiny appearance. Sterling silver (92.5% pure silver and 7.5% copper) is the standard alloy used in jewelry making. It is known for its luster and workability, making it suitable for both classic and contemporary designs.
3.1.3 Platinum
Platinum is a dense, heavy, and naturally white metal that is highly prized in jewelry manufacturing. Its resistance to tarnish and corrosion, coupled with its rarity, make it a premium choice for engagement rings and other high-end pieces. Platinum is often alloyed with small amounts of other metals to increase durability.
3.1.4 Palladium
Palladium is a lightweight, silvery-white metal that shares many characteristics with platinum, including its hypoallergenic properties. Palladium is less dense than platinum, making it a more affordable alternative for those seeking a similar look and feel.
3.1.5 Titanium
Titanium is known for its exceptional strength-to-weight ratio and corrosion resistance. It is a popular choice for contemporary and alternative jewelry designs. Titanium can be anodized to create vibrant colors, adding a unique element to jewelry pieces.
3.1.6 Other Alloys
Various other metal alloys are used in jewelry-making to achieve specific properties or appearances. Examples include:
- White Gold: Created by alloying yellow gold with white metals like nickel or palladium to achieve a silvery appearance.
- Rose Gold: Made by adding copper to gold, resulting in a warm, rosy hue.
- Bronze: A copper and tin alloy known for its vintage appeal.
- Brass: A copper and zinc alloy valued for its affordability and ability to mimic the appearance of gold.
Selecting the right metal for your jewelry design depends on factors like your design vision, budget, and the intended purpose of the piece.
3.2 Gemstones
Gemstones add color, brilliance, and value to jewelry. They come in a wide array of colors, shapes, and sizes, making them a versatile element in jewelry design. Here are some of the most popular gemstones used in jewelry:
3.2.1 Diamonds
Diamonds are the most coveted gemstone in the world, known for their unparalleled brilliance and hardness. They come in various colors, with colorless or near-colorless diamonds (graded on the D-Z scale) being the most valuable. Diamonds are commonly used in engagement rings, earrings, and necklaces.
3.2.2 Sapphires
Sapphires are prized for their deep blue color, but they also come in a range of other colors known as “fancy sapphires.” They are known for their durability, making them suitable for everyday wear. Sapphires are often used in engagement rings and as accent stones in jewelry.
3.2.3 Rubies
Rubies are red gemstones known for their vivid color and exceptional hardness. They symbolize love and passion and are often used in rings, pendants, and earrings.
3.2.4 Emeralds
Emeralds are green gemstones prized for their lush color and distinctive appearance. They are relatively soft compared to other gemstones, so they require careful handling. Emeralds are often featured in rings and pendants.
3.2.5 Other Gemstones
The world of gemstones is vast, and there are countless options to choose from, including:
- Amethyst: Known for its purple color.
- Aquamarine: A pale blue gemstone.
- Pearls: Organic gems formed inside mollusk shells.
- Opals: Known for their iridescent play of colors.
- Topaz: Available in various colors, including blue and yellow.
The choice of gemstone should align with your design concept and budget. Consider factors such as hardness, durability, and rarity when selecting gemstones for your jewelry.
3.3 Other Materials
While metals and gemstones are primary materials in jewelry-making, designers often incorporate other materials to add texture, contrast, or uniqueness to their pieces. Here are some additional materials used in jewelry:
3.3.1 Enamel
Enamel is a glass-based material that can be fused onto metal surfaces to create vibrant colors and intricate designs. It is often used in cloisonné or champlevé techniques to add a pop of color to jewelry.
3.3.2 Wood
Wooden elements can add warmth and organic textures to jewelry designs. They are often used in combination with metal or other materials to create contrast.
3.3.3 Leather
Leather straps or accents are commonly used in jewelry, especially for bracelets and necklaces. Leather adds a rustic or casual element to jewelry pieces.
3.3.4 Resin
Resin can be used to encapsulate small objects, creating unique and personalized jewelry pieces. It is often used to preserve flowers, insects, or other keepsakes.
3.3.5 Glass
Glass beads and elements are popular for their vibrant colors and versatility. They can be incorporated into a wide range of jewelry styles.
3.3.6 Alternative Metals
Metals like stainless steel and tungsten carbide are used for their durability and modern appearance. They are often chosen for men’s jewelry and contemporary designs.
The combination of metals, gemstones, and other materials allows jewelry designers to create pieces that are not only aesthetically pleasing but also rich in symbolism and personal meaning.
In the subsequent chapters, we will delve into the techniques and processes involved in transforming these selected materials into beautiful jewelry pieces, from wax carving and casting to gemstone setting and finishing touches.
Chapter 4: Tools and Equipment
In the world of jewelry manufacturing, the right tools and equipment are essential for creating precise and intricate pieces. This chapter will provide an overview of the tools and equipment needed for jewelry-making, from basic hand tools to specialized machinery.
4.1 Basic Tools
4.1.1 Pliers
Pliers are indispensable in jewelry-making, and various types serve different purposes:
- Round-nose pliers: Used for creating loops, curves, and bending wire.
- Chain-nose pliers: Ideal for gripping and bending wire, as well as opening and closing jump rings.
- Flat-nose pliers: Useful for gripping and bending, especially in tight spaces.
- Wire cutters: Essential for cutting wire, headpins, and other metal components.
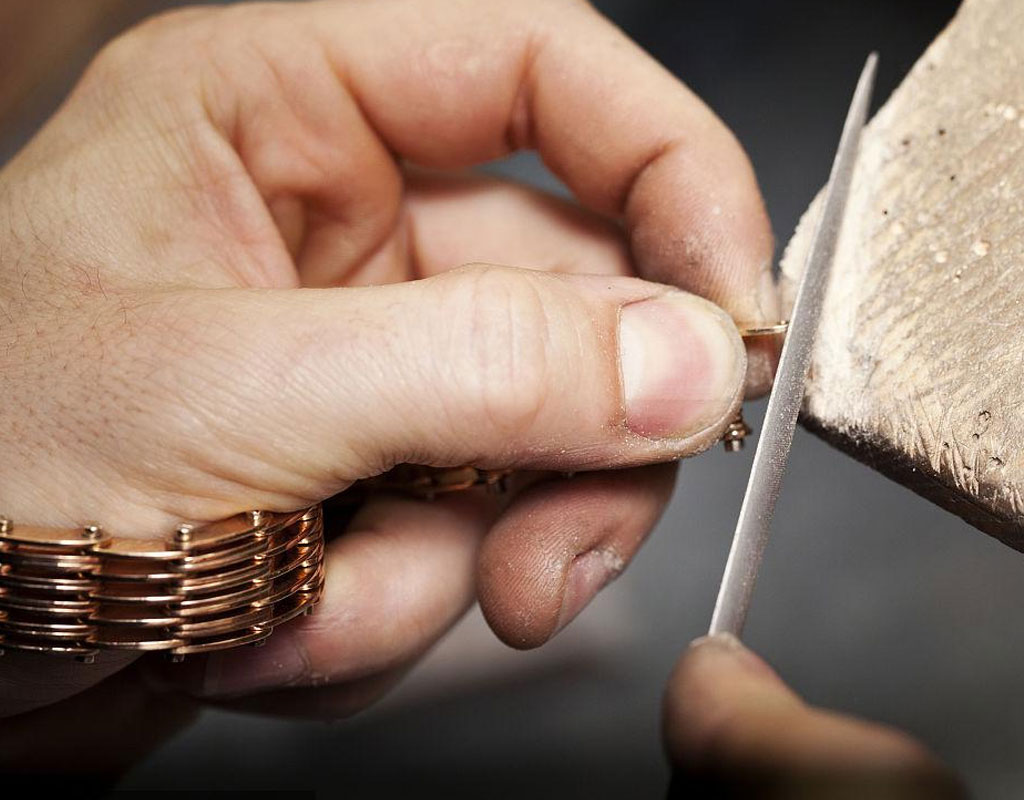
4.1.2 Files
Jewelry files are used for shaping, smoothing, and refining metal surfaces. Needle files, in particular, are essential for fine detail work.
4.1.3 Saws
Jeweler’s saws with fine blades are used for cutting metal sheets, wire, and other materials. They allow for precise and intricate cuts.
4.1.4 Hammers
Various types of hammers are used in jewelry-making, including:
- Ball-peen hammer: Used for shaping and texturing metal.
- Chasing hammer: Ideal for flattening and texturing metal.
- Mallet: Used for non-marring tasks, such as setting gemstones.
4.1.5 Mandrels
Mandrels are cylindrical rods used for shaping and sizing rings, bracelets, and other circular jewelry components.
4.1.6 Calipers
Calipers are precision measuring tools that help ensure accurate dimensions in jewelry design and manufacturing.
4.1.7 Soldering Tools
Soldering is a fundamental technique in jewelry-making, and you’ll need tools like a soldering torch, soldering pick, and soldering block to join metal components.
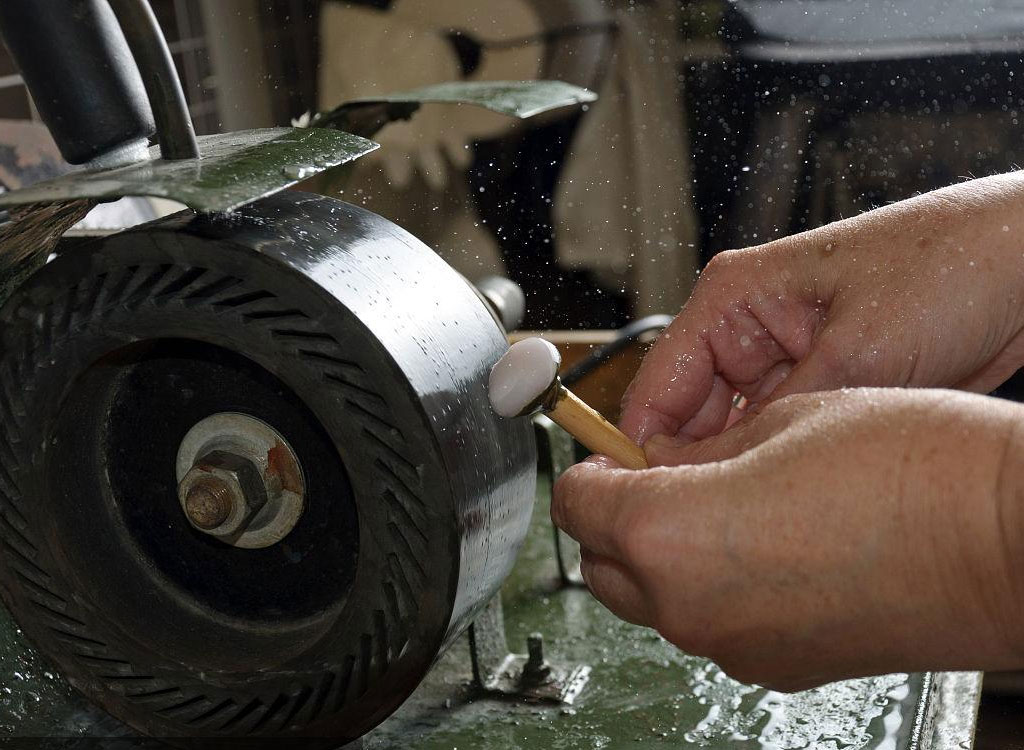
4.1.8 Buffing and Polishing Tools
Tools like polishing cloths, abrasive papers, and polishing compounds are essential for achieving a high-quality finish on metal surfaces.
4.1.9 Safety Gear
Safety should always be a priority in jewelry-making. Safety glasses, aprons, and proper ventilation in your workspace are crucial for protecting yourself from potential hazards.
4.2 Specialized Equipment
4.2.1 Jewelry Kiln
A jewelry kiln is used for processes like enameling and metal clay firing. It provides controlled high temperatures necessary for these techniques.
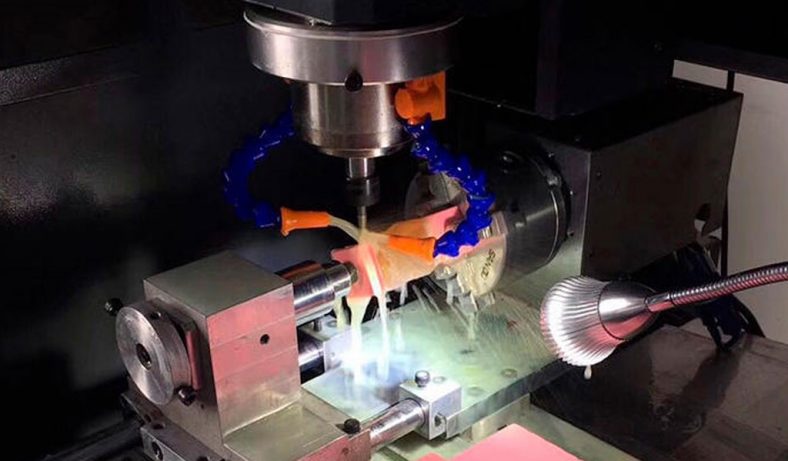
4.2.2 Rolling Mill
A rolling mill is used to flatten and reduce the thickness of metal sheets or wire. It’s essential for creating uniform metal components.
4.2.3 Casting Equipment
Casting is a common method in jewelry manufacturing. Equipment for casting includes:
- Crucible: A heat-resistant container for melting metals.
- Casting machine: Used to pour molten metal into molds.
- Vacuum casting machine: Assists in producing high-quality casts by removing air bubbles.
4.2.4 Lapidary Equipment
For cutting and shaping gemstones, lapidary equipment such as trim saws, grinding wheels, and polishing machines are necessary.
4.2.5 Engraving Tools
Engraving tools, including gravers and engraving machines, are used for adding intricate designs and patterns to metal surfaces.
4.2.6 Gemstone Setting Tools
Tools like prong pushers, bezel rollers, and burnishers are essential for securely setting gemstones in jewelry.
4.2.7 Ultrasonic Cleaner
An ultrasonic cleaner uses high-frequency sound waves to remove dirt and debris from jewelry pieces.
4.2.8 Jewelry Scale
Accurate weighing of materials, such as gemstones and metals, is crucial in jewelry manufacturing.
4.3 Workspace Setup
A well-organized and equipped workspace is essential for efficient and safe jewelry-making. Here are some considerations for setting up your jewelry studio:
4.3.1 Lighting
Good lighting is crucial for detailed work. Install bright, focused lighting sources, such as task lamps with adjustable arms, above your workbench.
4.3.2 Ventilation
Proper ventilation is essential, especially when soldering or working with chemicals. Ensure your workspace has adequate ventilation to remove fumes and ensure air quality.
4.3.3 Workbench
A sturdy workbench with a smooth, non-porous surface is ideal for jewelry-making. It should be at a comfortable height and have storage space for tools and materials.
4.3.4 Storage
Organize your tools, materials, and supplies in a way that’s easily accessible and keeps everything neat and tidy.
4.3.5 Safety
Always keep safety in mind. Install fire extinguishers, a first-aid kit, and safety equipment like eye protection and fire-resistant surfaces where necessary.
4.3.6 Ergonomics
Ensure that your workspace is ergonomically designed to reduce strain on your body during long hours of work.
4.3.7 Fireproofing
Jewelry-making involves high heat, so consider fireproofing your workspace with fire-resistant materials.
4.3.8 Chemical Storage
If you work with chemicals, store them safely in labeled containers, and keep them away from heat sources and open flames.
Creating a well-organized and equipped workspace is vital for jewelry-making success. Whether you’re a novice or an experienced jeweler, having the right tools and a safe, comfortable workspace will enhance your creativity and productivity.
Chapter 5: The Wax Carving Process
Wax carving is a traditional and artistic method used in jewelry manufacturing to create intricate and detailed models of jewelry pieces. This chapter explores the fascinating process of wax carving, including its introduction, techniques, and the modern use of 3D printing for wax modeling.
5.1 Introduction to Wax Carving
Wax carving is a versatile technique employed by jewelry designers and craftsmen to craft precise and intricate jewelry models. These wax models serve as prototypes for the final metal castings. Wax carving allows artisans to explore complex and delicate designs before committing to the expense of precious metals. Here’s a brief overview of the wax carving process:
- Material: Special jewelry wax is used for carving. It is available in various forms, such as sheets, blocks, and tubes, and comes in different hardness levels to suit the specific requirements of a design.
- Tools: Carvers use an assortment of tools, including wax carving tools with fine points and cutting edges. These tools allow for detailed work, shaping, and texturing.
- Techniques: Wax carving techniques involve subtractive methods, where material is removed from the wax block to create the desired form. These techniques include carving, filing, scraping, and sanding.
- Design Freedom: Wax carving offers designers a high degree of creative freedom. It allows for intricate detailing, fine textures, and the creation of complex, three-dimensional shapes.
- Durability: While wax is relatively soft and easy to work with, it is durable enough to withstand the molding and casting processes without deforming.
5.2 Wax Carving Techniques
Wax carving involves various techniques and approaches to shape and sculpt the wax into the desired form. Here are some essential wax carving techniques:
5.2.1 Carving
Carving is the most fundamental technique in wax carving. It involves removing material from the wax to create the desired shape. Jewelers often use carving tools with sharp edges and points to carve out intricate details.
5.2.2 Filing
Filing is used to refine the shape and edges of the wax model. Various files with different grits are employed to achieve the desired smoothness and finish.
5.2.3 Scraping
Scraping involves using a tool with a flat, smooth edge to remove thin layers of wax. It is often used to achieve even surfaces and smooth transitions between different parts of the model.
5.2.4 Sanding
Sanding is the final step in achieving a polished and refined surface on the wax model. Jewelers use sandpaper of different grits to remove imperfections and create a smooth finish.
5.2.5 Texturing
Texturing is the art of adding surface patterns or designs to the wax model. This can be done using specialized tools, such as texture plates or stamps, to create unique and visually appealing effects.
5.2.6 Wax Welding
Wax welding involves attaching separate wax components together using heat. This technique is valuable when creating multi-part models or adding intricate details.
5.3 Creating a Wax Model
The process of creating a wax model involves several key steps:
5.3.1 Design Concept
Start with a well-defined design concept. This includes sketches, drawings, or reference materials that capture your vision for the jewelry piece.
5.3.2 Material Selection
Choose the appropriate type and hardness of wax for your project. Softer waxes are easier to carve but may not hold fine details as well as harder waxes.
5.3.3 Block or Sheet Preparation
If using wax blocks or sheets, cut or shape them into a rough form that approximates your design. This saves time and material during the carving process.
5.3.4 Carving and Shaping
Use wax carving tools to carve, shape, and refine the wax according to your design. Pay attention to detail and proportions, as the wax model will serve as a blueprint for the final piece.
5.3.5 Filing and Smoothing
Once the basic shape is achieved, use files and sandpaper to smooth and refine the surfaces. This step is critical for achieving a flawless finish.
5.3.6 Texturing and Detailing
Add any desired textures or fine details to the wax model using specialized tools or techniques. This step can greatly enhance the character of the piece.
5.3.7 Final Inspection
Thoroughly inspect the wax model for any imperfections or errors. Make any necessary corrections before proceeding.
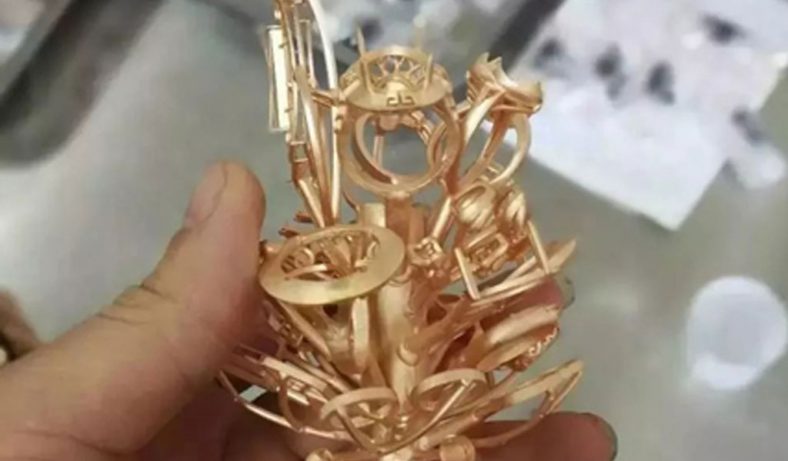
5.3.8 Mold Making
Once the wax model is perfect, it is used to create a mold. The mold is typically made of silicone or another suitable material and will be used for casting the final piece in metal.
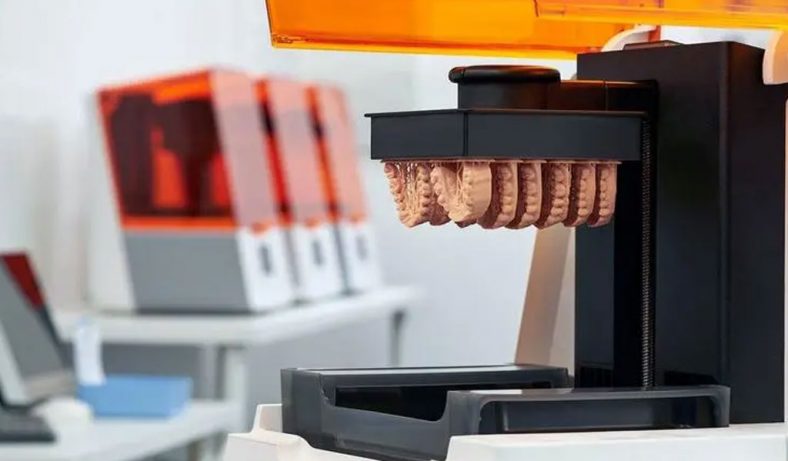
5.4 3D Printing A Wax Model
In addition to traditional wax carving techniques, modern technology has introduced 3D printing as a valuable tool for creating wax models. Here’s how the process works:
5.4.1 CAD Design
Start by creating a 3D digital model of your jewelry design using computer-aided design (CAD) software. This digital model serves as the blueprint for the 3D printer.
5.4.2 3D Printing
Use a 3D printer that is compatible with wax-like resins. The printer follows the digital design to build up the wax model layer by layer. This method is highly precise and can produce complex geometries with ease.
5.4.3 Post-Processing
After printing, the wax model may require some post-processing to remove support structures or imperfections. This can be done manually or with the use of specialized tools.
5.4.4 Casting
Once the 3D-printed wax model is complete and perfected, it is used to create a mold for the final metal casting process, similar to the traditional wax model.
3D printing offers several advantages, including rapid prototyping, intricate detailing, and the ability to easily replicate designs. It is particularly useful for designers looking to create highly complex and customized made jewelry pieces.
In the subsequent chapters, we will explore the casting process, gemstone setting, finishing, and other critical aspects of jewelry manufacturing.
Chapter 6: Gemstone Setting
Gemstone setting is a meticulous and skillful process in jewelry manufacturing, where precious and semi-precious gemstones are securely placed in a metal setting. This chapter explores various types of gemstone settings, the tools and techniques required for setting gemstones, and the step-by-step process of setting gemstones in jewelry.
6.1 Types of Gemstone Settings
There are several types of gemstone settings, each offering unique characteristics and aesthetics. The choice of setting depends on the design of the jewelry piece and the type of gemstone being used. Here are some common types of gemstone settings:
6.1.1 Prong Setting
Prong settings use small metal claws or prongs to hold the gemstone in place. This type of setting is popular for solitaire rings and allows maximum exposure of the gemstone, allowing it to catch and reflect light from multiple angles.
6.1.2 Bezel Setting
In a bezel setting, the gemstone is surrounded by a metal rim or collar that encircles it completely. Bezel settings provide excellent security and protection for the gemstone while offering a sleek and modern look.
6.1.3 Pave Setting
Pave settings involve a cluster of small gemstones set closely together, often with minimal visible metal. This setting creates a sparkling, continuous surface of gemstones and is commonly used in wedding bands and halo-style rings.
6.1.4 Channel Setting
Channel settings involve placing gemstones between two parallel metal walls or channels. This setting is often used for smaller gemstones, such as diamonds, and provides a clean and elegant appearance.
6.1.5 Tension Setting
Tension settings use the pressure of the metal to hold the gemstone in place without visible prongs or bezels. The gemstone appears to “float” within the metal, creating a contemporary and minimalist look.
6.1.6 Flush or Gypsy Setting
In a flush or gypsy setting, the gemstone is set into the metal so that its table (top facet) is level with the surface. This type of setting is common for men’s rings and offers durability and a low-profile appearance.
6.2 Tools and Techniques for Gemstone Setting
Setting gemstones requires specialized tools and techniques to ensure a secure and visually appealing result. Here are some essential tools and techniques used in gemstone setting:
6.2.1 Tools
- Prong Pushers: These tools are used to bend and shape the prongs over the gemstone securely.
- Bezel Rollers: Bezel rollers help jewelers shape the metal collar in a bezel setting around the gemstone.
- Gravers: Gravers are small cutting tools used for creating seats or notches to hold gemstones securely.
- Burnishers: Burnishers are used to smooth and shape metal around the gemstone for a snug fit.
- Stone Setting Pliers: These pliers are designed for precision when manipulating prongs and settings.
6.2.2 Techniques
- Seat Cutting: Creating a secure seat for the gemstone is crucial. This involves using gravers or burs to cut precise grooves or notches in the metal.
- Prong Bending: Prongs are carefully bent over the gemstone using prong pushers to hold it in place securely.
- Bezel Setting: For bezel settings, jewelers use bezel rollers and burnishers to shape the metal around the gemstone’s edges, ensuring a tight fit.
- Pave Setting: Gemstones in pave settings are set close together and secured using small beads or grains of metal between them.
- Channel Setting: Channel settings involve carefully aligning and securing gemstones within the metal channels using gravers and burnishers.
- Tension Setting: Tension settings require precise measurements and shaping of the metal to create the necessary pressure to hold the gemstone securely.
6.3 Setting Gemstones
Setting gemstones in jewelry is a delicate and step-by-step process that requires precision and attention to detail. Here is a simplified guide to setting gemstones:
6.3.1 Prong Setting
- Prepare the Prongs: Ensure that the prongs are evenly spaced and positioned to hold the gemstone securely.
- Place the Gemstone: Carefully position the gemstone on the prongs, ensuring that it is centered and level.
- Bend the Prongs: Using prong pushers, gently bend the prongs over the gemstone, working in a consistent pattern to achieve even pressure on all sides.
- Check Alignment: Verify that the gemstone is properly aligned and secure. Make any necessary adjustments to the prongs.
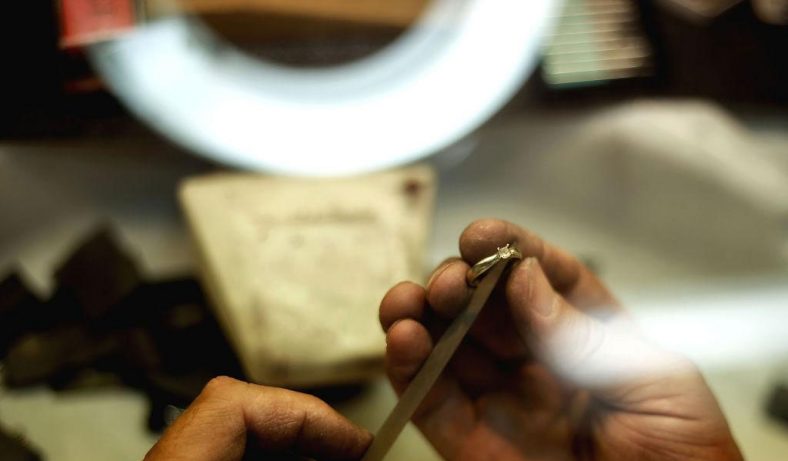
- Final Inspection: Inspect the setting to ensure that the gemstone is secure and properly seated. Polish the metal if needed to achieve the desired finish.
6.3.2 Bezel Setting
- Create the Bezel: Form the metal collar (bezel) to match the shape and size of the gemstone.
- Insert the Gemstone: Place the gemstone inside the bezel, ensuring a snug fit.
- Secure the Bezel: Use bezel rollers or burnishers to carefully push the metal over the gemstone’s edges, gradually shaping the bezel around it.
- Check the Fit: Ensure that the gemstone is securely held by the bezel and that the metal is smooth and even.
- Final Inspection: Examine the setting for any imperfections or irregularities. Make necessary adjustments and polish the metal for a finished look.
Setting gemstones in jewelry requires a steady hand, patience, and practice. Jewelers often undergo extensive training to master the various techniques and achieve consistently high-quality results.
Chapter 7: Conclusion
In this concluding chapter, we reflect on the art and craft of jewelry making, your journey as a jewelry manufacturer, and the enduring allure of jewelry.
7.1 The Art and Craft of Jewelry Making
Jewelry making is a harmonious blend of artistry and craftsmanship, where creativity meets precision. It is a craft that has been cherished for millennia, transcending cultures and eras. The creation of jewelry involves not only the mastery of techniques but also the ability to infuse pieces with meaning, emotion, and personal stories.
As a jewelry manufacturer, you have embarked on a path that allows you to express your creativity and bring beauty into the lives of others. Your craft involves working with precious metals, gemstones, and other materials to craft pieces that adorn, inspire, and celebrate life’s special moments.
Remember that jewelry is more than just ornamental; it often carries sentimental value, symbolizing love, commitment, milestones, and memories. As you create jewelry, you have the privilege of playing a significant role in the lives of your customers, helping them mark important occasions and express their unique personalities.
7.2 Your Journey as a Jewelry Manufacturer
Your journey as a jewelry manufacturer is a continuous evolution of skills, inspiration, and innovation. It begins with mastering the fundamentals of jewelry design and fabrication, from sketching and carving wax models to casting and setting gemstones. Over time, you refine your techniques, develop your unique style, and build a brand that resonates with your target audience.
Embrace the challenges and learning opportunities that come your way. Jewelry making is a craft that demands patience, attention to detail, and the willingness to adapt and grow. Seek inspiration from art, nature, and the world around you, and let your creativity flow into your designs.
Building your business as a jewelry manufacturer requires not only craftsmanship but also entrepreneurial skills. Consider factors such as pricing, marketing, distribution channels, and customer relationships. Building a loyal customer base and a strong brand identity are essential for long-term success.
7.3 Embracing the Timeless Beauty of Jewelry
Jewelry, in its many forms, has endured through centuries and across cultures. Its timeless beauty continues to captivate and inspire generations. Whether it’s an intricately designed engagement ring, a handcrafted pendant, or a pair of elegant earrings, jewelry has the power to convey love, celebrate achievements, and serve as a reminder of cherished moments.
As a jewelry manufacturer, you contribute to the perpetuation of this timeless beauty. Your creations become part of the stories and legacies of your customers, passed down through families and cherished for generations to come.
Embrace the privilege of working with precious materials and the responsibility of crafting pieces that hold deep sentimental value. Your dedication to the art and craft of jewelry making enriches the lives of others, making every piece you create a work of art that transcends time and trends.
In closing, your journey as a jewelry manufacturer is a testament to the enduring allure of jewelry and the human desire to adorn ourselves with symbols of beauty, love, and meaning. May your passion for this timeless craft continue to inspire and bring joy to those who wear your creations.