
Cutter compensation is a fundamental concept in CNC (Computer Numerical Control) machining that plays a crucial role in achieving precision and accuracy in machining operations. It involves making adjustments to the toolpath to account for the tool’s geometry, specifically its length and radius. In this comprehensive guide, we will explore two primary types of cutter compensation: Tool Length Compensation (G43) and Cutter Radius Compensation (G41 and G42). We will delve into their definitions, functions, practical applications, and the G-codes used to implement them.
View More Articles:
Section 1: Tool Length Compensation (G43)
In the realm of CNC machining, precision is paramount. Achieving the highest level of precision requires a comprehensive understanding of various aspects of machining operations, and tool length compensation (G43) is a critical component in this regard.
In this section, we will delve into the intricacies of tool length compensation, from its definition and purpose to advanced techniques for optimizing tool performance.
1.1. Definition and Purpose of Tool Length Compensation
Understanding Tool Length Offset
Tool length compensation, often referred to as tool length offset, is a CNC machining technique used to adjust the tool’s position based on its length. In simple terms, it allows the machine to account for variations in tool length, ensuring that the tool reaches the correct depth during machining operations. To understand this better, consider a scenario where you’re machining a workpiece, and your tool is expected to penetrate to a specific depth. However, due to manufacturing tolerances or wear and tear, the actual length of the tool might differ slightly from the expected length. Without tool length compensation, this disparity can lead to inaccurate cuts and, in some cases, damage to the workpiece or the tool itself.
Tool length compensation resolves this issue by applying an offset value, which is a calculated adjustment, to the tool’s position in the CNC program. This offset ensures that the tool reaches the desired depth accurately, compensating for any variations in the tool’s actual length.
Importance of Tool Length Compensation in CNC Machining
The significance of tool length compensation in CNC machining cannot be overstated. Here are some key reasons why it is indispensable:
- Precision and Accuracy: Tool length compensation is a cornerstone of achieving precision and accuracy in machining operations. It eliminates the margin for error that can arise from variations in tool length, thereby ensuring that the machined parts meet the required specifications.
- Tool Flexibility: CNC machines often use a variety of tools for different operations. Tool length compensation allows for seamless tool changes without the need to recalibrate the entire machining program. This flexibility is vital for optimizing production efficiency.
- Tool Wear Management: Over time, cutting tools experience wear and become shorter. Tool length compensation enables CNC operators to account for this wear and maintain consistent machining quality by adjusting the offset accordingly.
- Cost Reduction: By minimizing errors and reducing the need for manual adjustments, tool length compensation helps save time and material costs. It also contributes to extending tool life, reducing the frequency of tool replacements.
- Complex Machining Tasks: In intricate machining tasks, such as contouring, pocketing, or 3D milling, precise tool length compensation becomes even more critical. It ensures that the tool follows the desired path accurately, creating intricate and complex shapes with ease.
1.2. Implementing Tool Length Compensation
Explanation of the G43 G-code
Tool length compensation is implemented in CNC machining through the use of G-codes, which are standardized commands that control various aspects of the machine’s operation. In the case of tool length compensation, the G-code that comes into play is G43.
G43 is used to enable tool length compensation on the machine. When this G-code is executed in the CNC program, it instructs the machine to apply the predetermined offset value to the tool’s position. The offset value is stored in the machine’s memory and is specific to each tool in use.
How to Set Up Tool Length Offsets
Setting up tool length offsets is a crucial step in implementing tool length compensation. Here’s a step-by-step guide on how to do it:
- Tool Measurement: Begin by accurately measuring the length of each tool you plan to use in your CNC machine. This measurement should be precise and account for any variations in tool length.
- Tool Offset Table: Most CNC machines have a tool offset table where you can input the measured values for each tool. Each tool is assigned a unique tool number, and the corresponding offset value is associated with it.
- G43 Command: In your CNC program, insert the G43 command followed by the tool number for the tool you intend to use. For example, if you are using tool number 1, your G43 command would look like this:
G43 H1. - Tool Change: Before changing to a different tool during machining, ensure that you issue a G43 command with the appropriate tool number. This tells the machine to apply the offset specific to the new tool.
- Testing and Calibration: Run a test program to verify that the tool length compensation is functioning correctly. Make any necessary adjustments to the offset values to ensure precise machining.
- Documentation: Maintain comprehensive documentation of your tool offset values and update them as needed. This documentation is essential for consistency in future machining operations.
Common Parameters and Their Significance
When using the G43 G-code for tool length compensation, several parameters come into play, each serving a specific purpose. Understanding these parameters is crucial for effective implementation:
- H: The H parameter in the G43 command specifies the tool number for which you want to enable tool length compensation. For instance,
G43 H2would enable compensation for tool number 2. - D: The D parameter is used to specify the tool length offset value. This value represents the difference between the actual tool length and the expected (or programmed) tool length. The machine uses this offset to adjust the tool’s position during machining.
- Z: The Z parameter is employed to indicate the clearance plane or the reference plane for tool length compensation. It establishes the point from which the machine calculates the offset. Typically, it is set to the top surface of the workpiece or the machine’s reference point.
- R: In some CNC systems, the R parameter is used to cancel tool length compensation. Issuing a G43 H0 or G43 H0 D0 command will cancel any previously enabled compensation.
1.3. Practical Applications
Real-World Examples of When Tool Length Compensation is Essential
Tool Length Compensation (TLC) plays a crucial role in various real-world machining scenarios where precision and accuracy are paramount. Here are some practical examples highlighting the necessity of TLC:
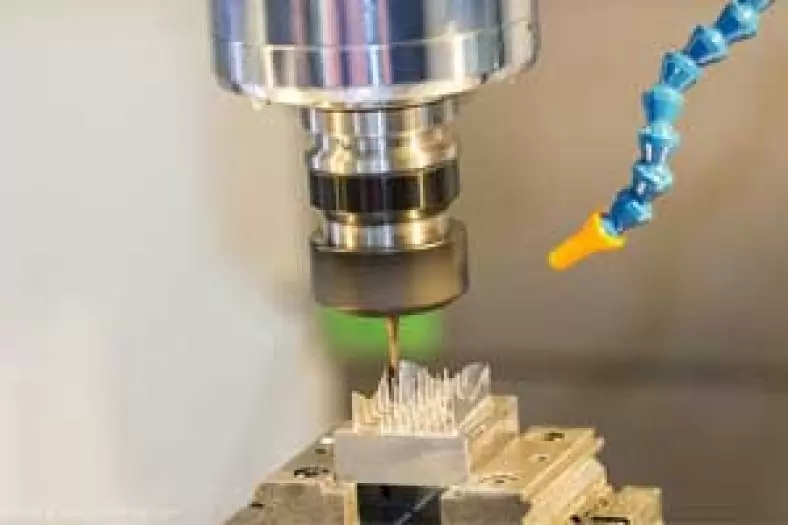
1. Drilling to Precise Depths: In industries like aerospace and automotive, where components require precise hole depths, TLC ensures that drilling operations reach the exact specifications. Without it, variations in tool lengths could lead to components that fail to meet design criteria.
2. Engraving and Marking: Engraving intricate designs or markings on workpieces demands a high level of precision. TLC ensures that the engraving tool reaches the desired depth, creating clear and accurate markings.
3. Thread Milling: In threading operations, especially for critical applications like those in the medical field or oil and gas industry, TLC guarantees that threads are cut to the correct depth and pitch, preventing costly assembly issues.
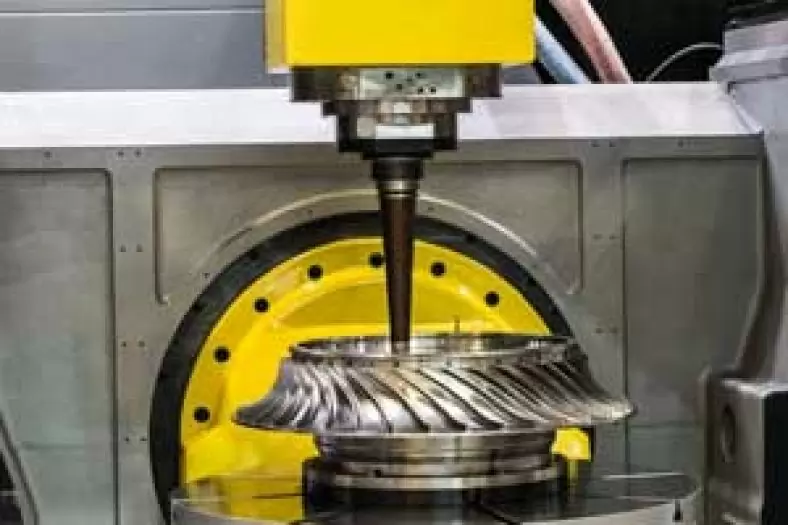
4. Complex 3D Contouring: When machining complex 3D surfaces, TLC ensures that the tool maintains the correct depth and contour, allowing for the creation of intricate and precisely shaped components.
5. Mold and Die Making: In mold and die manufacturing, where tolerances are extremely tight, TLC is indispensable for ensuring that cavities and features are machined accurately, leading to high-quality molds and dies.
Advantages and Disadvantages
Advantages of Tool Length Compensation:
- Precision: TLC eliminates the margin for error associated with tool length variations, ensuring that machining operations are executed with the highest precision.
- Tool Flexibility: CNC machines often employ a variety of tools within a single program. TLC allows for seamless tool changes without the need for recalibrating the entire program, enhancing production efficiency.
- Time and Cost Savings: By minimizing errors and reducing manual adjustments, TLC saves time and material costs. It also contributes to extending tool life, reducing the frequency of tool replacements.
- Tool Wear Management: Over time, cutting tools experience wear and become shorter. TLC enables CNC operators to account for this wear and maintain consistent machining quality by adjusting the offset accordingly.
- Complex Machining: For intricate machining tasks like contouring, pocketing, or 3D milling, precise TLC becomes even more critical. It ensures that the tool follows the desired path accurately, creating intricate and complex shapes with ease.
Disadvantages and Considerations:
- Programming Complexity: Implementing TLC may seem complex, especially for beginners. However, with proper training and software support, the complexities can be managed effectively.
- Machine Compatibility: Not all CNC machines support TLC, so compatibility should be considered when selecting machining equipment.
- Operator Training: To maximize the benefits of TLC, CNC operators need proper training in setup and troubleshooting. Lack of training can lead to setup errors and machining defects.
1.4. Troubleshooting Tool Length Compensation
Common Issues and Solutions
While Tool Length Compensation (TLC) is a powerful tool for precision machining, issues can arise during its implementation. Here are some common problems and their solutions:
- 1. Incorrect Offset Values: If the offset values for tools are inaccurate, the machine will not compensate correctly. Solution: Double-check and update the offset values as needed based on precise measurements of tool lengths.
- 2. Toolpath Deviations: In some cases, the toolpath may still deviate from the desired path. This could be due to incorrect TLC setup or programming errors. Solution: Review and debug the CNC program to ensure that TLC is properly enabled and configured.
- 3. Forgotten TLC Commands: It’s easy to forget to include G43 commands in the CNC program when changing tools. Solution: Implement procedures to ensure that G43 commands are consistently included before using a different tool during machining.
- 4. Overlapping Compensation: Overlapping compensation can occur when transitioning between tools or changing compensation modes. Solution: Ensure that the machine cancels any previous compensation properly to prevent double compensation, which can lead to machining inaccuracies.
Best Practices for Accurate Tool Length Compensation
To ensure precise Tool Length Compensation, consider the following best practices:
- Regular Maintenance: Keep your tools well-maintained and replace them when excessively worn. Accurate measurements of tool lengths are crucial.
- Toolpath Simulation: Utilize CNC simulation software to visualize and verify toolpaths before running them on the machine. This reduces the risk of errors and enhances efficiency.
- Documentation: Maintain detailed records of tool offset values, TLC settings, and program changes. This documentation is invaluable for troubleshooting and replicating successful setups.
- Operator Training: Invest in training for CNC operators and programmers. Proper training ensures that they can set up and troubleshoot TLC accurately.
1.5. Advanced Tool Length Compensation Techniques
Dynamic Tool Length Compensation
Dynamic Tool Length Compensation takes TLC to the next level by adjusting tool length offsets in real-time during machining. This technique is especially useful in scenarios where thermal expansion or deflection of the machine tool and workpiece occur during operation. Dynamic compensation helps maintain precision throughout the machining process.
Tool Length Measurement Methods
To implement Dynamic Tool Length Compensation, various measurement methods can be used, including:
- Laser Tool Measurement: Some advanced CNC machines incorporate laser measurement systems that can precisely measure tool lengths and update offset values on-the-fly.
- Probing Systems: CNC machines equipped with probing systems can automate tool length measurements during machining. These systems can measure tools in the spindle and adjust offsets accordingly.
Tool Wear Compensation
As cutting tools wear down over time, they become shorter, which can lead to machining inaccuracies if not addressed. Tool Wear Compensation involves continuously monitoring tool wear and adjusting the tool length offsets to maintain consistent machining quality. This technique extends tool life and reduces the need for frequent tool replacements.
Measuring Tool Wear
Tool wear can be measured using various methods:
- Touch Probes: Touch probes can be used to measure tool wear by comparing the actual tool length to a reference length stored in the CNC machine’s memory.
- Tool Presetters: Specialized tool presetters are designed to measure tool wear accurately and provide data that can be used to update offset values.
- Visual Inspection: Operators can visually inspect tools for signs of wear, such as edge chipping or dullness. While less precise, this method can still be effective for monitoring tool wear.
Incorporating advanced Tool Length Compensation techniques like Dynamic Compensation and Tool Wear Compensation into CNC machining processes can further enhance accuracy and efficiency, especially in high-precision and production environments. These techniques help mitigate the impact of machine and tool wear, ensuring consistent and reliable machining results over time.
Section 2: Cutter Radius Compensation (G41 and G42)
Cutter Radius Compensation is another vital aspect of CNC machining, complementing Tool Length Compensation to achieve precision and accuracy. In this section, we’ll explore the definition, implementation, practical applications, troubleshooting, and advanced techniques related to Cutter Radius Compensation, represented by G41 and G42 G-codes.
2.1. Understanding Cutter Radius Compensation
Definition and Purpose
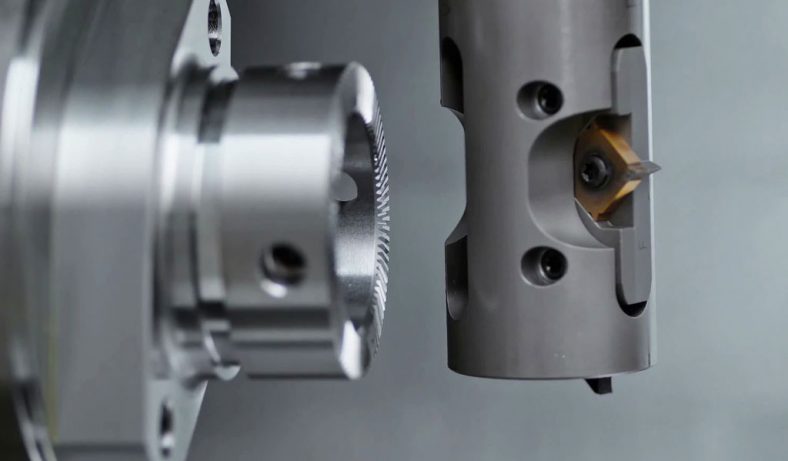
Cutter Radius Compensation (CRC) is a CNC machining technique used to adjust the tool’s path based on its radius. It ensures that the tool follows the intended path, taking into account its size. Imagine a milling tool with a 6mm radius; without CRC, the machine would interpret tool movement based on the tool’s center, potentially causing errors in the final machined part. CRC corrects this by offsetting the toolpath by half the tool’s diameter or radius.
How Cutter Radius Compensation Affects Toolpath
CRC significantly impacts the toolpath by offsetting it from the programmed path to the actual path the tool should follow. When using CRC, the CNC machine calculates the correct path by considering the tool’s geometry, specifically the radius. This ensures that the machined feature matches the intended dimensions and contours accurately.
2.2. Implementing Cutter Radius Compensation
Explanation of the G41 and G42 G-codes
Cutter Radius Compensation in CNC machining is activated using the G41 and G42 G-codes. Here’s a breakdown of these codes:
- G41: When you use G41 in your CNC program, you are instructing the machine to apply left-hand compensation. This means the toolpath will be offset to the left of the programmed path by half the tool’s radius.
- G42: Conversely, G42 enables right-hand compensation. With this code, the toolpath will be offset to the right of the programmed path by half the tool’s radius.
Setting Up Cutter Radius Offsets
To implement Cutter Radius Compensation effectively, follow these steps:
- Tool Measurement: As with Tool Length Compensation, start by accurately measuring the tool’s radius. This measurement should be precise, considering any variations due to manufacturing or wear.
- Tool Offset Table: Most CNC machines have a tool offset table similar to the one used for tool length compensation. Input the measured values for each tool, associating the radius with the corresponding tool number.
- G41/G42 Commands: In your CNC program, insert either the G41 or G42 command, followed by the tool number. For instance,
G41 D2would enable left-hand compensation for tool number 2.G42 D3would activate right-hand compensation for tool number 3. - Tool Changes: Ensure that you issue the appropriate G41/G42 command before using a different tool during machining. This action tells the machine which compensation to apply based on the tool’s radius.
- Testing and Calibration: Run a test program to verify that Cutter Radius Compensation is functioning correctly. Adjust the offset values if necessary to ensure precise machining.
Cutter Compensation in Contouring and Pocketing Operations
Cutter Radius Compensation is especially valuable in contouring and pocketing operations where the tool must accurately follow complex paths. Here’s how CRC plays a role:
- Contouring: When machining intricate shapes or contours, CRC ensures that the toolpath accurately follows the designed contour, compensating for the tool’s radius. This is essential for producing precise parts with intricate geometries.
- Pocketing: In pocketing operations, CRC maintains the correct distance between the tool and the pocket’s walls. Without CRC, the tool might cut too deep or too shallow due to the tool’s geometry, leading to inaccuracies in pocket dimensions.
2.3. Practical Applications
Real-World Examples Showcasing the Need for Cutter Radius Compensation
Cutter Radius Compensation is indispensable in various machining scenarios:
1. External Profile Machining: Imagine machining an intricate external profile on a workpiece. Without CRC, the tool might deviate from the desired path, resulting in an inaccurate profile. CRC ensures that the tool accurately follows the profile’s contours.
2. Internal Cavity Machining: When creating internal cavities or pockets, CRC guarantees that the tool maintains the correct distance from the cavity walls, preventing over-cutting or under-cutting.
3. Thread Milling: In thread milling operations, where precision is critical, CRC ensures that the threads are cut to the correct depth and pitch, even when using different tool sizes.
4. Complex 3D Surfaces: CRC is vital when machining complex 3D surfaces, such as those found in aerospace or automotive components. It ensures that the tool follows the intricate surface contours accurately.
Advantages and Disadvantages
Advantages of Cutter Radius Compensation:
- Accuracy: CRC significantly improves machining accuracy, especially in operations involving tight tolerances and complex geometries.
- Versatility: It allows for the use of various tool sizes without the need for extensive program adjustments, enhancing machining flexibility.
- Time and Material Savings: By reducing errors and optimizing toolpaths, CRC minimizes material waste and machining time, leading to cost savings.
- Improved Surface Finish: CRC helps achieve smoother surface finishes by ensuring that the toolpath precisely follows the contours.
- Reduced Tool Wear: Properly configured CRC can reduce tool wear by optimizing tool engagement and minimizing unnecessary cutting.
Disadvantages and Considerations:
- Programming Complexity: Implementing CRC requires careful programming and tool offset management. Errors in setup or programming can lead to machining defects.
- Machine Compatibility: Not all CNC machines support CRC, so compatibility should be considered when selecting machining equipment.
- Operator Training: Operators need to be trained in CRC setup and troubleshooting to maximize its benefits.
2.4. Troubleshooting Cutter Radius Compensation
Cutter Radius Compensation (CRC) is a valuable technique in CNC machining, but like any tool, it can encounter issues. Here are common issues and their solutions when working with CRC:
Common Issues and Their Solutions
- 1. Incorrect Offset Values: Using incorrect tool radius offset values can lead to machining errors. Solution: Ensure that the offset values accurately reflect the tool’s actual radius. Double-check the tool database for precision.
- 2. Toolpath Deviations: Sometimes, the toolpath may still deviate from the desired path. This can occur due to incorrect G41/G42 commands or problems in the CNC program. Solution: Review and debug the CNC program to ensure proper CRC setup and command usage.
- 3. Tool Collisions: Incorrect CRC setup can result in tool collisions with the workpiece or fixtures. Solution: Confirm that the CRC offset direction (left or right) matches the tool’s actual geometry. Adjust the offset accordingly to avoid collisions.
- 4. Forgotten G41/G42 Commands: It’s easy to forget to include G41/G42 commands in the CNC program when changing tools. Solution: Implement procedures to ensure that G41/G42 commands are consistently included before using a different tool during machining.
- 5. Overlapping Compensation: Overlapping compensation can occur when transitioning between tools or changing compensation modes. Solution: Ensure that the machine cancels any previous compensation properly to prevent double compensation, which can lead to machining inaccuracies.
- 6. Toolpath Verification: If the CNC simulation does not match the actual machining results, it may indicate CRC-related issues. Solution: Verify the CRC setup in the program and the machine. Make sure the toolpath corresponds to the intended geometry.
2.5. Advanced Cutter Radius Compensation Techniques
Cutter Radius Compensation (CRC) can be taken to the next level by implementing advanced techniques that optimize toolpaths, compensate for deviations, and manage tool wear effectively.
Toolpath Optimization with G41/G42
Optimizing toolpaths using CRC is essential for efficient machining. Advanced techniques for toolpath optimization with G41/G42 include:
- Adaptive Toolpaths: Some CNC software offers adaptive toolpath strategies that adjust the tool’s engagement with the material based on its radius. This minimizes tool wear, improves surface finish, and reduces cycle times.
- High-Speed Machining (HSM): HSM strategies leverage CRC to maintain consistent cutting conditions, such as feeds and speeds, throughout the toolpath. This approach enhances efficiency and surface finish quality.
Compensation for Toolpath Deviations
To compensate for toolpath deviations, especially in complex machining scenarios, consider the following techniques:
- Backlash Compensation: Backlash in the CNC machine’s mechanical components can cause toolpath deviations. Implement backlash compensation routines to reduce the impact of backlash on machining accuracy.
- Toolpath Simulation: Utilize advanced toolpath simulation software to visualize and verify toolpaths before running them on the machine. This helps identify potential deviations and errors in advance.
- Machine Calibration: Regularly calibrate the CNC machine to ensure that it accurately interprets the CRC commands and follows the intended toolpath.
Compensation for Tool Wear
Managing tool wear is crucial to maintaining machining precision. Advanced techniques for compensation due to tool wear include:
- Tool Life Monitoring: Implement a tool life monitoring system that tracks tool usage and wear. This data can be used to adjust CRC offset values in real-time, ensuring consistent machining quality.
- Dynamic CRC Updates: Some CNC machines and software systems support dynamic updates of CRC offsets based on real-time tool wear measurements. This adaptive approach minimizes the impact of tool wear on part accuracy.
- Automatic Tool Changers: If feasible, consider investing in CNC machines with automatic tool changers. These systems can automatically replace worn tools with fresh ones, reducing the need for manual intervention.
By incorporating these advanced CRC techniques into your CNC machining processes, you can further enhance accuracy, efficiency, and the overall quality of machined parts. These methods adapt to changing conditions during machining, ensuring that tool wear and deviations in toolpaths do not compromise the final product’s precision.
Section 3: Comparing Tool Length and Cutter Radius Compensation
In the world of CNC machining, Tool Length Compensation (G43) and Cutter Radius Compensation (CRC) with G41/G42 are two indispensable techniques that contribute significantly to precision and accuracy. While both serve the common goal of ensuring that CNC machines produce parts to specification, they have distinct roles and applications. This section explores the key differences between these compensation methods, their complementary roles, and common pitfalls and misconceptions.
3.1. Key Differences
Understanding the Distinctions Between Tool Length and Cutter Radius Compensation
Tool Length Compensation and Cutter Radius Compensation are distinct techniques with unique applications:
Tool Length Compensation (G43):
- Focus: Tool Length Compensation primarily deals with adjusting the tool’s position along its axis to account for variations in tool length.
- Parameter: G43 is the G-code used for enabling Tool Length Compensation, with an additional parameter (H) specifying the tool number.
- Applications: It is critical for operations where the tool’s length is pivotal, such as drilling to a precise depth or machining parts that require consistent tool engagement.
Cutter Radius Compensation (G41/G42):
- Focus: Cutter Radius Compensation centers around adjusting the toolpath to accommodate the tool’s geometry, specifically its radius, ensuring that the machined feature matches the intended dimensions.
- Parameters: G41 enables left-hand compensation, while G42 enables right-hand compensation. The D parameter is used to specify the tool’s radius.
- Applications: CRC is crucial for tasks involving complex contours, pocketing, and any operation where the tool’s radius affects the final part’s accuracy.
When to Use One Over the Other
The choice between Tool Length Compensation and Cutter Radius Compensation depends on the machining operation’s requirements:
Use Tool Length Compensation (G43) when:
- Precision in tool penetration depth is paramount.
- You need to account for variations in tool length.
- The focus is on ensuring that the tool reaches the correct depth during machining.
Use Cutter Radius Compensation (G41/G42) when:
- You are working with intricate contours or complex 3D geometries.
- The tool’s radius significantly affects the part’s dimensions.
- You need to maintain consistent distances between the tool and the workpiece surface.
- Understanding the specific needs of your machining operation will guide your choice between these compensation techniques.
3.2. Complementary Roles
How Tool Length and Cutter Radius Compensation Work Together
Tool Length Compensation and Cutter Radius Compensation are not mutually exclusive; they can complement each other in a machining process:
- Example 1: Drilling and Countersinking:In a scenario where you are drilling holes and subsequently countersinking them, you can employ both compensation techniques. Initially, Tool Length Compensation (G43) ensures that the drill reaches the desired depth accurately. Afterward, Cutter Radius Compensation (G41/G42) adjusts the toolpath for countersinking, ensuring the countersink diameter matches the specifications.
- Example 2: Milling a Contoured Surface:When milling a contoured surface with varying depths and radii, Tool Length Compensation ensures that the tool maintains consistent penetration depths. Simultaneously, Cutter Radius Compensation takes care of the contour’s intricate geometry, ensuring the tool follows the desired path accurately.
Examples of Combined Use in Machining Processes
Here are additional examples where Tool Length Compensation and Cutter Radius Compensation can be combined to achieve precise results:
- 1. Multi-Tool Operations: When machining operations involve multiple tools, combining both compensations allows seamless tool changes without compromising precision. Tool Length Compensation ensures accurate penetration depths, while Cutter Radius Compensation maintains contour accuracy.
- 2. Thread Milling: In thread milling, you can use Tool Length Compensation to control the tool’s penetration depth while employing Cutter Radius Compensation to ensure the threads’ dimensions are correct, especially for internal threads.
- 3. 3D Contouring with Varying Tool Lengths: In cases where 3D contouring requires tools of varying lengths, Tool Length Compensation ensures consistent depths, while Cutter Radius Compensation manages the complex contouring geometry.
3.3. Common Mistakes and Misconceptions
Pitfalls to Avoid When Working with These Compensation Types
Avoiding common pitfalls is crucial to the successful implementation of Tool Length and Cutter Radius Compensation:
- 1. Incorrect Offset Values: One of the most prevalent mistakes is using incorrect offset values. Always ensure that the offset values accurately reflect the tool’s actual dimensions, whether it’s the length for Tool Length Compensation or the radius for Cutter Radius Compensation.
- 2. Forgetting to Enable Compensation: Failing to include the appropriate G43, G41, or G42 commands in the CNC program when changing tools can lead to machining errors. Implement procedures to ensure these commands are consistently included when needed.
- 3. Overlapping Compensation: Be cautious of overlapping compensation. When transitioning between tools or changing compensation modes, ensure that the machine cancels any previous compensation to prevent double compensation, which can lead to machining inaccuracies.
- 4. Insufficient Training: Inadequate training of CNC operators and programmers can result in misconfigured compensation settings and erroneous machining. Invest in proper training and ongoing skill development to mitigate this risk.
Debunking Myths About Tool Length and Cutter Radius Compensation
There are some common misconceptions surrounding Tool Length and Cutter Radius Compensation that need clarification:
- 1. Compensation Is Unnecessary: Some operators believe that compensation is not needed, especially in simpler machining tasks. In reality, compensation techniques are essential to achieve accuracy and consistency in CNC machining, regardless of the complexity of the operation.
- 2. One-Size-Fits-All Compensation: Another misconception is that one set of compensation values can be used for all tools of the same type. In truth, each tool may have unique characteristics, requiring individual offset values for precise machining.
- 3. Compensation Equals Complexity: While compensation techniques might seem complex at first, modern CNC machines and software have made their implementation much more straightforward. With proper training and documentation, they can be effectively integrated into machining processes.
Tool Length Compensation (G43) and Cutter Radius Compensation (G41/G42) are essential tools in CNC machining, each with its unique role and applications. By understanding their differences, recognizing their complementary roles, and avoiding common pitfalls and misconceptions, CNC operators and programmers can harness the full potential of these compensation techniques to achieve accurate and precise machining results.
Section 4: Best Practices and Tips
Achieving precision and efficiency in CNC machining relies not only on the proper use of tool length and cutter radius compensation but also on a range of best practices and tips that enhance the overall machining process. In this section, we’ll explore key best practices and tips in four critical areas:
4.1. Ensuring Accuracy
Calibration and Regular Checks
Calibration is the foundation of accuracy in CNC machining. Here’s how to ensure it:
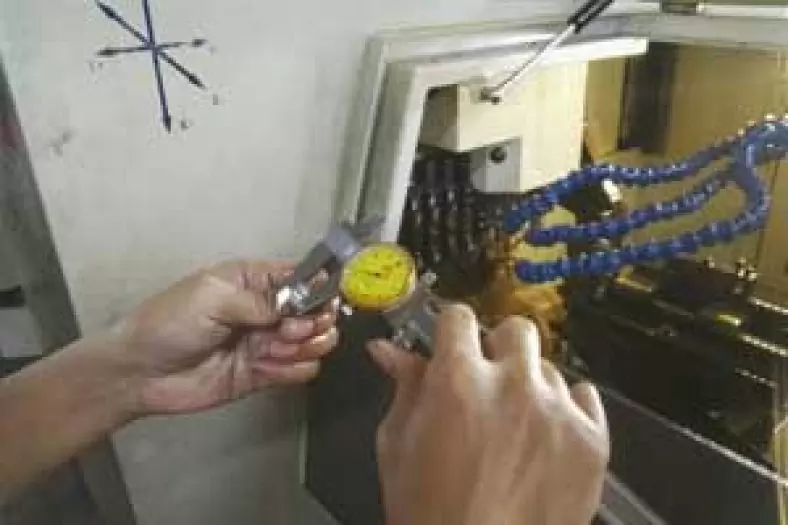
- Regular Calibration: Calibrate your CNC machine regularly, especially when installing new tools or after significant machine usage. Calibration checks should include verifying tool length and radius measurements.
- Tool Length Measurement: Use precise measuring tools, such as micrometers and digital calipers, to measure tool lengths accurately. Ensure that these tools are also calibrated regularly to maintain their accuracy.
- Probe Systems: Some CNC machines come equipped with probing systems that can automate tool length measurement and calibration. Implementing such systems can streamline the calibration process and enhance accuracy.
Using the Right Measuring Tools
Selecting the appropriate measuring tools is essential for precision:
- Digital Calipers: Digital calipers provide quick and accurate measurements for tool lengths and workpiece dimensions. Opt for high-quality digital calipers with a clear digital readout.
- Micrometers: Micrometers offer exceptional precision for measuring tool diameters, thicknesses, and depths. Invest in high-precision micrometers for critical measurements.
- Tool Presetters: Tool presetters are specialized machines designed for measuring tool lengths and diameters. They offer high accuracy and can streamline the tool setup process.
4.2. Documentation and Record-Keeping
Importance of Maintaining a Tool Database
Maintaining a comprehensive tool database is essential for efficient CNC machining:
- Tool Database: Create a digital tool database that includes detailed information about each tool, including tool number, length, radius, and wear history.
- Offset Values: Store tool offset values for each tool in the database. This ensures that operators can quickly access the correct offset values during tool changes.
- Tool Life Data: Track tool life data, such as the number of cycles, hours of use, and wear rates. This information is crucial for predictive maintenance and optimizing tool usage.
Tracking Tool Wear and Performance
Monitoring tool wear and performance can prevent unexpected issues and reduce downtime:
- Regular Inspections: Implement a routine inspection schedule to assess tool wear and condition. Replace worn tools promptly to maintain machining accuracy.
- Wear Patterns: Analyze wear patterns on cutting tools. Understanding how tools wear can help identify underlying issues, such as improper feeds and speeds or toolpath problems.
- Performance Metrics: Use performance metrics to evaluate tool efficiency. Metrics may include tool life, chip evacuation, surface finish quality, and cycle time.
4.3. Operator Training and Skills
Training Requirements for CNC Machinists
Well-trained CNC machinists are essential for the success of any machining operation:
- Formal Training: Ensure that CNC operators receive formal training on machine operation, programming, and tool compensation techniques. Many vocational schools and training centers offer CNC machining programs.
- On-The-Job Training: Provide on-the-job training and mentorship to new operators. Experienced machinists can pass on practical knowledge and troubleshooting skills.
- Continuous Learning: Encourage continuous learning and skill development among CNC operators. New advancements in CNC technology and software tools require machinists to stay up-to-date.
Continuous Improvement in Programming and Machining Skills
To maintain high machining standards, operators should focus on skill development:
- Programming Skills: Invest in developing programming skills, as effective CNC programming is essential for optimizing tool compensation techniques and achieving efficient machining.
- Problem-Solving: Train operators to become adept problem solvers. Troubleshooting skills are invaluable when issues related to tool compensation, tool wear, or tool breakage arise.
- Process Optimization: Encourage machinists to explore process optimization techniques, such as optimizing cutting parameters, toolpath strategies, and feeds and speeds.
4.4. Staying Updated with Technology
Advances in CNC Machinery and Software
Staying informed about advancements in CNC technology is crucial for maintaining competitiveness:
- Machine Upgrades: Regularly assess your CNC machinery to identify opportunities for upgrades or replacements. Newer machines often come equipped with advanced features that enhance precision and efficiency.
- Software Updates: Keep your CNC software up-to-date. Software updates often include bug fixes, performance improvements, and new features that can benefit tool compensation and overall machining.
- Toolpath Simulation: Utilize advanced toolpath simulation software to visualize and verify machining processes before execution. This reduces the risk of errors and enhances efficiency.
Future Trends in Cutter Compensation
To prepare for the future of CNC machining, consider emerging trends in cutter compensation:
- Artificial Intelligence (AI): AI-powered CNC machines are becoming more common, and they can optimize tool compensation dynamically, responding to real-time data for improved efficiency and precision.
- Additive Manufacturing Integration: As CNC machining and additive manufacturing technologies merge, tool compensation techniques will adapt to support hybrid processes that combine subtractive and additive techniques.
- Digital Twins: Digital twins of CNC machines and tooling systems will become more prevalent, allowing for virtual testing and optimization of tool compensation strategies before physical machining.
Precision and efficiency in CNC machining rely on a combination of accurate tool length and cutter radius compensation, calibration, proper documentation, well-trained operators, and staying informed about technological advancements. By adhering to these best practices and embracing emerging trends, CNC machining operations can consistently produce high-quality, precise parts while maximizing productivity and minimizing downtime.
In Conclusion
Mastering the intricacies of tool length and cutter radius compensation is essential for achieving precision and efficiency in CNC machining operations. These compensation techniques, represented by G43, G41, and G42 G-codes, play distinct yet complementary roles in ensuring that machined parts meet the required specifications.
Tool Length Compensation (G43) focuses on adjusting the tool’s position along its axis to account for variations in tool length. It is crucial for operations where precision in tool penetration depth is paramount. By using accurate measuring tools, maintaining a tool database, and tracking tool wear and performance, CNC operators can optimize tool length compensation for consistent and accurate machining results.
On the other hand, Cutter Radius Compensation (G41/G42) centers around adjusting the toolpath to accommodate the tool’s geometry, specifically its radius. This compensation is vital for tasks involving complex contours, pocketing, and operations where the tool’s radius significantly affects the part’s dimensions. Implementing best practices such as calibration, documentation, operator training, and staying updated with technology ensures that cutter radius compensation enhances precision and efficiency in CNC machining.
These compensation techniques are not mutually exclusive but can work together in machining processes, allowing for seamless tool changes and precise machining results. Combining tool length and cutter radius compensation is especially valuable in operations involving multiple tools, intricate contours, or complex 3D geometries.
However, successful implementation of these compensation techniques requires a commitment to best practices and a thorough understanding of their differences, applications, and potential pitfalls. Regular calibration, accurate measurement tools, proper documentation, ongoing training, and staying abreast of technological advancements are crucial elements of achieving precision in CNC machining.
As CNC machining continues to evolve, embracing emerging trends such as artificial intelligence, additive manufacturing integration, and digital twins will be essential for staying competitive and further enhancing tool compensation strategies.
In the end, CNC operators and programmers who master these compensation techniques and follow best practices will be well-equipped to produce high-quality, accurate, and efficient machined parts, meeting the demands of modern manufacturing industries.

The Detail Of BE-CU Cnc Machining Shop
BE-CU.COM – As an accomplished CNC machining Service Manufacturer and CNC shop, BE-CU Prototype has been specialized in OEM CNC lathing, custom CNC machining parts production and rapid CNC machining services China for over 35 years and always maintaining the highest standard in delivery speed and reliable quality of precision CNC manufacturing components. With the help of high-level technology and efficient equipment, as well as rigorous attitude, BE-CU passed the ISO9001:2015 quality certification, which supports the long-term development of CNC milling services, CNC turning services, CNC milling-turning, CNC drilling services, 3/4/5 axis machining, gear machining services, CNC machining China custom parts and service, small parts machining, etc.Our CNC machining products can be utilized in a broad range of industries. Contact us for email: [email protected]
-
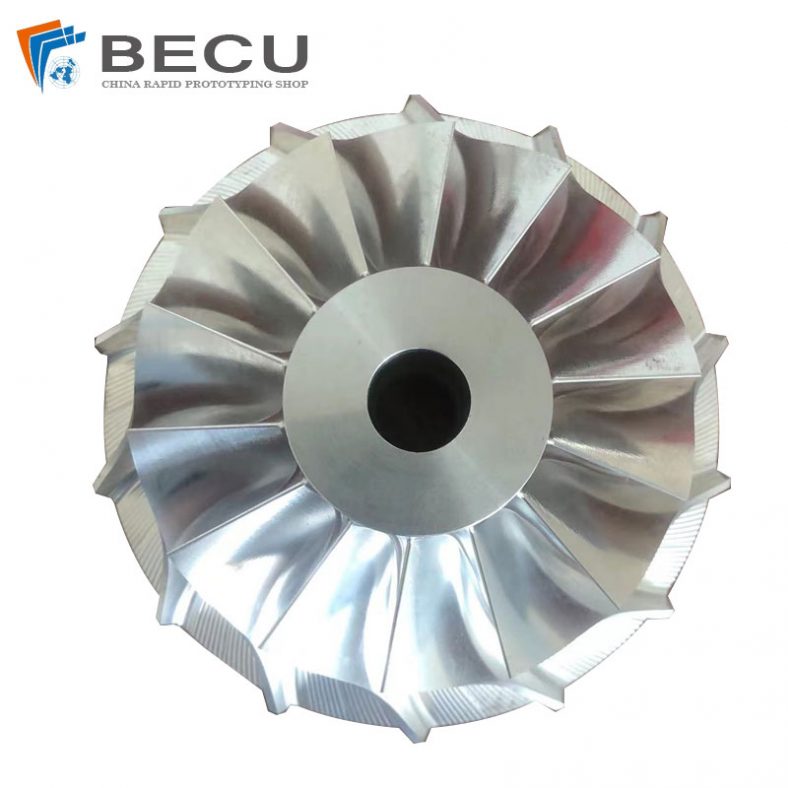
3-Way Centrifugal Compressor Closed Impeller By 5 Axis Machining
-
3/4/5 Axis Precision Milling Custom Vehicle Parts
-
3D Flexible Welding Platform By Large Machining
-
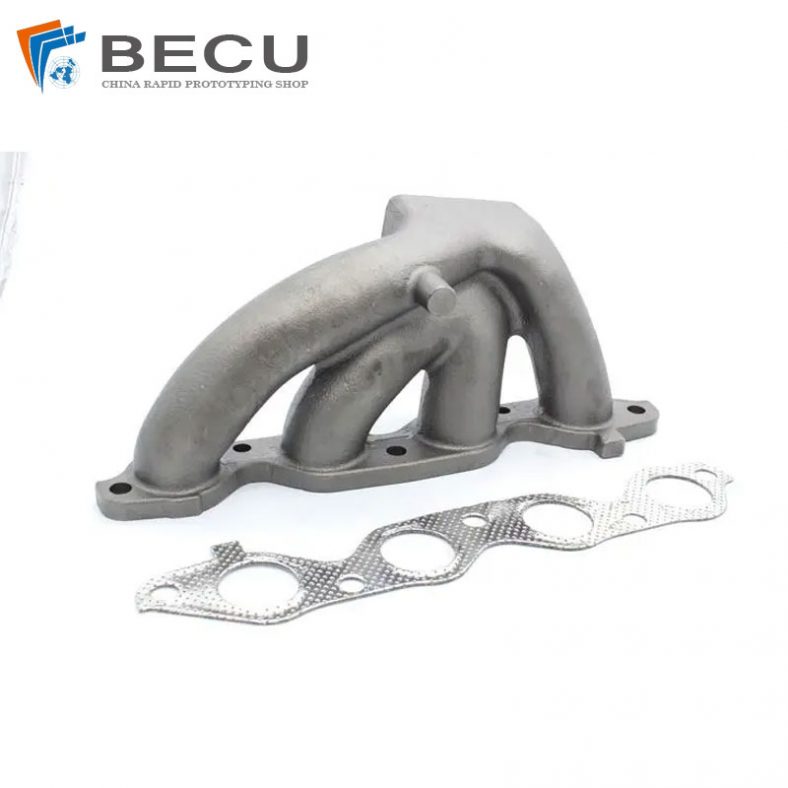
3D Printed Inconel Exhaust Manifold
-
3D Printing And CNC Machining Custom Black PPS Valve
-
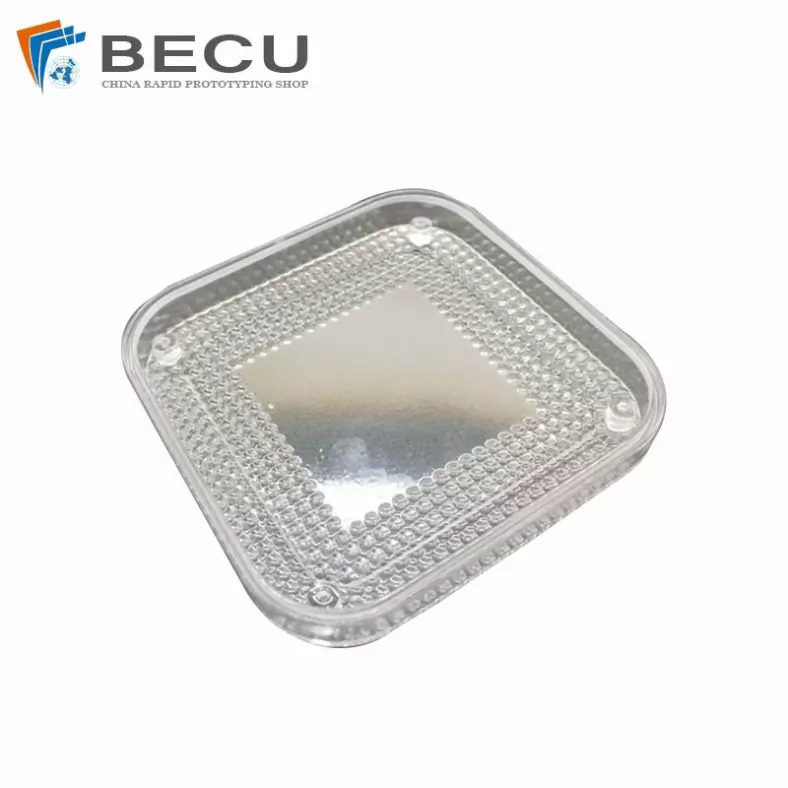
3D Printing Full Transparent Acrylic Lampshade Model
-
4 Axis CNC Machining Titanium Grade 5 Mobile Phone Buttons
-
4 Axis Machining Highly Transparent Acrylic LED Tunnel Light Lens